


We’ve been hacking our Sheath Dress pattern and are ready to share some ideas with you! This dress is such a good base to add your own personal style!
For this pattern hack we are doing a few things:
- Cutting the back and front on the fold – ie no zip at the back
- Removing the facing and finishing the neck with self made bias binding
- Creating a panel at the front for contrasting fabrics
- Elastic waist at the back only
Instead of splitting these out in to 4 tutorials we have done it all in one dress and it looks fab!
You could just follow the part of the tutorial that you are interested in or just go for it and do all of it at once.
Firstly, find your size and cut or trace your size out. If you missed our article on making adjustments to The Sheath Dress you can read it here.
If you are going to overlock your pieces first, overlock all of them apart from the side seam of the waistband piece and the neckline edge.
CUTTING THE BACK ON THE FOLD
The centre back of the dress has a 1.5cm seam allowance in order for you to be able to sew the zip. If you are going to cut it on the fold you will need to remove the 1.5cm seam allowance. The only other thing to remember is, if you still want to use the facing instead of binding you need to remove the seam allowance from the back facing piece.
CREATING A PANEL AT THE FRONT
We wanted a slightly curved panel at the front and, to create this, we measured 15cm down the CF and drew a curved edge towards the side seam. It’s a good idea to curve the line in to a fairly straight line at the CF (really just 2cm or so) so that, once cut on the fold and opened out, this section will have a straight line. If you are being adventurous with your curve, we advise that you test it on some scrap fabric to make sure it works.

Before you separate these pieces, draw some notches that will help us to sew these two pieces together later.

Separate these two panels and then slide some pattern paper underneath. We need to add seam allowances so that we can sew these two pieces back together without affecting the overall size.

Continue the straight line on the CF of both pieces and then, following the shape, add 1.5cm to each piece. Can you see on the side seam we have followed the shape of the curve?

You can now cut your new front pieces:

Redraw your notches onto the seam allowance so that they are on the edge of the pattern piece:

We wanted a curved panel but you may decide you want a straight line or a line further down to have a wider panel at the front bodice. Whatever you decide to do, just remember that you need to add on a seam allowance. There are so many options! You could even create a panel that is length ways instead of across!
JOINING THE FRONT PANEL
Remember those notches we created? We’ve marked the one side with pins to show you. Join these pieces right sides together, matching up the notches (seam allowance 1.5cm). When finished, iron open your seam allowances. Look at that lovely curve!


BIAS BINDING NECK FINISH
Join your front and back together at the shoulder seams and iron open the seam allowances.
To complete the neck we are going to make our own bias binding. Bias binding is essentially a strip of fabric that is cut on the bias of the fabric. The bias runs at a 45 degree angle across the lengthwise and crosswise grain. When fabric is cut on the bias it has stretch and is perfect for curved hems. You can buy it ready made in a haberdashery store but if you want to to match your fabric why not make your own?
TIP – to create beautiful binding take your time drawing the line very straight and cut out your strips very accurately. Your iron is key to preparing the bias binding strips.
We’ve drawn our lengthwise and crosswise grain and placed a ruler at a 45 degree angle. Our ruler is the perfect width that we want too so we are going to just draw a line either side of the ruler and use this width as our binding. You can decide how wide your binding is but we suggest around 2.5 – 3cm.
To see how much binding you need, take your measuring tape and measure the neck circumference on your garment. Add on approx 6 centimetres and you have your completed length needed.
If you have a piece of fabric wide enough you could measure the full length so that you have one continuous piece but that does mean you are cutting right across a piece of fabric just for one strip of bias binding!


We didn’t have very much fabric left over once we had cut out our bodice so we are going to join strips of bias binding together to create the long length we needed.
Here’s how we do it:
As above, draw your first bias strip across the 45 degree angle and then continue to draw lines next to this first line, following the shape of the first drawn line. Ensure that your pieces are the exact same width (this is why our ruler works so well). We ended up with around 7 pieces – each around 10cm long. We then draw another straight line, parallel to our first line so that when we cut out the strips they all had the same shape and were all the same length. Cut out all of your strips.

To join them together, place two strips on to each other at the angle shown here (wrong sides together). Your seam allowance is 1cm so you have to place these two pieces that, once sewn and opened out, they form a straight line. To do this, manoeuvre the pieces so that you start sewing on 1cm and finish sewing on 1cm.
Once sewn, open the seam allowances, iron and then trim down the seam allowance fabric that is sticking out so that you have your straight line of binding. Continue adding pieces until you have your desired length.


Lastly, iron this piece in half along the length of the binding, and then iron each side in towards the ironed mark. Your binding is now ready!

ATTACHING THE BINDING TO THE NECKLINE
TIP – read all of the binding instructions so that it makes sense before you start.
TIP – decrease your sewing machine stitch length.
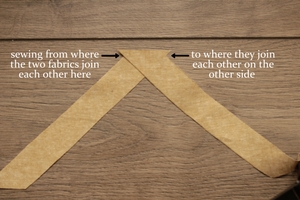
On the wrong side, find the middle of the back piece at the neck edge- in other words the centre back (CB) and place a pin or make a small mark on the fabric. Place the tape hanging 3cm over the CB mark.
We are going to start sewing around 2cm past the CB mark as we will need to join the binding together when we come around the other side.

This picture is to show you where the pin is marking the CB and how far away from it we are going to start sewing… roughly 2cm.

Use the ironed line as your sewing line guide – you can see it’s less than 1cm. Sew your way around the neckline, keeping the shoulder seam allowances open when you get to them.

When you get to the other side of the back piece, stop sewing around 2cm from the CB mark, reverse stitch and remove this from the sewing machine.

We now need to join our binding tape together so that it is one continuous piece around the neckline. Pin each side of fabric against the neckline until the two edges meet – preferably at the CB pin/mark. Sew these two binding pieces together, ensuring that you reverse stitch at the start and finish.

Cut away any excess binding so that the seam is 1cm and open out the seam allowance. You can now pin this loose edge to the neckline and sew this closed binding piece to the neckline.

Turn the dress right sides facing you and pull the binding to the front, using the sewn edge as your guide. Look at the back piece in the picture below so that you can see you are turning all of the binding over to the front. Use your fingers to manoeuvre the fabric over to the right side. You don’t want to see any of the inside of the dress, you want the binding edge to be just inside the garment.
You can now turn under the previously ironed piece as your work your way around the neckline and pin this in place. Sew along the edge of the binding strip.

Your completed neck – pretty isn’t it?

WAISTBAND AT BACK ONLY
Lay out your back piece, wrong side facing you, and place the pattern piece for the waistband over the back garment – matching up the notches. The waistband should hang over each side. Trace the side seams of the back garment on to your waistband and then cut the shape out of the waistband piece and overlock the edges. If you are going to make this dress again with the waistband in the front and back we suggest tracing this pattern piece before you start adjusting the shape.
Place the waistband onto the wrong side of the garment and match up your notches again.
We have used a very thin elastic which means that our seam allowances for sewing on the waistband piece are 2.5cm on each side. Use your elastic width as your guide on how wide your seam allowance should be so that it is even on both sides of the waistband piece.
Sew the bottom edge of the waistband piece on.
We didn’t want the elastic to be too tight so pre-measured the elastic.
Sew the elastic on to the side of the garment -just underneath the sewn waistband piece. If you have pre-measured the elastic piece you can move over to the other side and sew the elastic to the other side seam.
OR you can use a safety pin to hold it in place on the other side and fit the elastic once you have sewn up the side seams (you’ll need to leave a gap at the side seam to pull on the elastic and then, when you have your desired fit, you can sew it closed)

Going back to the side seam, sew the bottom edge of the side seam – gently pulling the elastic so that your fabric stays flat. Ensure that the elastic doesn’t twist or get sewn over.

COMPLETING THE GARMENT
Before you sew your side seams together here is a little trick for sleeve hems… you know how fiddly it is to turn over the seam allowance of a sleeve hem after you have sewn the sleeve?
We always iron the seam allowance before we sew up the side seams. This makes it SO much easier when we sew the hem as it turns up on the ironed line easily.

Open out the ironed hem, pin and sew your side seams together using a 1.5cm seam allowance. You know that curve of the sleeve? We like to create a row of double stitching here to reinforce this section. If you are using a thick fabric you may need to snip into this curve to help it shape better.

Sew your side seams and then turn up your sleeve hems and sew. Turn up your hem and sew.

WOO HOO we are done! How do you like your new dress?


We’d love to see your Sheath Dress pattern hacks so please share with us!
Happy Sewing everyone!!
