

Your A-Line Dress should be taking shape nicely! Today we’re jumping in and doing a lot so we hope your sewing machine is ready! We’ll be joining the dress at the shoulder seams, and constructing, attaching, under-stitching and finishing the neck facing. Then, we we be moving to the skirt; attaching the pockets and joining the skirt to the bodice.
As before, if you are only just joining us you can catch up at any point. If you haven’t got the pattern you can buy your version here and join our Sew-A-Long:


Need some fabric inspiration? We’ve sourced some gorgeous options for this pretty dress – have a look here!
If you’ve just joined us you can catch up here:
The A-Line Dress Sew-A-Long Start
Layplans, fabric, pinning and cutting
Overlocking and final preparation
Darts, Back Bodice & Invisible Zip
We suggest you read each section before sewing – the tips are really going to help you sew this dress beautifully!
SHOULDER SEAMS
Check whether your standard presser foot is back on the sewing machine. Then, join the front bodice to the back bodice at the shoulder seams, using an accurate 1.5cm seam allowance.
Tip: It’s important that you use a very accurate 1.5cm seam allowance. Can you see how, when you get to the neck side of the facings, there is a shape? When you place the two shoulder seams together your sewing line needs to be 1.5cm from the edge so that when you open out this piece the neckline has a lovely curve.

Iron/press open the seam.
Repeat these steps on the facing pieces.
You can now pin and sew the centre front of the bodice, using an accurate 1.5cm seam allowance. Press open the seam.

Tip – sorry to harp on but to get a beautiful dress you really want to ensure that your seam allowances are accurate, on the facing piece too! Facings are tricky as the shape doesn’t seem to look right when you are pinning them so, the important thing to remember is, that when you open out the piece, you want the fabric to be flush on each edge. So, you start sewing where the two pieces meet each other at 1.5cm and stop sewing where the two pieces meet each other at 1.5cm and when you open it out the curve will be perfect.
Iron/press open your seam allowances.


Let’s join the facing to the bodice. With the right side of the bodice facing you, place the facing on to the bodice – right sides together – and start to match up notches, shoulder seams (keeping seam allowances open) and the V at the Centre front (keeping seam allowances open). Can you see how, by sewing accurate seam allowances, your pieces should fit together perfectly!
Tip – Place your pins facing as shown as this will make the piece so much easier to work with when you are sewing.
Double tip – Take your time and pin this piece perfectly – it will be worth it once you start sewing!
Note: your seam allowances for the facing are 1cm

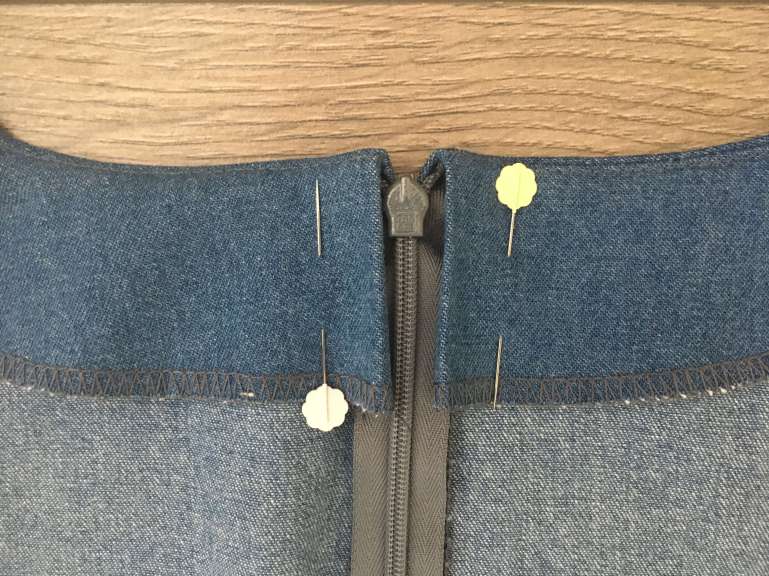
When you come around to the back pieces, open out the zip and line up the facing along the edges.


At the CF of the bodice, mark the pivot point 1cm from the top of the join (our orange dot in the picture below).

You ready to sew this piece? Don’t forget your seam allowance are 1cm. You could also set your sewing machine length to a shorter stitch length to help your accuracy.
Start sewing from the left back piece, keeping the zip flat underneath the facing. Use your sewing machine seam allowance guides to ensure that you are always sewing on a 1cm seam allowance. On reaching the pivot point, keep the needle in the fabric, lift the presser foot, turn and continue to sew.

Tip – If you are using a thicker fabric it may be worth reverse stitching at either side of the pivot point to strengthen this section. You could also reverse stitch over the shoulder seam stitches.

Can you see how, when we pivot, the stitching on the next piece is eactly 1cm from the edge? This creates the perfect V.

Zip up the zipper and check that the CB sides align at the back. This is the time to correct this piece if one side is higher than the other.
You can now snip into the seam at the centre front of the dress, taking care not to snip to far down to the stitches.
Snip into the seam allowance around the back and front edges of the facing, ensuring you are not snipping too closely to the stitches. This enables a smoother curve in the facing when it is turned right side out.

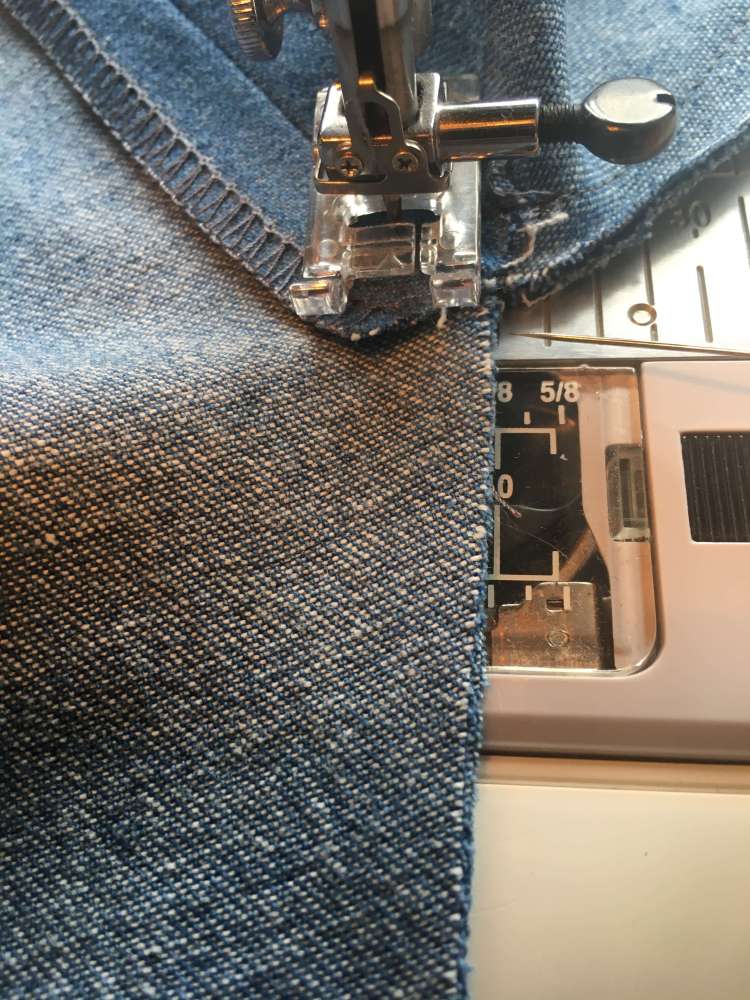
UNDERSTITCHING THE FACING
Understitching helps a facing or lining stay inside a garment. A line of stitching is made on the facing or lining and the seam allowance but not on the main piece of fabric. The stitching is seen just inside the garment but not visible on the right side of the garment.
Working on the right side of the garment and starting from the CB, push the seam allowances and facing to the right and the garment to the left.
You are sewing close to the edge of the facing. Keep pushing the seam allowances and facing to the right and garment to the left as you work your way along this piece.
Tip. “Pushing” the fabric to the left and facing/seam allowance to the right will help you to sew more accurately
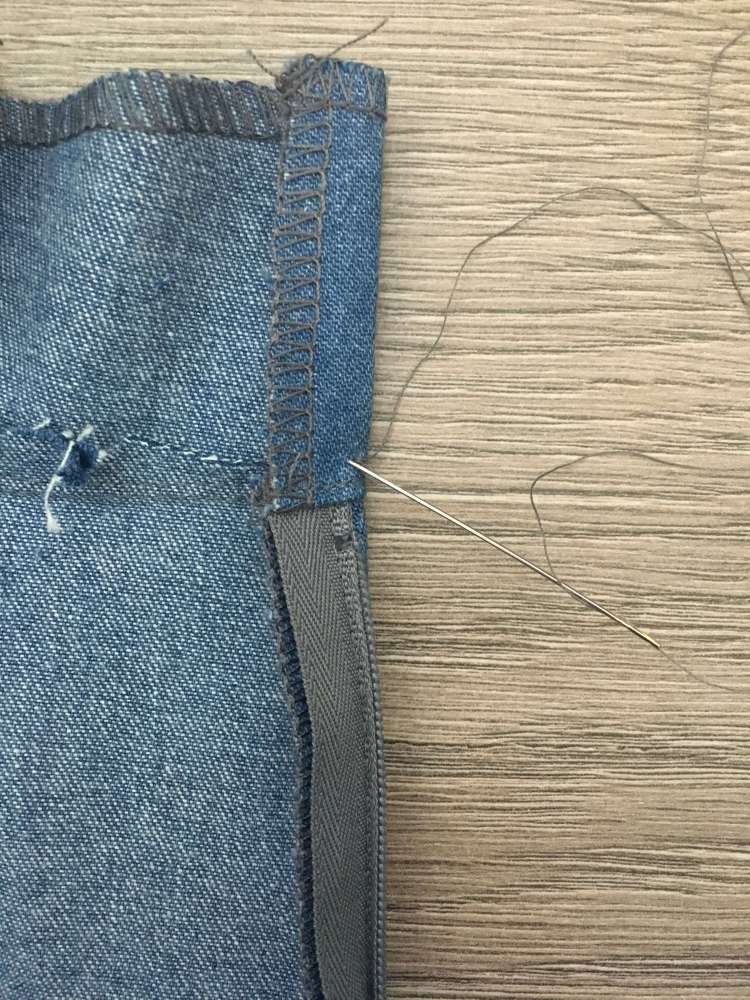
This image shows you how you would take the piece to the machine:

Now you turn the facing and seam allowance to the right:

Your row of stitches is just on the facing, catching the seam allowance underneath – roughly 3-5mm from the edge. It really, really helps to use your hands on either side gently pushing the fabric and facing away from each other – this will give you a clearer line of sewing. As you work your way around this piece, keep checking that your seam allowances are to the right and work on a small section at a time.

When you get to the V you should be able to carefully sew along the edge. Check underneath to ensure nothing is getting caught that shouldn’t (but if you are going to lift the presser foot to check, ensure that the needle is in the fabric).
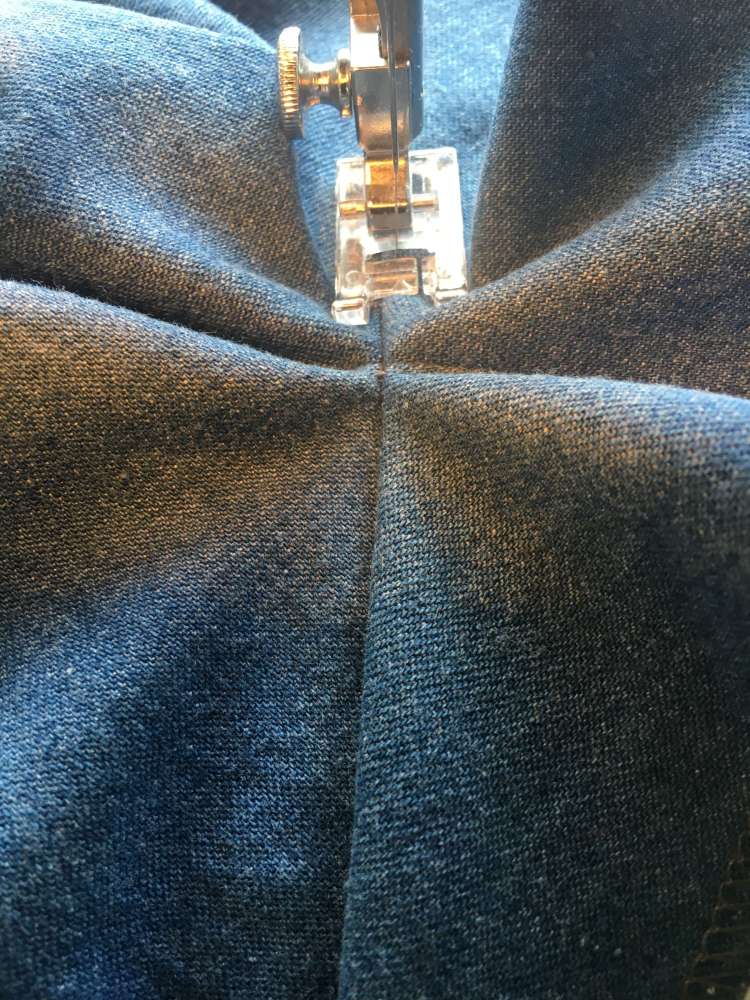
Once complete, iron/press this section on the wrong side and then, with hand stitching, sew the facing to the shoulder seam allowance to help it stay in place.

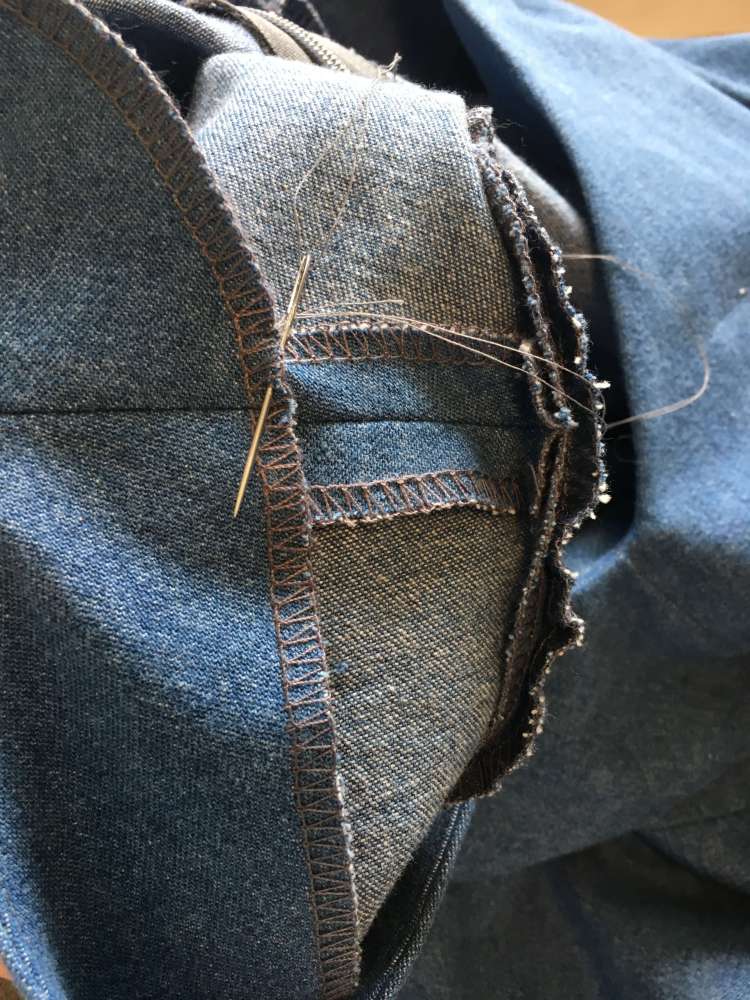
OK, let’s go in to detail on how to create a beautiful finish at the CB edge.
At the back, fold the CB seam allowance and iron the seam allowance really flat. The ironing bit is key!

Then, fold over and check that, when the zip is closed, both sides are even.
Working on one side, open up the piece like this and, using a hand needle and thread, start your stitching as shown (just catching the facing seam allowance):
Then, fold over the facing and your next stitch should catch just the zip but be directly across from where your starting stitch was.
We do this by creating ladder stitches that are very small stitches working from one side to the other in a zig-zag, keeping really even small gaps between the stitches. We are only catching the zip and the facing but not the main garment. Use the edge of the fabric that has been ironed flat as the line your stitching is on.
Hand stitch the facing to the zip (not too close to the zip otherwise the zip won’t close nicely), making sure no stitches are visible from the right side.


When you fold over the facing, can you see how the zip is sandwiched between the fabric and facing?

Ta daaaaaaaaaaaah. Your completed facing.

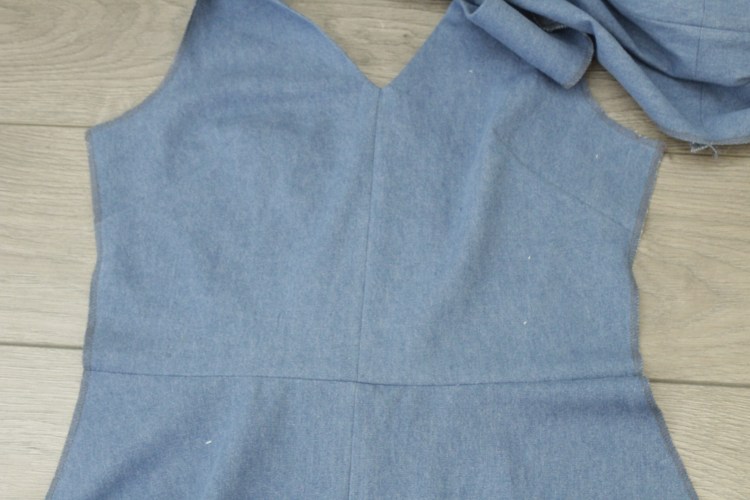
FRONT SKIRT
Join the front skirt pieces together, matching up the notches at the CF. Iron/press open the seam allowance.

Then, join the bodice to the front skirt, right sides together, also catching the front facing. Align the CF seam of the bodice to the CF seam of the skirt so that when you turn it to the right side these two joins line up perfectly.

POCKETS
If you are not putting in pockets, miss this step.
Place the front dress right side facing you. Then, place the inner pocket pieces right sides together onto the dress using the marks/notches for the pocket placement. Sew the pocket to the skirt, using a 1cm seam allowance.

Repeat on the back skirt.
On the right side, iron/press the pocket pieces flat to the side.
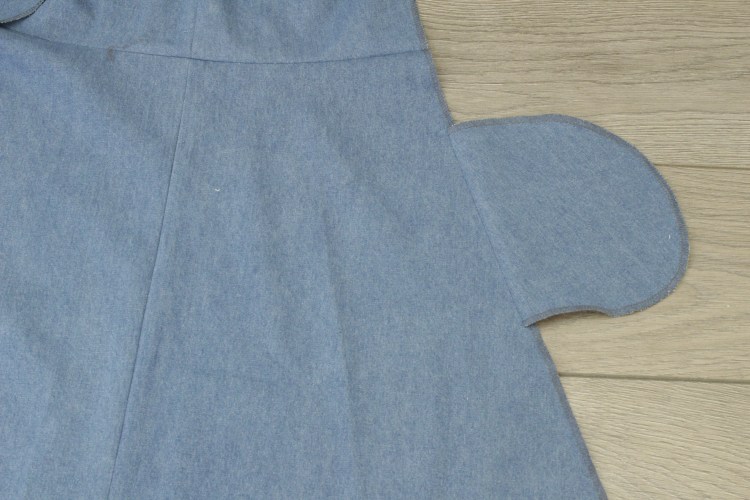
At the pocket (on the wrong side), mark the side and pocket seam allowance (1.5cm). When we sew the skirt together at a later stage, this will show you where to pivot so that you keep to the 1.5cm seam allowance.
Next we are going to put in the sleeve and then sew up the side seams of our dress, complete the hem of the sleeve and skirt hem!
We hope you have a lovely day making this part of the dress and, at any point, if you need help please just add a comment and we’ll help you!
