

An overlocker will take your sewing to another level and is an great investment. A beautiful addition to your sewing room, your overlocker will work side by side with your sewing machine and make your sewing projects an absolute joy!
What does an overlocker do?
The ultimate purpose of an overlocker (also known as a serger) is to finish/neaten the fabric edges of your cut out pieces before you start sewing. An overlocker isn’t a sewing machine and cannot perform all those tasks that a sewing machine performs such as zips & buttonholes. However, different models do different things and it’s worth looking into each additional feature when purchasing an overlocker.
The Janome machine pictured above has 3 or 4 thread options meaning that they take 3 or 4 cones of thread – depending on the stitch you select. This one does wide, narrow and rolled hem functions; a colour coded threading guide for ease of use; differential feed, needle guard; stitch length variations (1-4mm), adjustable cutting width (3.1-7.3mm); easy threading system, tension release and an electronic foot controller.
It’s perfect for keen crafts people, not too daunting for inexperienced sewers and it also has plenty of options for more experienced enthusiasts.
How much do they cost?
You don’t have to spend a fortune on an overlocker and most of the great brands – Brother, Janome, Toyota, Elna to name a few – sell theirs for around £189. As I always say with buying sewing machines or overlockers, buy from a reputable store and, if you can, go in and test them out and speak to the sales people in the store as they will be able to show you the different functions!
But can’t I use my sewing machine to overlock?
Yes you can, with the zig-zag stitch. However, I personally don’t like the finish it creates or the stress on your machine. It is also very time consuming when using your sewing machine. Your sewing machine is a sewing machine, not an overlocker.
What thread should I use for my overlocker?
Ensure that you use the same thread for your overlocker – so it can be different colours but the reels of cotton should be the same quality otherwise it will affect the stitch quality. Don’t buy expensive thread for your overlocker – you can buy big cones of thread if you use your overlocker a lot. I buy black, white and grey cones and then use black for all very dark colour fabrics, grey for in between or fabric that is multi coloured and white for the rest. This way you aren’t spending a fortune on big cones of thread every time you make a project.
HOW TO OVERLOCK
Here are some guides on using an overlocker:
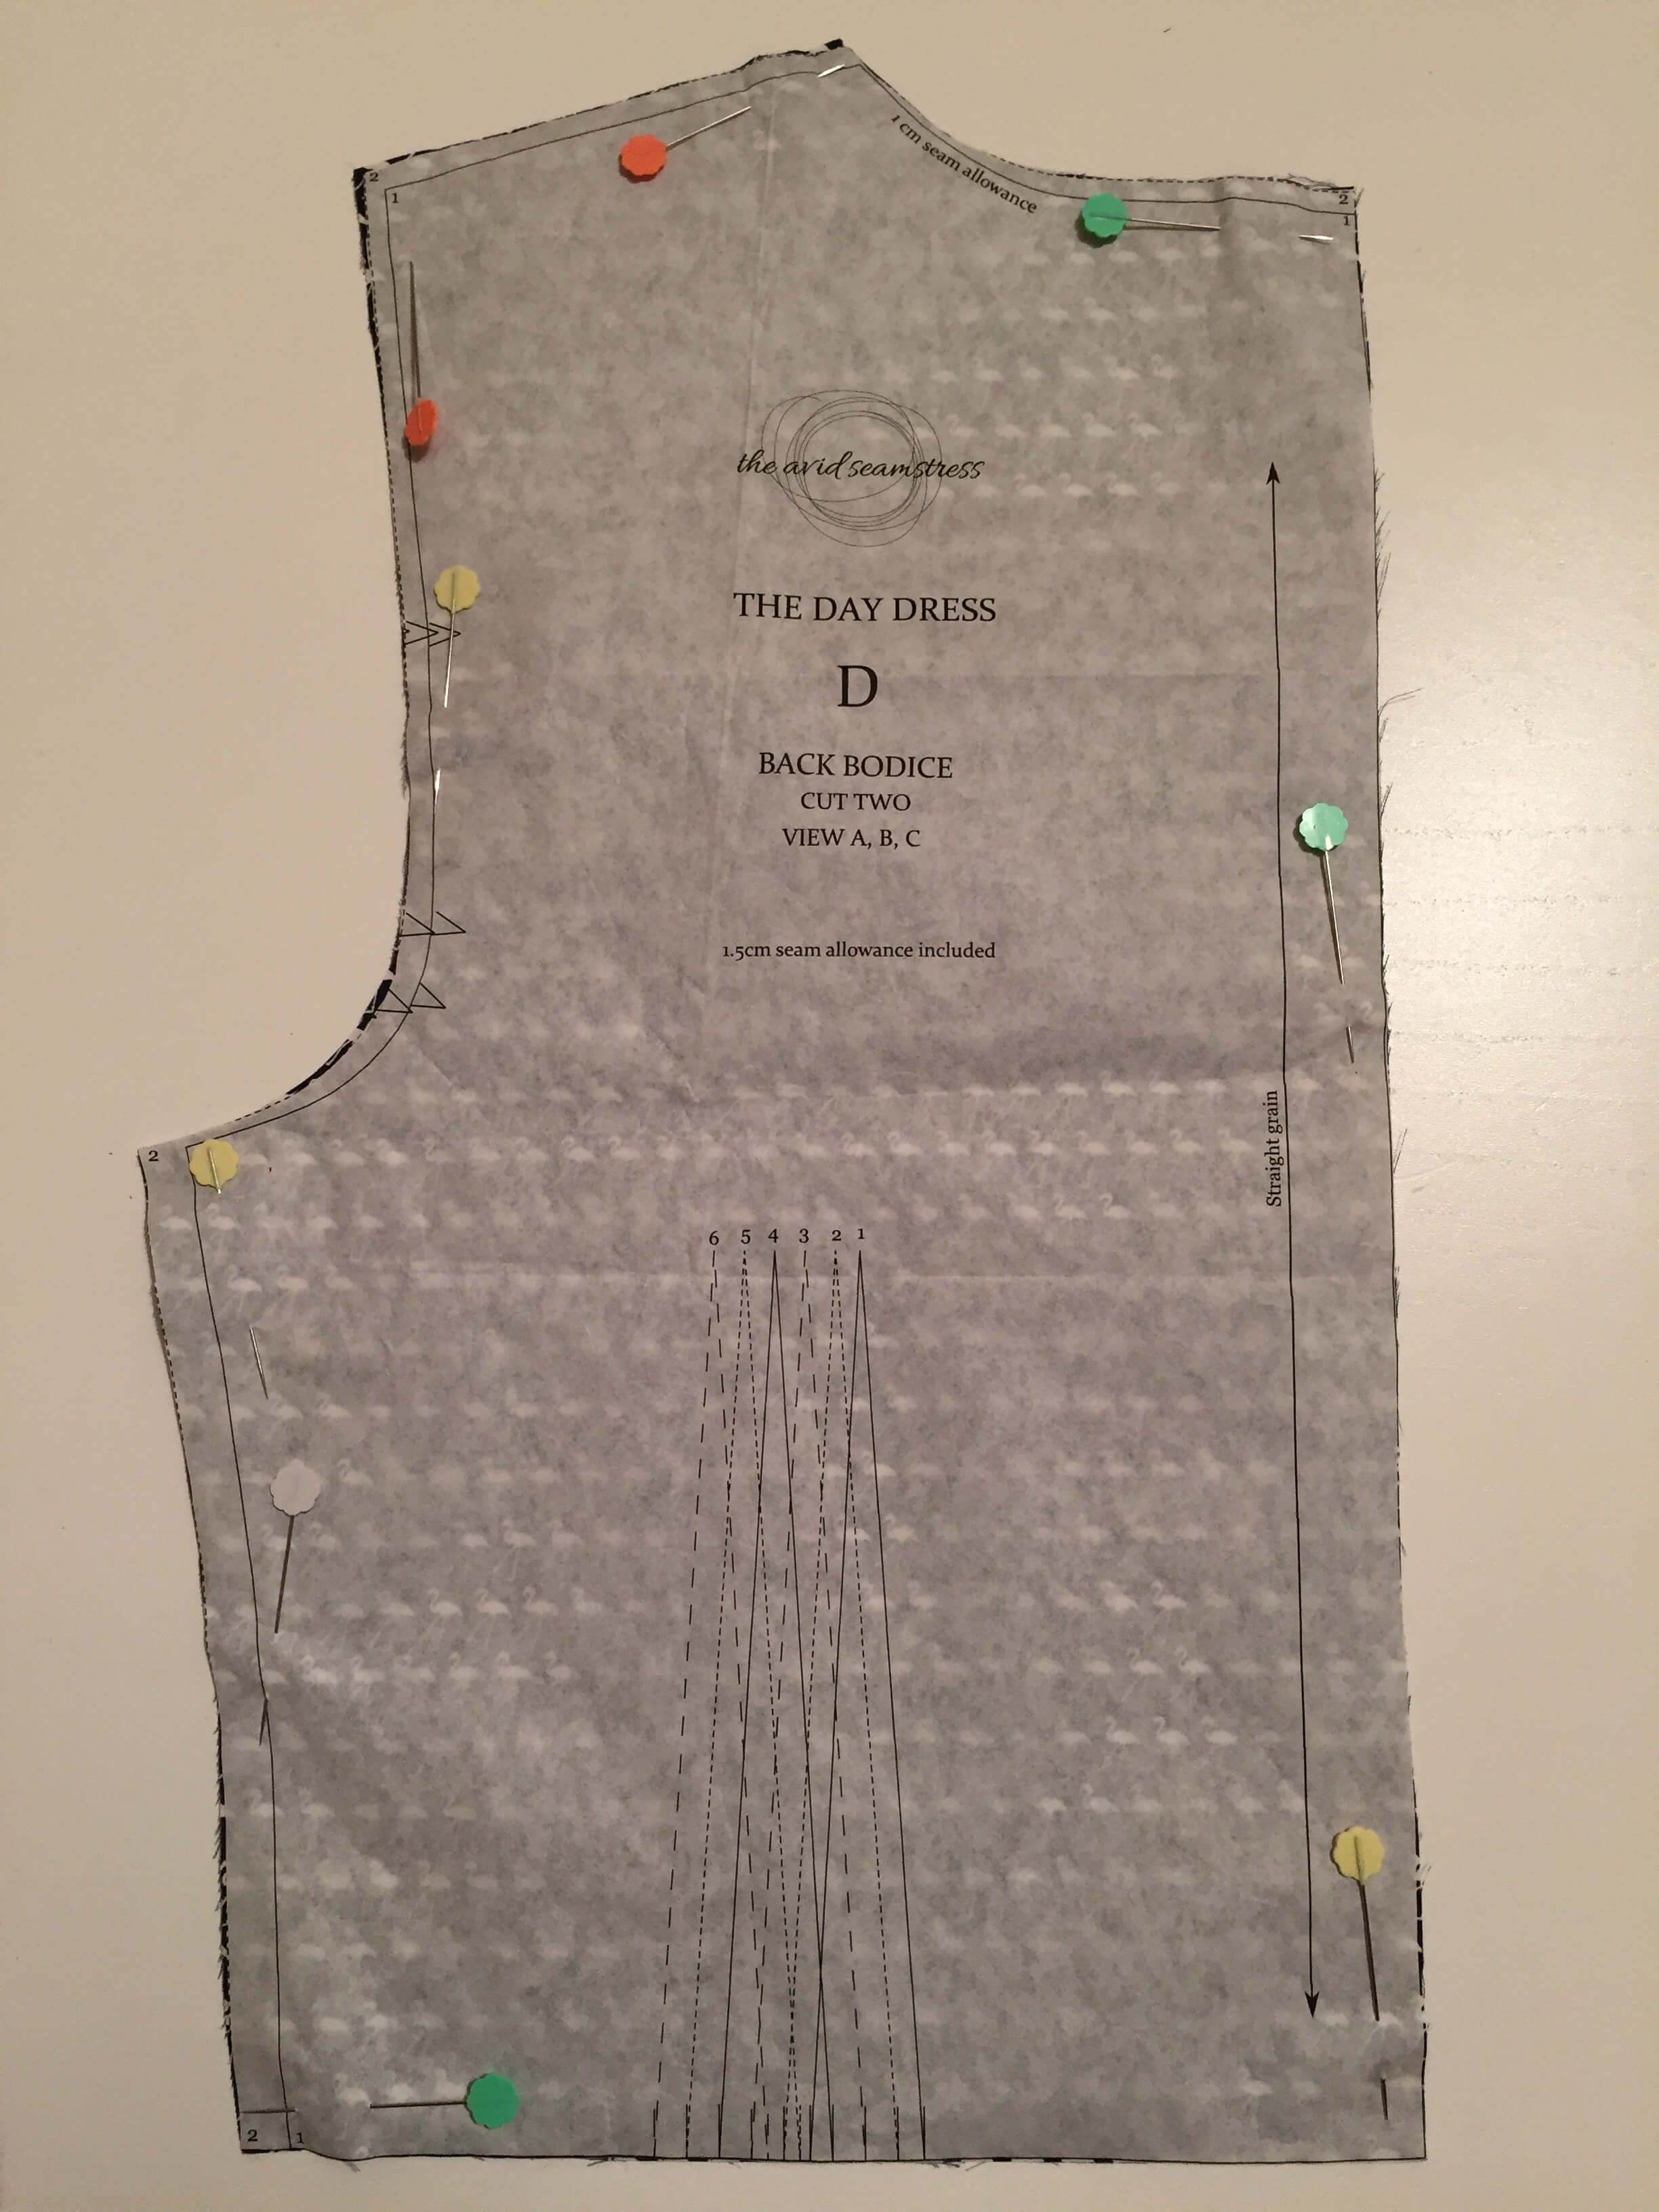
When you have cut out your pattern pieces and fabric there are two methods you can use:
Method 1 – cut your triangles/notches into your fabric and the remove the pattern and overlock your pieces. Sometimes the overlocking will disguise the notches so they are hard to see. You could use a coloured fabric pen to mark the notches and then cut them after overlocking.
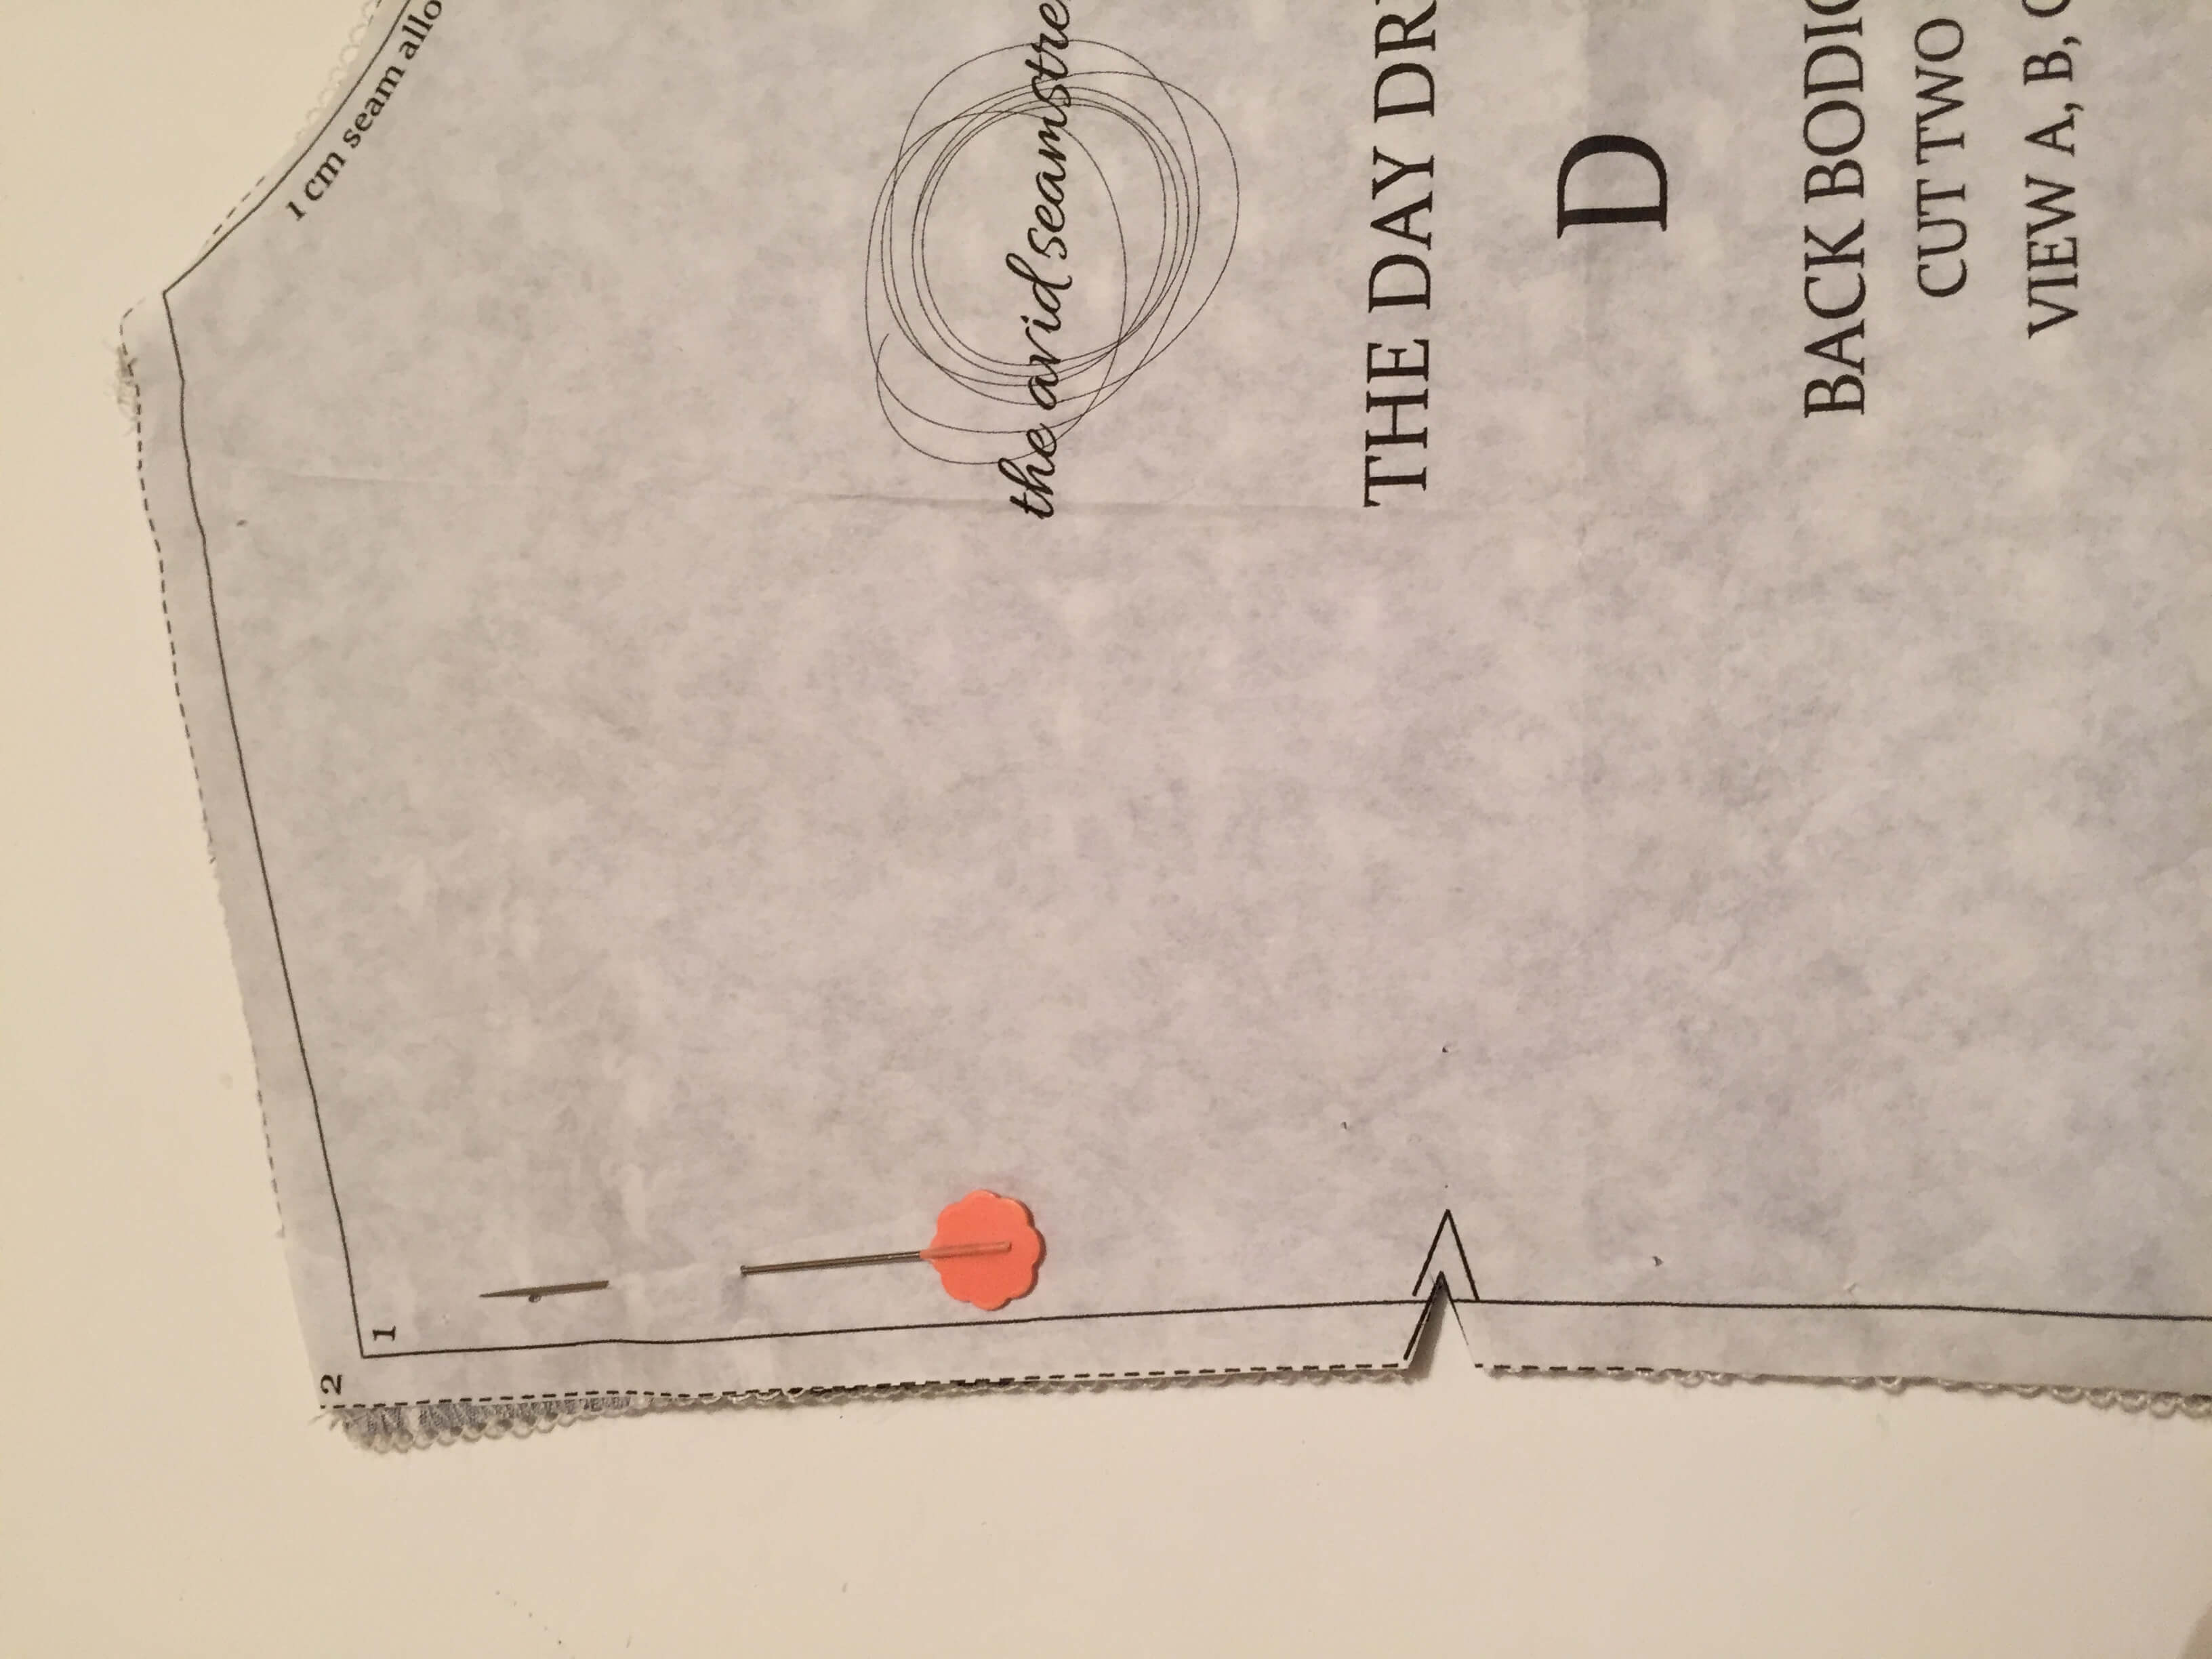
Method 2 – remove the pattern piece and then overlock, then reattach the pattern pieces carefully and then mark / cut the notches. We find that the notches are much easier to see when done after overlocking. Take care when using this method as it will add time to your project and you will have the line up the pattern pieces again very well before cutting the notches.
METHOD 2
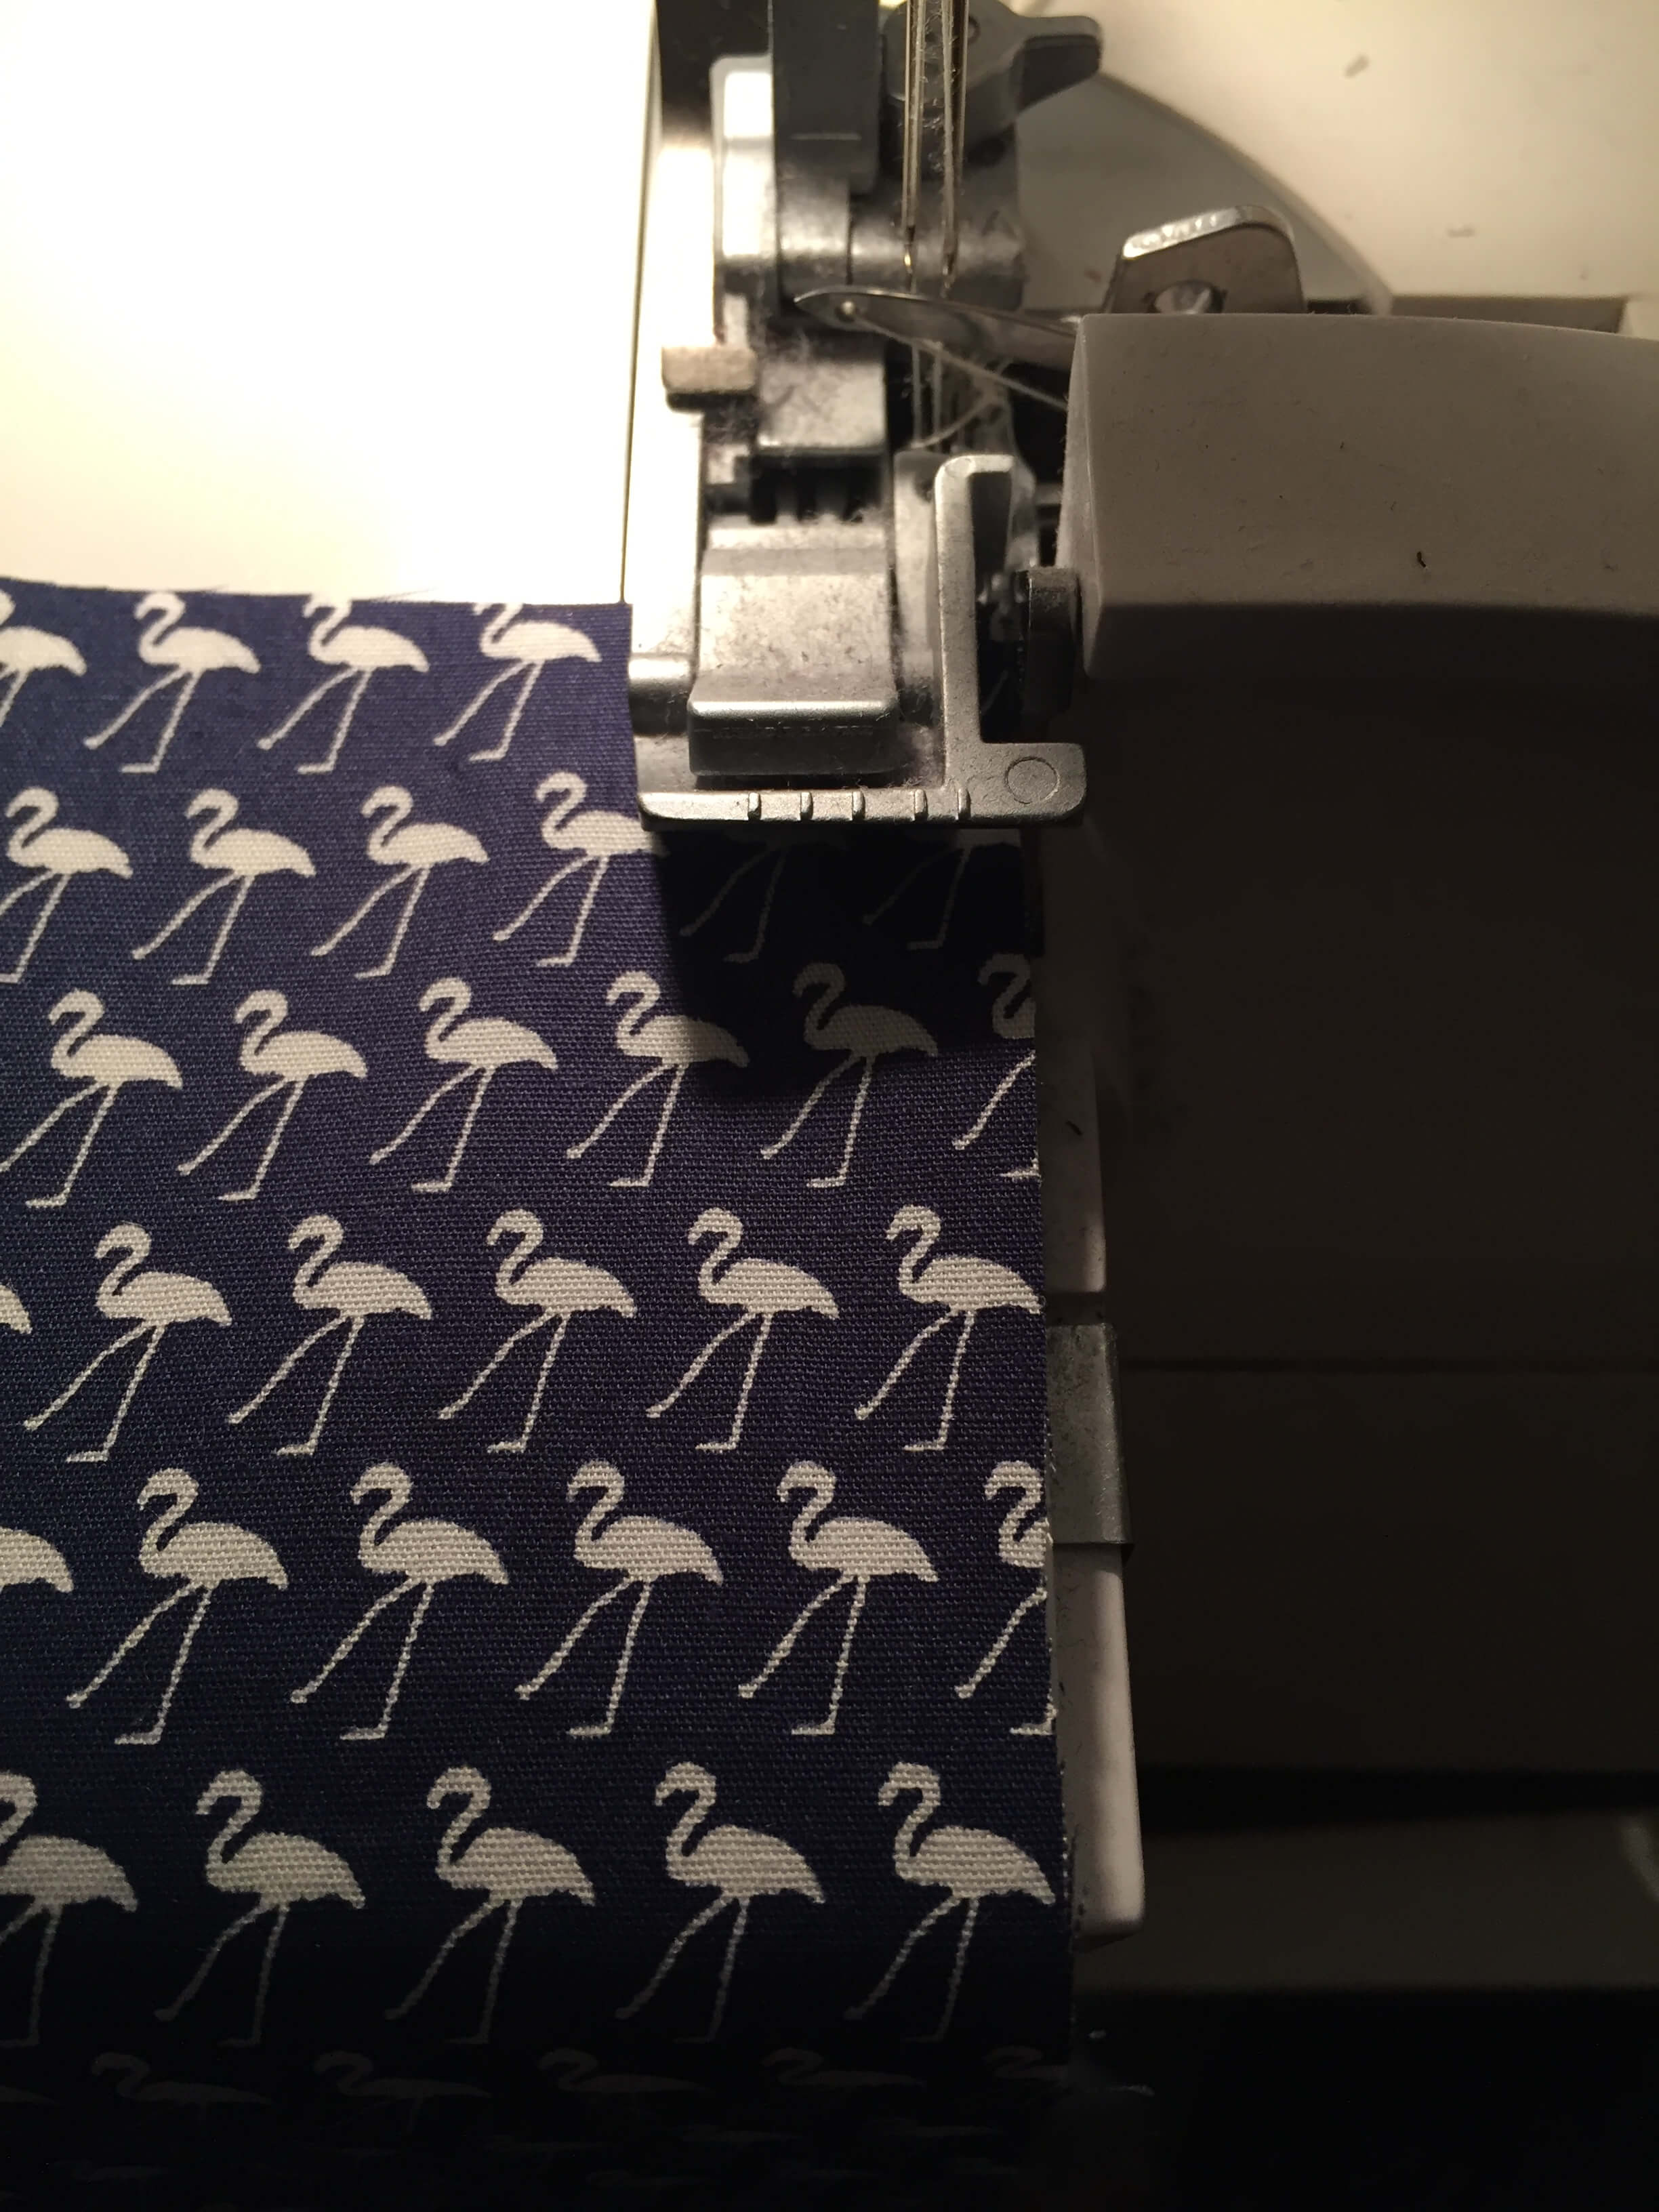
Remove your pins.

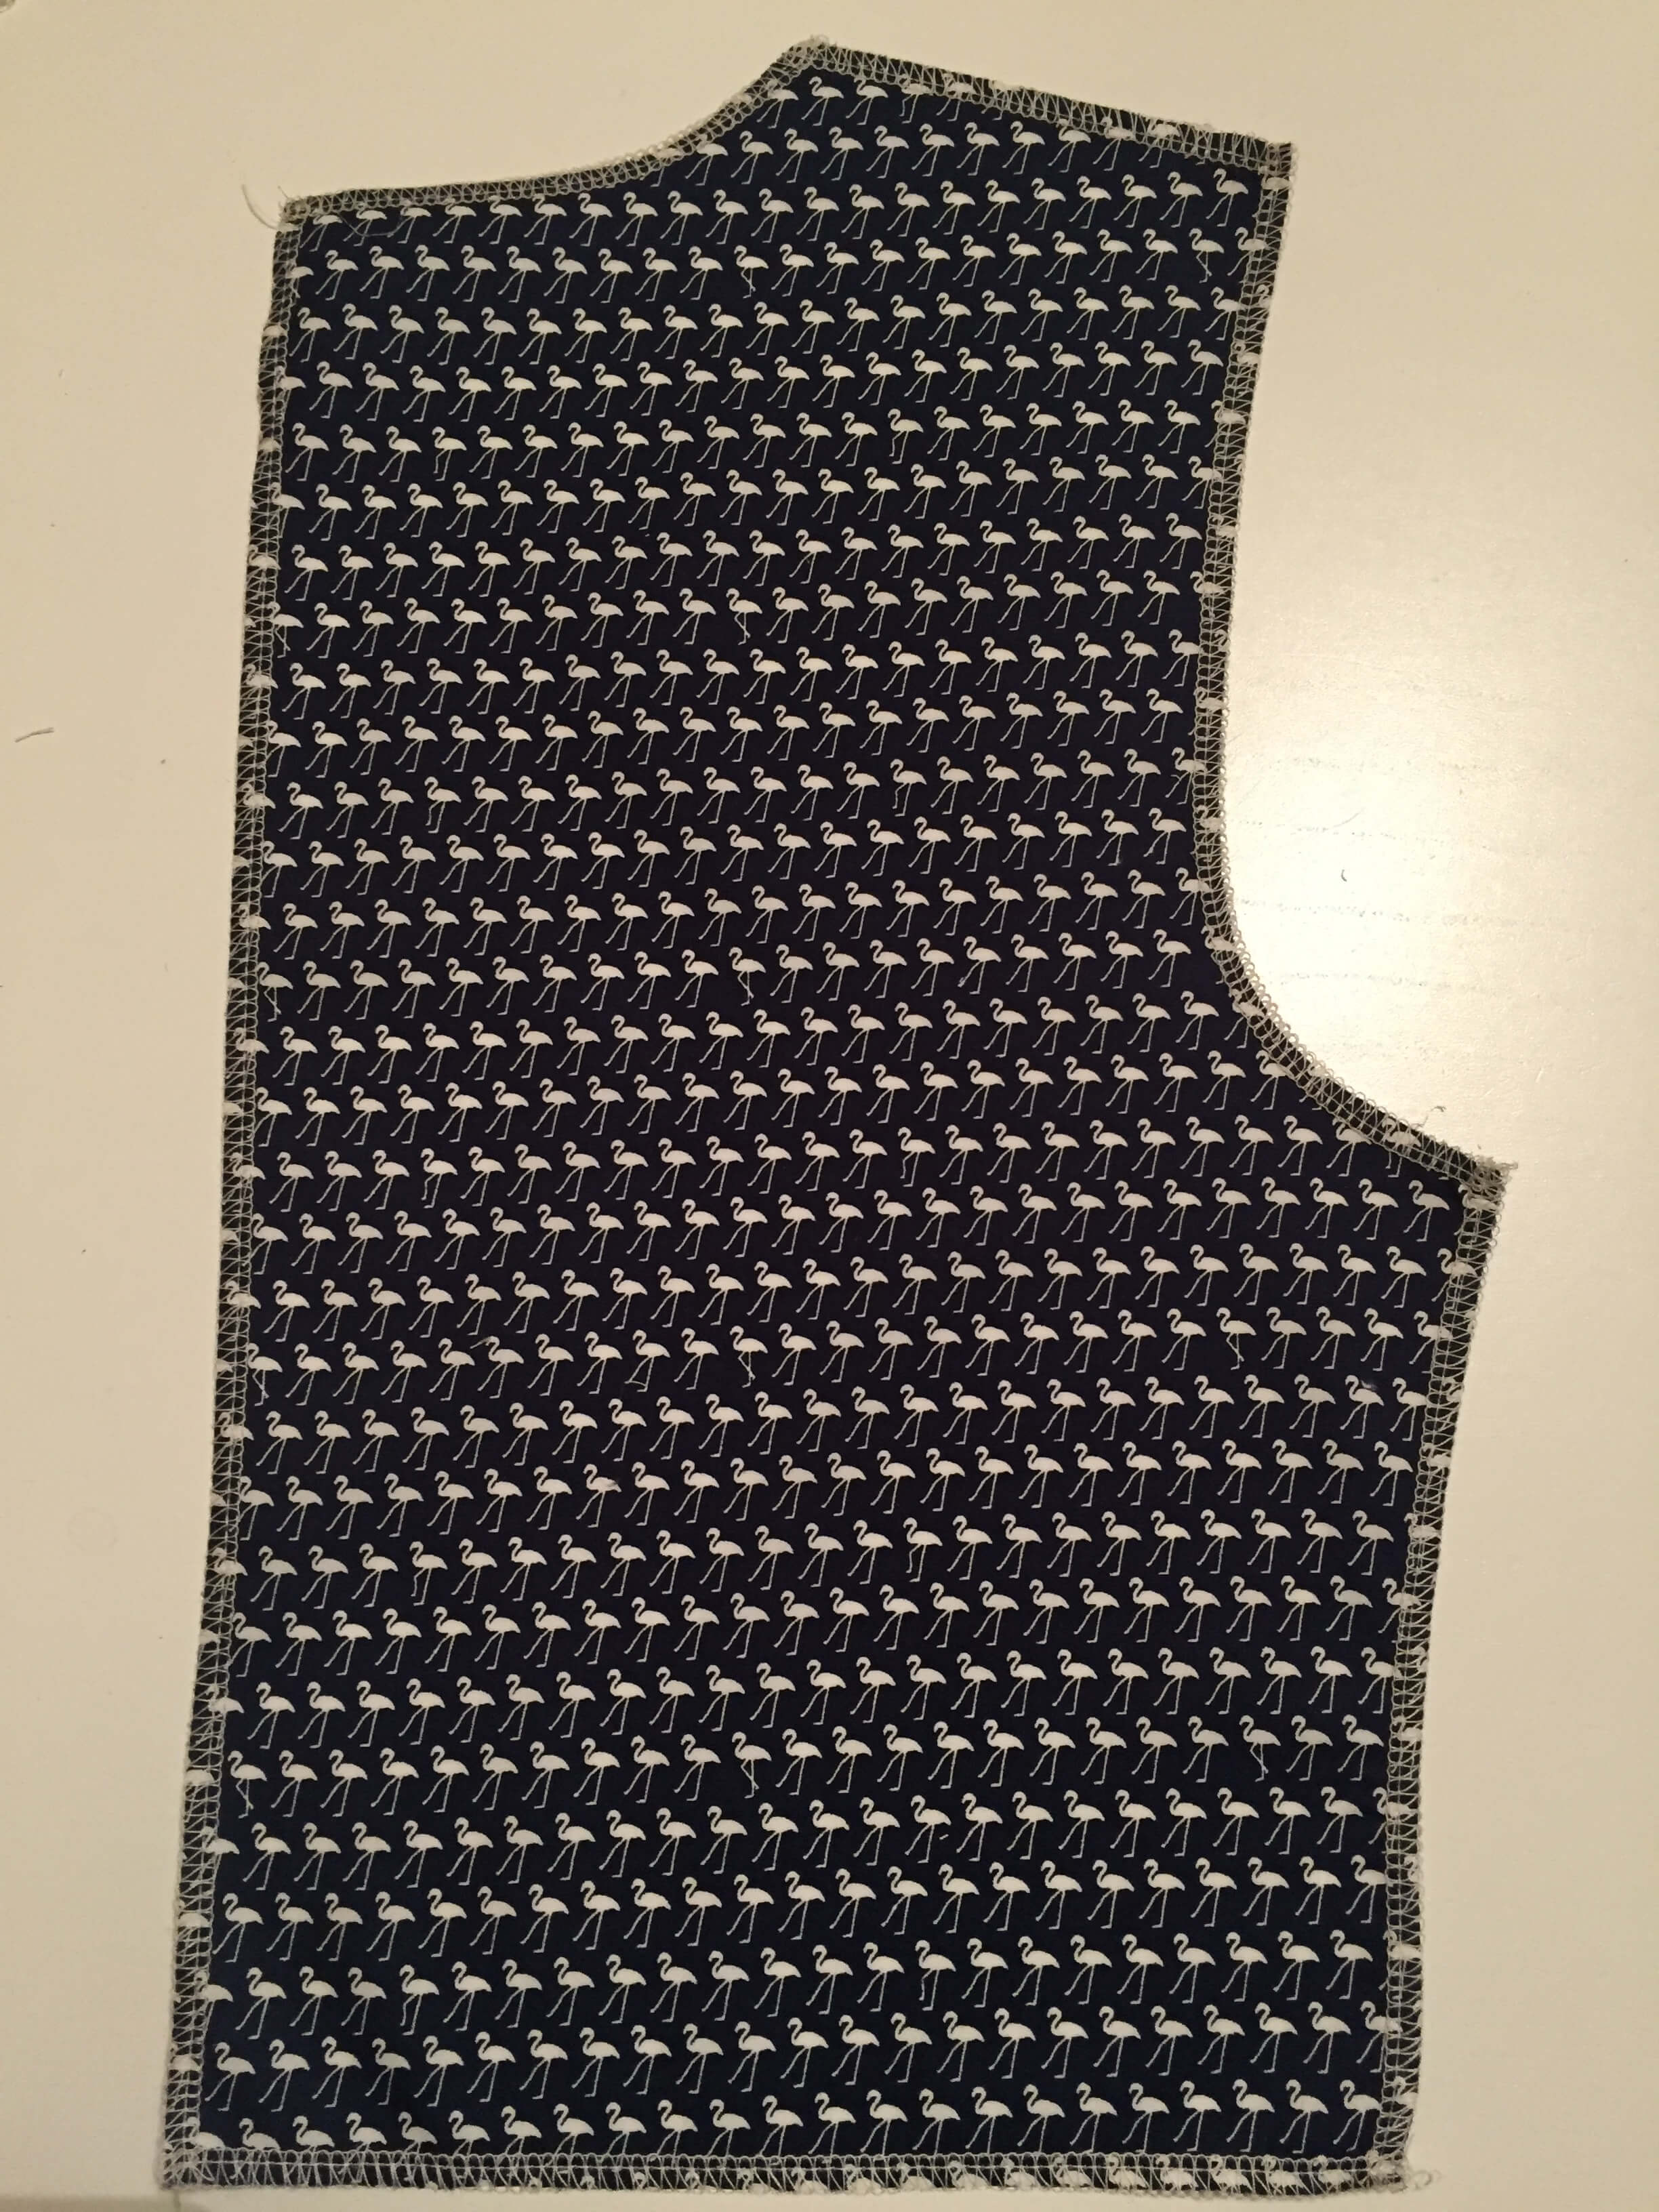
Start overlocking on a straight edge. We like to keep all of our pieces facing the same way up so that the overlocking stitch looks the same (OCD much?). Be careful of the blade on the overlocker and ensure that your pieces are lying flat and haven’t twisted underneath!
Start overlocking slowly, keeping a light pressure on the pedal.
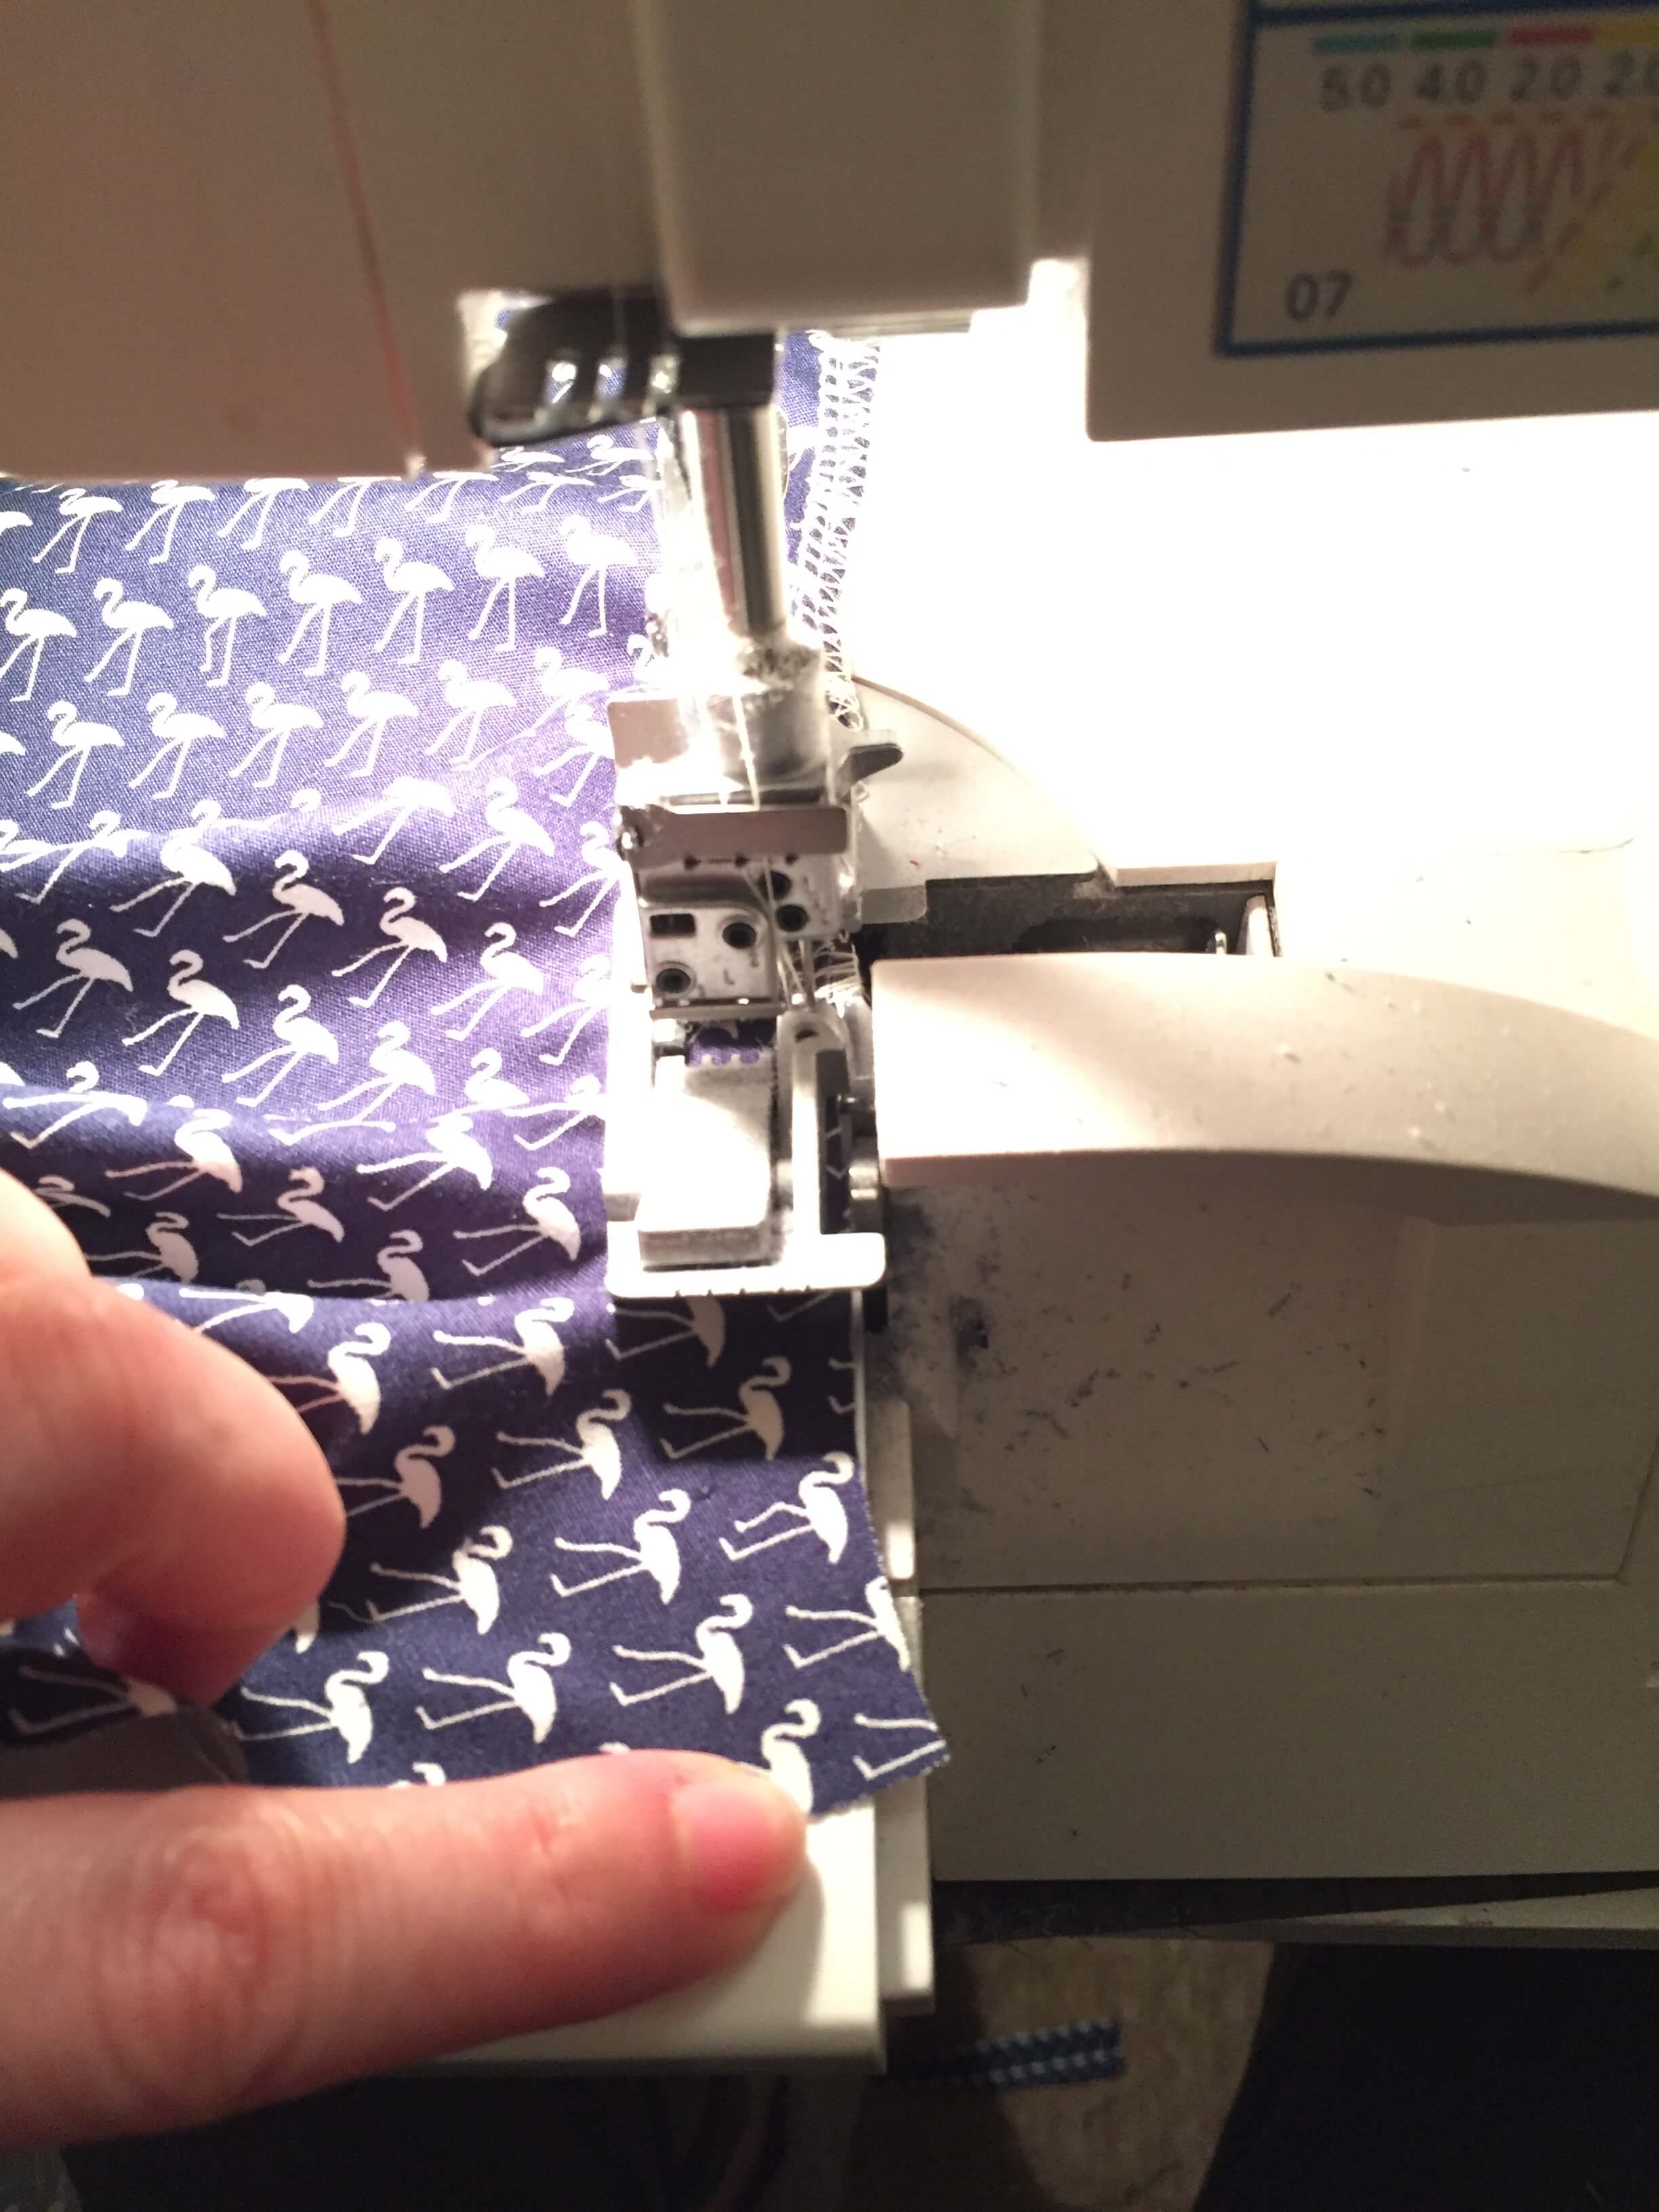
One you reach a curve keep your eye on the edge of the fabric and make sure it is lined up with the edge of the blade.

I am now using my left hand to keep the edge of the fabric straight against the edge of the blade whilst ensuring the fabric doesn’t fold to the left side.
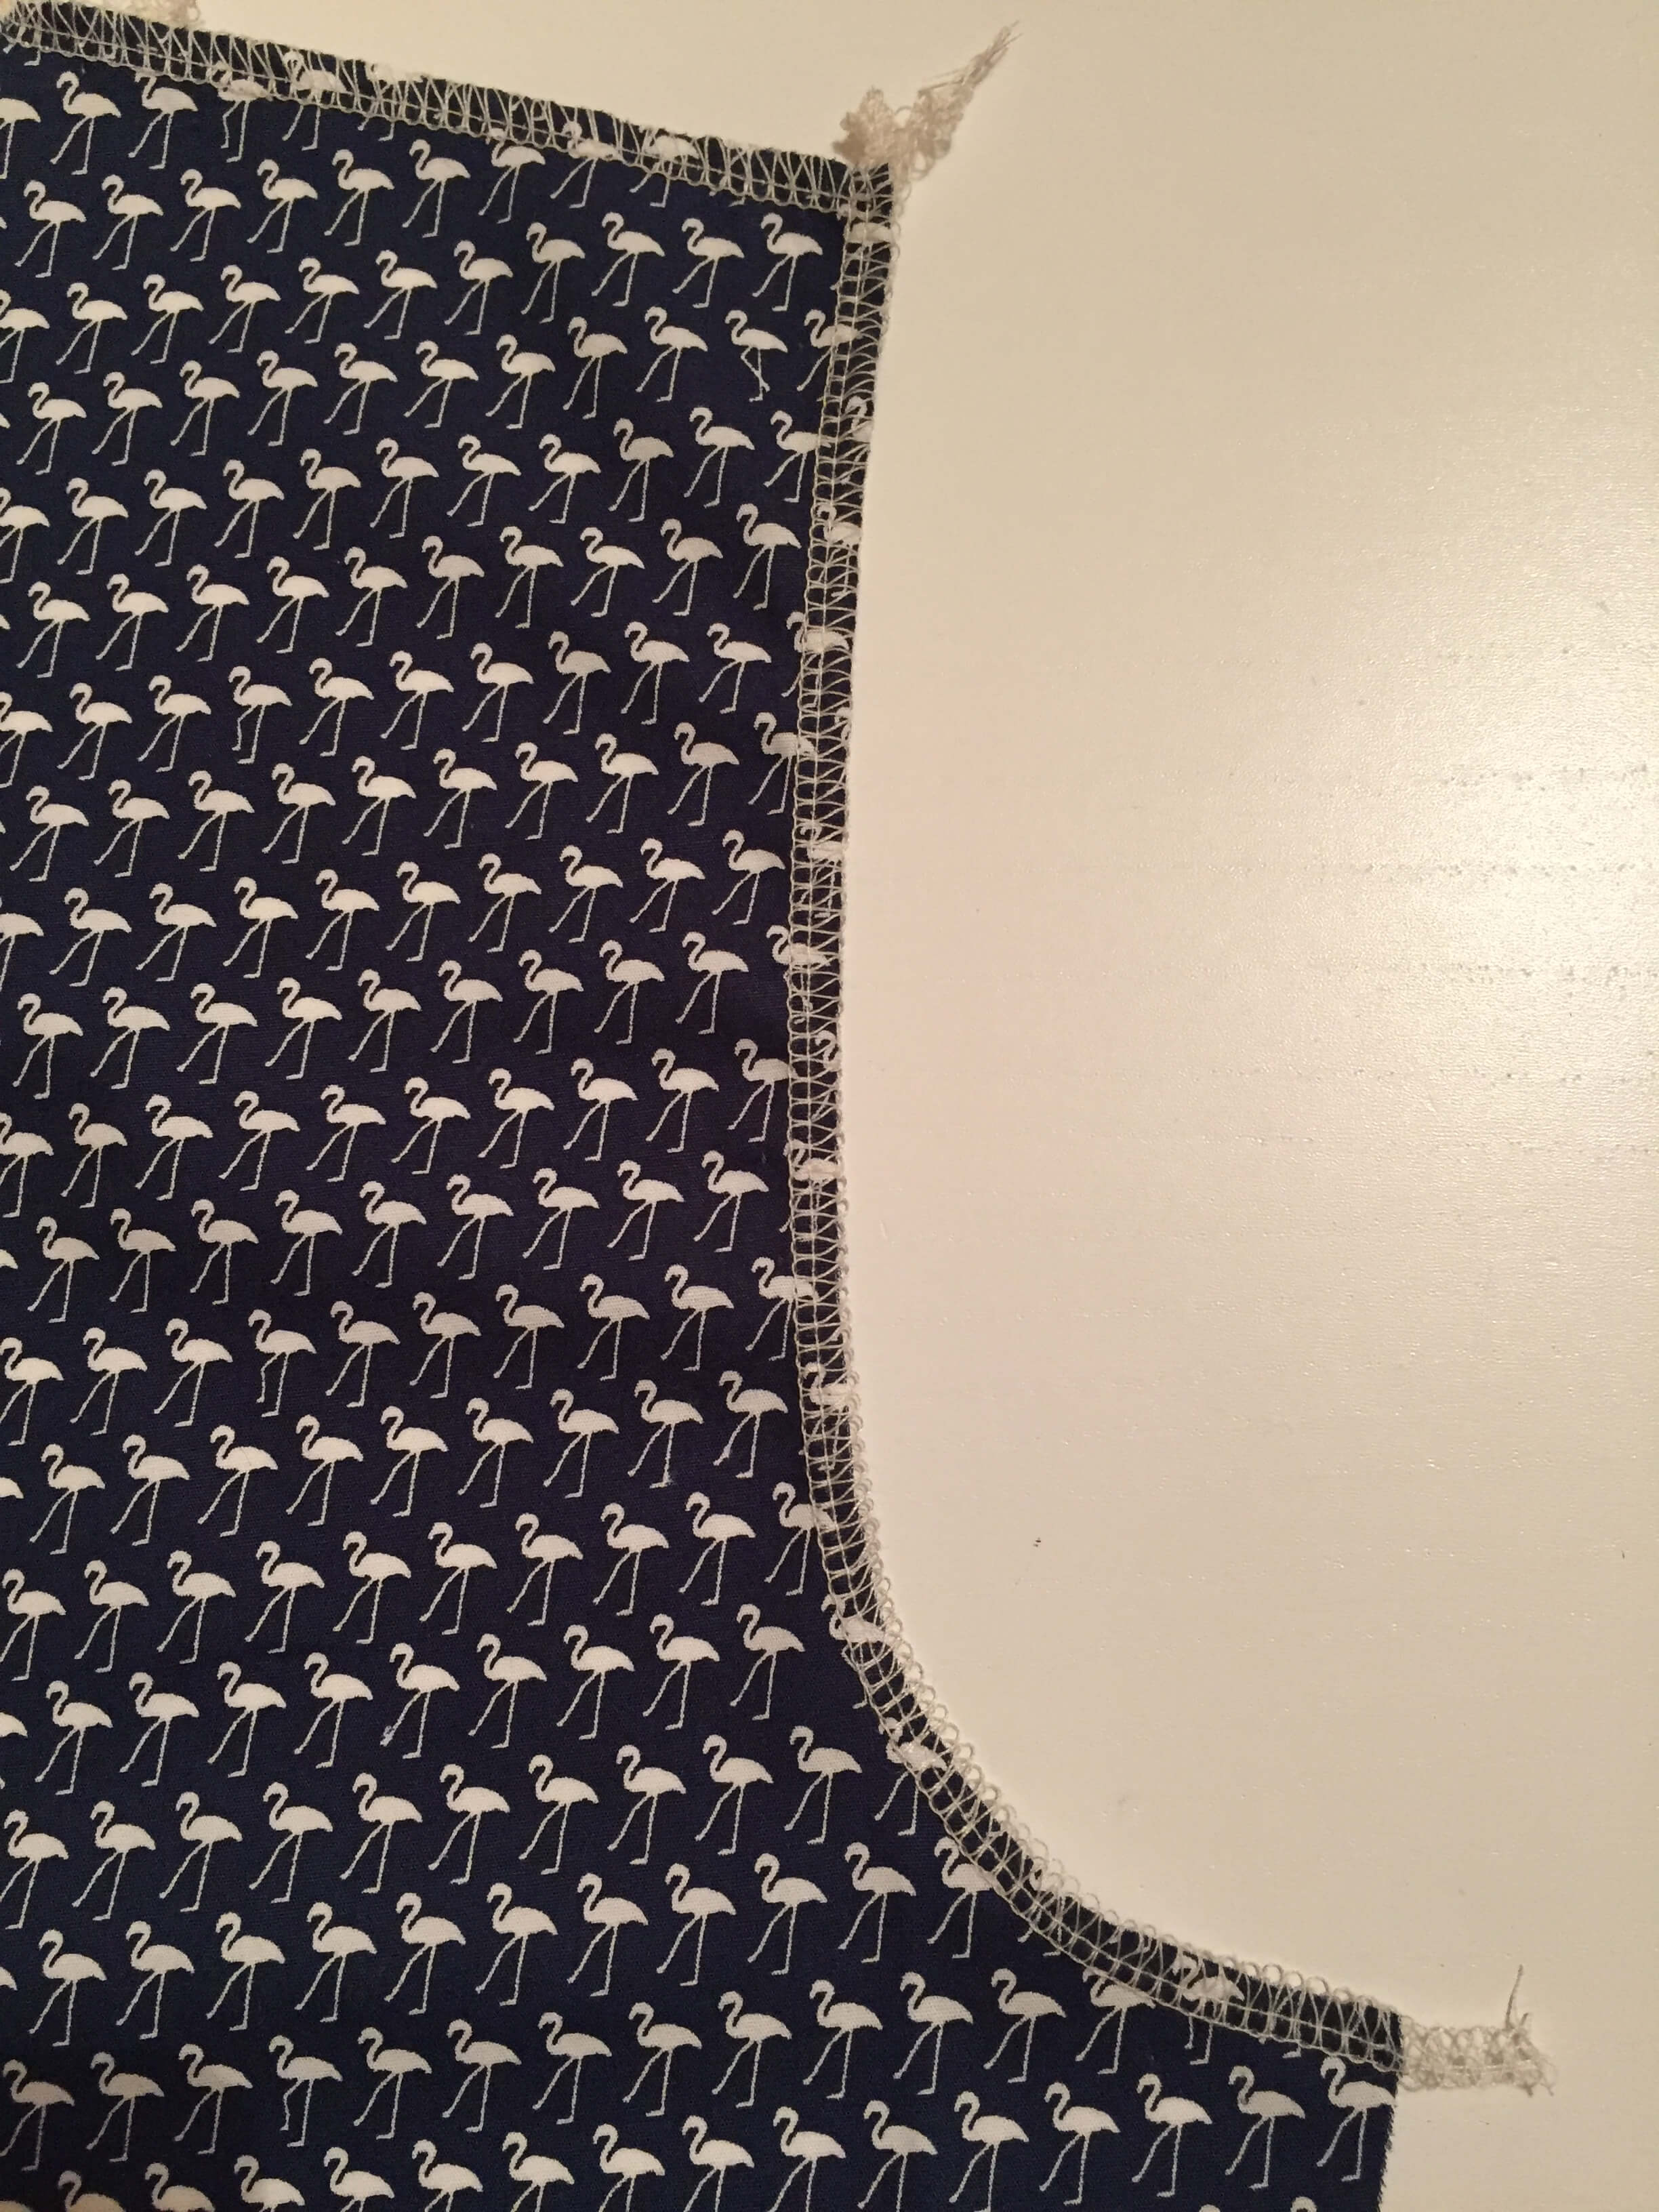
When you take the piece out you can see that the overlocking is perfectly along the curve of the edge of the fabric. Sometimes it is incredible hard to get around a very curved piece – in this case I would overlock as far as I could and then almost overlock off the edge. At the end of the day a piece that’s overlocked 80% is better than 0%.
When you are finished overlocking your piece it can sometimes seem a bit creased / ruffled after all that overlocking! Give your pieces a lovely iron and place them right sides together as they were when you first cut them out. You can then lay your pattern piece back on top.
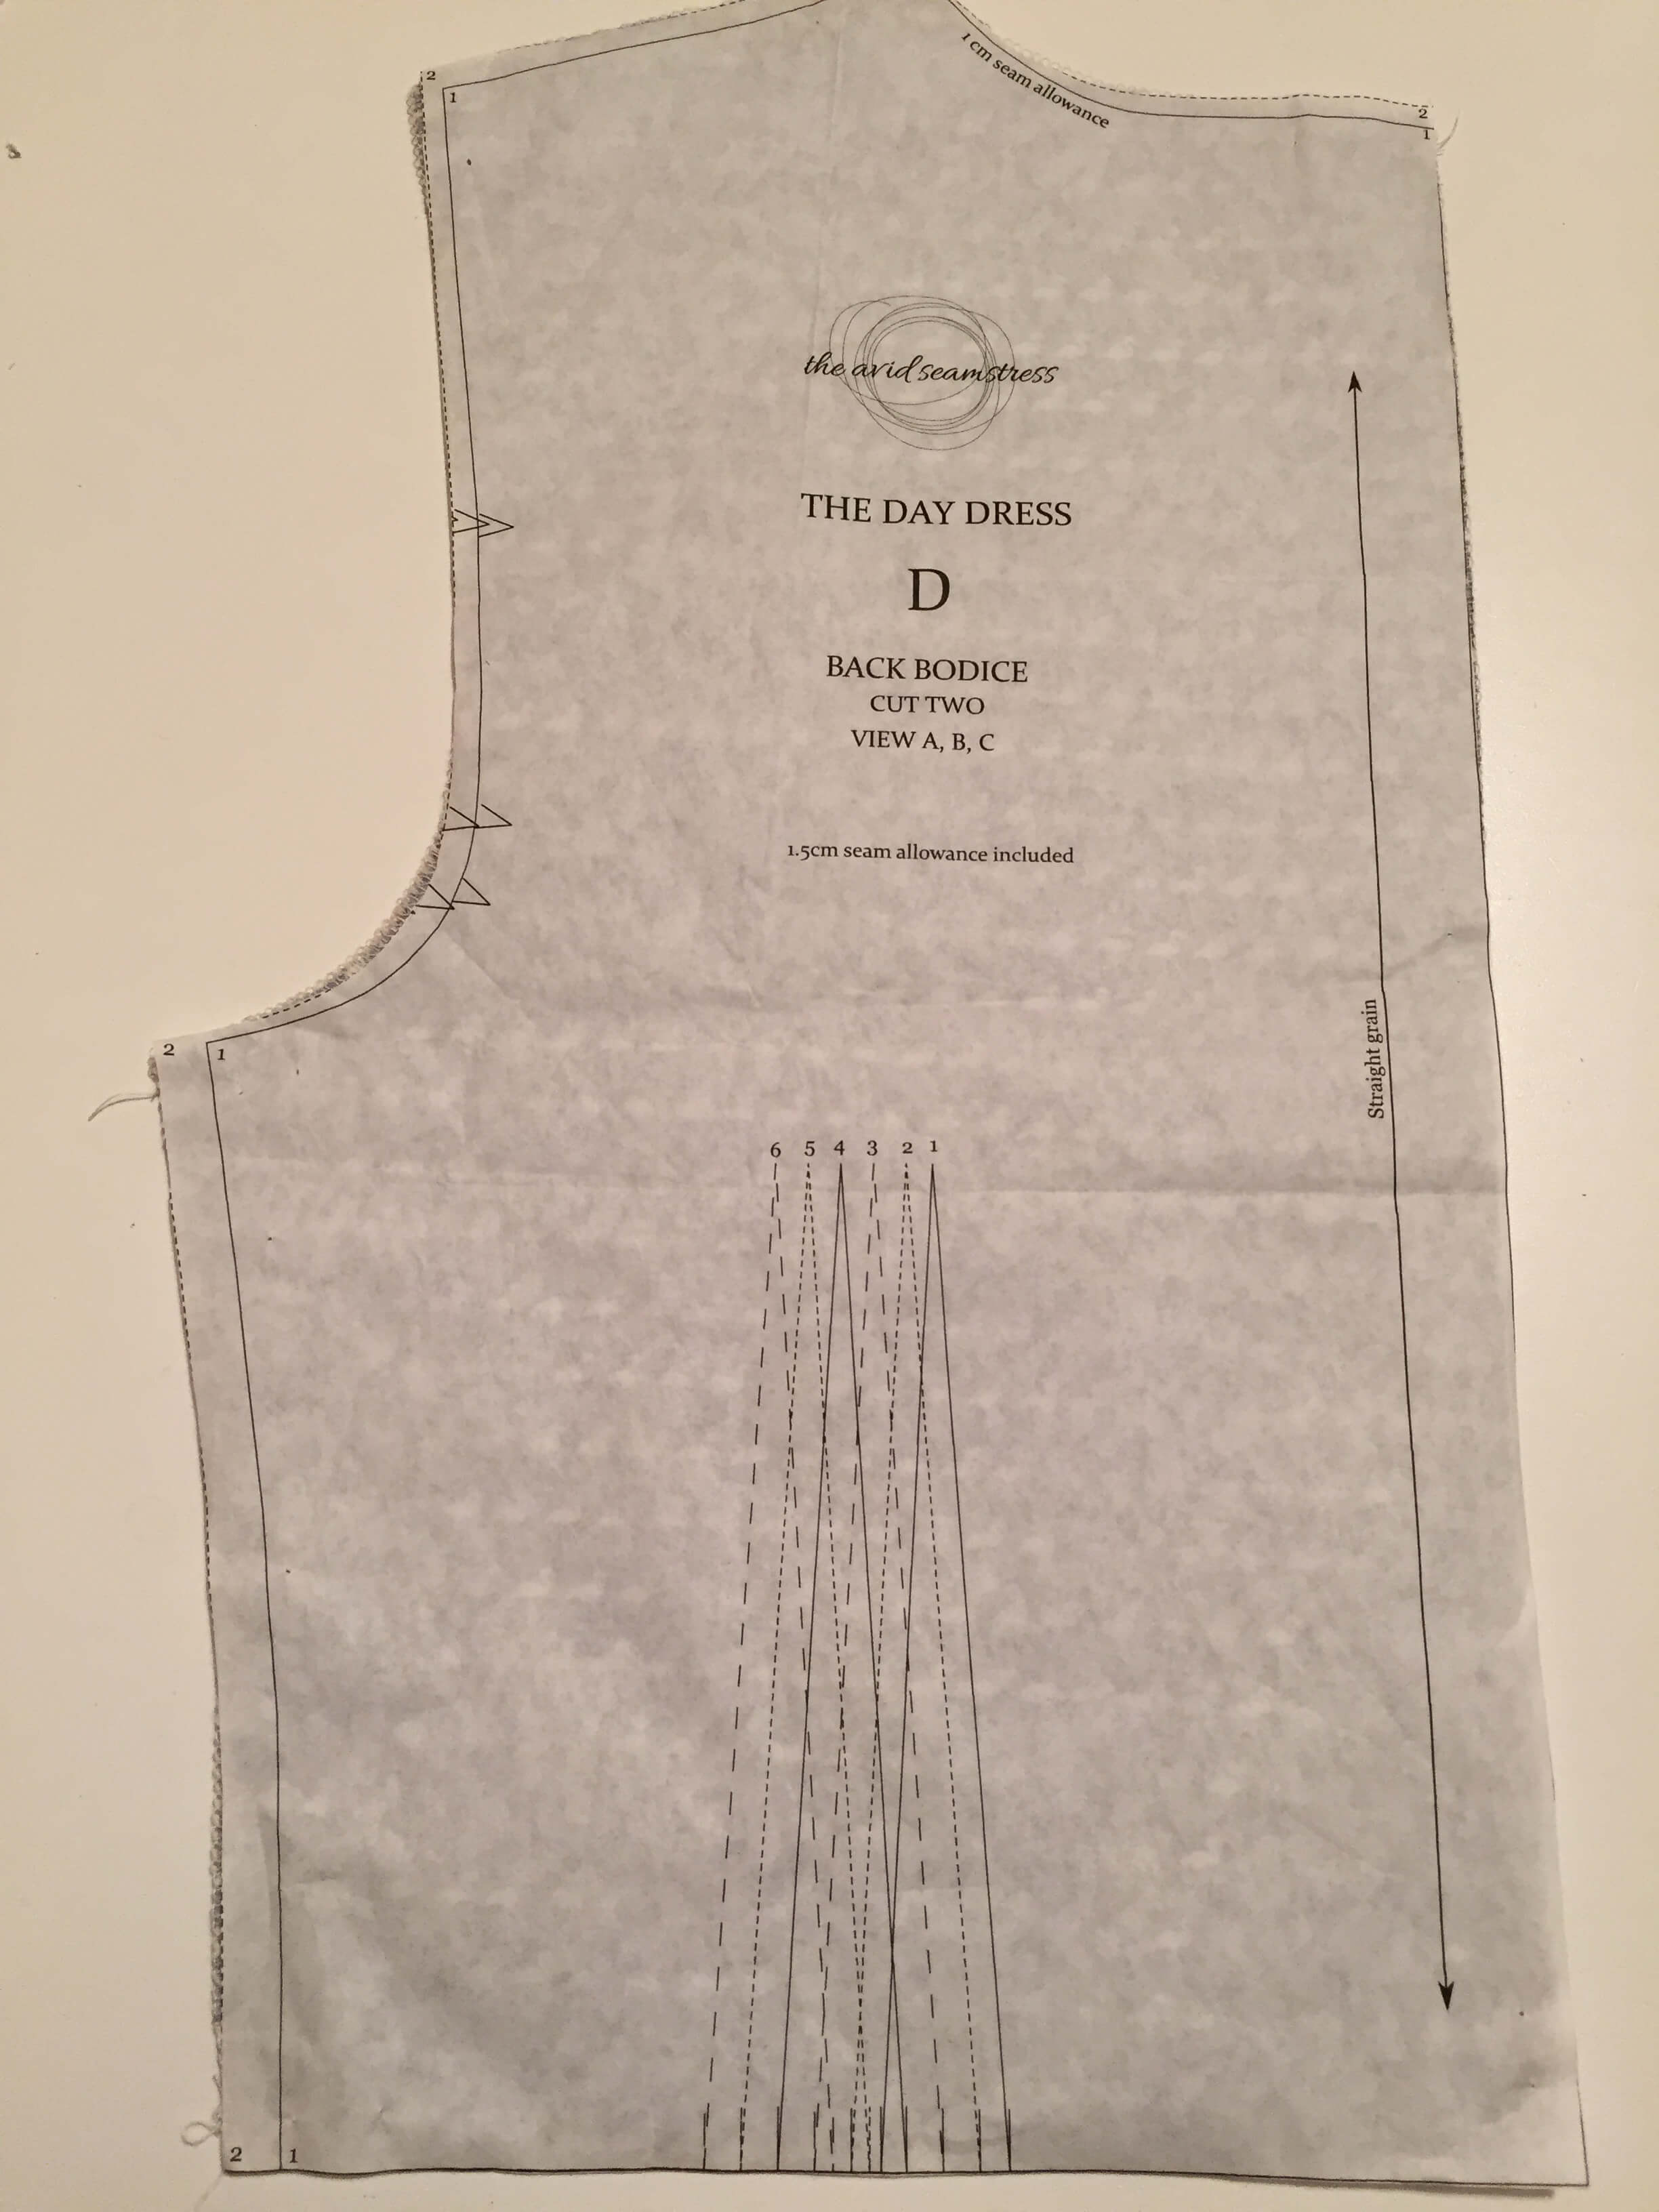
Now you can cut your notches! Can you see how clear they are now.

I know this method seems very time consuming but I am a strong believer in preparation with sewing. If I am making a garment I would normally cut out the pattern and overlock the pieces as one project and then do the sewing the next day/opportunity. If you try to do it all at once you normally rush through the beginning parts which are the most important.
When you slow down with cutting out your pattern pieces, pinning, cutting and overlocking the sewing part will be bliss! Rush through the beginning and you will struggle to match up your pieces!
TIPS
Overlocking sleeves
Before you take out the pins on a sleeve make sure you mark which is the front and back side of the sleeve as once it’s overlocked it’s very hard to tell which is the front and back. I normally put a pin in the front side of each side in an area that I’m not overlocking. Or use a coloured pencil to mark the front and back that you will still be able to see once overlocked.
Do you have any tips that you would like to add? Or anything you would like to ask? We’d be more than happy to help or add additional tutorials to help you!
