

We hope you enjoyed our first article on sewing, Sewing Pattern Guide. If you missed it, click here to catch up.
We love sewing and truly love the creativity, individuality and happiness it brings. We think preparation is one of the most important parts of sewing. Careful preparation will ensure that you’ll enjoy the whole journey as well as avoid costly mistakes and disappointment. We know the feeling of excitement when you have all your sewing goodies and just want to see the finished garment. Alot of people see the actual sewing part as the key part to sewing, however we think it’s the preparation. Think of it like this, whatever you take to the sewing machine is what you are working with. So, if pieces haven’t been cut out accurately they aren’t going to fit together and this will just lead to frustration when sewing.
We want to show you how to take your time and enjoy the whole process of creating a garment, from choosing the pattern & fabric, the preparation and the sewing. Here’s our top tips:
TAKING MEASUREMENTS
Take accurate measurements and never assume your size. Sewing pattern companies use different measurement tables for their garments. You may be a size 10 using pattern company A and a 12 using pattern company B. This is especially important for making children’s garments, as a size 5 may fit a 4 or 6 year old.
HABERDASHERY FOR YOUR PROJECT
Ensure you have the correct haberdashery for the project (usually listed on the pattern envelope). If the sewing pattern says invisible zip, don’t buy a standard zip and so on. If you are zig-zag stitching to finish the seams you may need extra thread.
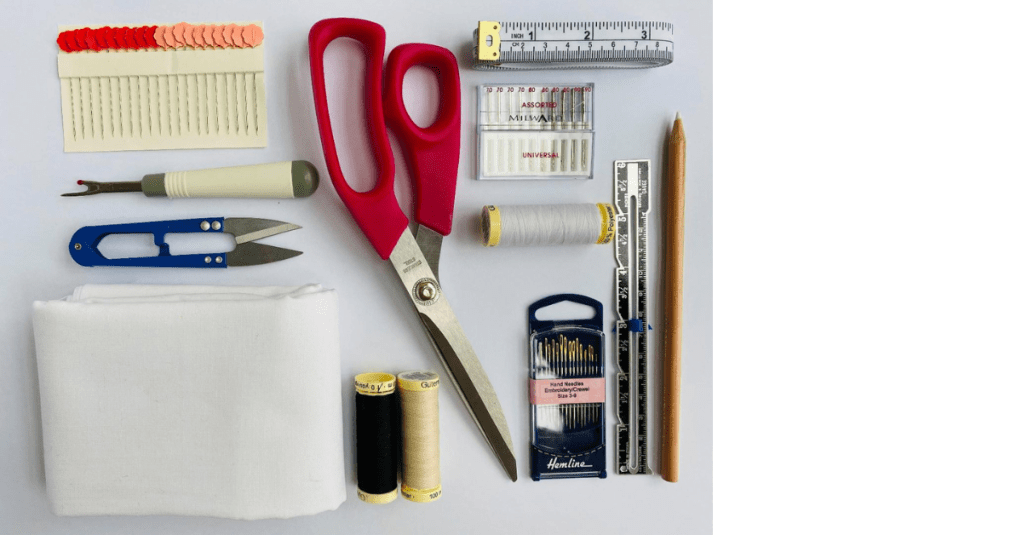
SEWING KIT
Ensure you have everything you need in your sewing kit. We’ve put together a dream kit with all the tools a beginner Avid Seamstress needs to achieve amazing handmade garments.
FABRIC PREPARATION
Wash the fabric being used for your project, according to the manufacturers guidelines.
FINISHED GARMENT MEASUREMENTS
The finished garment measurements are larger than the body measurements so that there is room to move when wearing the garment. Some garments have more ease in them than others and the style of the garment will determine how much ease has been added. Once you have taken your body measurements, refer to the finished garment measurements – either printed on the pattern envelope or provided seperately. You can now determine which size you will be making as you can compare between the body and finished garment measurements. Locate the size that is closest to your body measurements, depending on the fit of the garment.
MAKING ADJUSTMENTS
Decide whether you’ll need to make any adjustments such as lengthening the trouser / skirt as these adjustments will need to be done to the pattern piece before cutting out the fabric.
PREPARE THE PATTERN SHEET
If you have bought the pattern in the envelope, take out the pattern sheet and press it with a warm iron to remove creases. If you have put the pattern together as a digital file it may have tape or glue so ironing is not recommended. If you don’t have alot of space to work from, roughly cut out the pattern pieces first, so you have pieces that are easier to work on. Cut around each piece, leaving as much paper as possible and keeping any larger sheets of paper aside as these can come in handy when making pattern adjustments.
TRACING PATTERN PIECES
If you’d like to make various sizes or intend on making various changes to the garment, you can trace the pattern. You can use sewing pattern tracing paper, baking paper, lightweight paper, spot and cross paper, Swedish tracing paper or anything that can make an accurate copy of the pattern pieces. Be sure to trace all notches, instructions and arrows so that the pieces you have traced are an exact replica of the main pattern piece.
LAYPLANS
The layplans will show you how to lay the pattern pieces onto the fabric to best utilise the piece of fabric. As most fabric comes in two widths 112cm/44″ and 145cm/57″ you may find layplans provided for both widths of fabric. The layplans may also be further split into size categories to reduce fabric wastage. For fabric that has a directional print, all of the pattern pieces need to be running in the same direction. It is critical that the pattern pieces have the grainline arrow running parallel to the fabric as the position of the grainline determines how the finished garment hangs. When a pattern piece is cut on the bias it may look strange on the layplan to begin with. The positioning will be correct with the grainline parallel to the edge of the fabric. Ensure that you study the layplans to ensure you are using the correct one for the size you are making. The layplans for The Pyjama Bottoms are printed on the pattern sheet in a handy section that you can cut out and keep in the envelope.
PINNING TIPS
Once you are ready to cut out the fabric, you can prepare the fabric for cutting. Place the pattern pieces as shown on the layplan and then, before pinning, check that they are in the correct position – ie the pieces that need to be cut on the fold are lying next to the fold of the fabric. Now you can start to pin the pieces to the fabric. When pinning any pieces that lie against the fold, use a weight to hold the folded edge perfectly on the edge of the fabric and then pin around the pattern piece edges, not down the folded edge. Ensure that the grainlines are running parallel to the fabric edge.A top tip to ensure the grainline is parallel, especially when pieces are “floating” on the fabric is to measure at the top of the grainline arrow to the edge of the fabric and at the bottom of the grainline arrow to the edge of the fabric – both distances should be the same. Pin as close to the pattern piece edge so that it lies very flat onto the fabric. This will help you to cut accurately. Once the pieces are pinned, do a final check to ensure the pieces are correctly layed out.
CUTTING TIPS
Invest in some fabric scissors that you only use for sewing. Try to cut in long strokes when cutting along a longer edge so that you don’t have chopped edges. Remember, whatever you take to the sewing machine is what you are going to be working with so take your time with the cutting.
NOTCHES AND PATTERN MARKINGS
Transfer any notches onto the pattern pieces and remove the pattern pieces from the fabric. Keep the pattern pieces handy as you may need to refer to them.
MAKE A TOILE
We are firm believers in making a toile (mock up of the garment) before cutting the main fabric so that you can get an idea of the fit and any adjustments that you may need to make. A “toile” is an initial mock up of the garment, usually made with a cheaper fabric that is a similar weight to the main garment fabric that will be used.Making a toile allows you to test the fit of the garment and then make any adjustments to the paper pattern before cutting the main fabric. A toile is important if the garment is complicated or you are in between sizes. Wasting fabric when a garment doesn’t turn out like you had hoped leads to unnecessary dissapointment and can put you off sewing.When making a toile, you don’t have to make the entire garment. For example, if the bodice of a dress was very fitted but the skirt loose, you could just sample the fit of the bodice.Make the changes to the toile and transfer them to the paper pattern. However, if you end up making a lot of changes to the toile we advise that you make a second toile after changing the pattern pieces. We buy extra wide curtain lining so that we always have a stash for toiles.Another bonus? You get to road-test the instructions and making the garment out of the main fabric will feel more relaxed. Sewing butterflies gone.
PREPARE YOUR SEWING MACHINE
Fill up a bobbin and thread your machine with a matching thread to colour to the fabric you are using.
OVERLOCKING & ZIG-ZAG STITCHING
When most woven fabrics are cut, they start to fray. Fraying occurs when the threads unravel. Some fabrics will fray quicker than others. To stop the fabric unravelling you can use French seams, pinking shears, zig-zag stitch the edges or use an overlocker (sometimes called a serger) to finish the edge. All sewing machines will have the zig-zag stitch option but it’s important to note that when using this stitch function, it can distort the edges of the fabric – leaving you with pieces that are untidy and likely to cause frustration when sewing. The best option is to sew first and then zig-zag stitch the edges once sewn, whenever possible. This will need to be done during the process of making the garment to obtain the best result.Alternatively, an overcast (over-edge/overlocker) foot can be purchased for your sewing machine. This wonderful little foot can give you an edging similar to that of an overlocker.
INSTRUCTIONS
Read through the instructions before you start and avoid skipping through any part of the sewing instructions.
Are you ready? It feels like a lot of preparation but it’s worth it! The best thing about sewing? the more you do it the better you get! Jump right in, don’t be afraid to start somewhere and never think your sewing isn’t good enough. We are our own worst critics and we have to put this aside and marvel at the fact that you are creating something incredible with your own hands.
If you need any help on your sewing journey, we’d love to hear from you. Email us at hello@theavidseamstress.co.uk and we’ll help you as soon as we can.
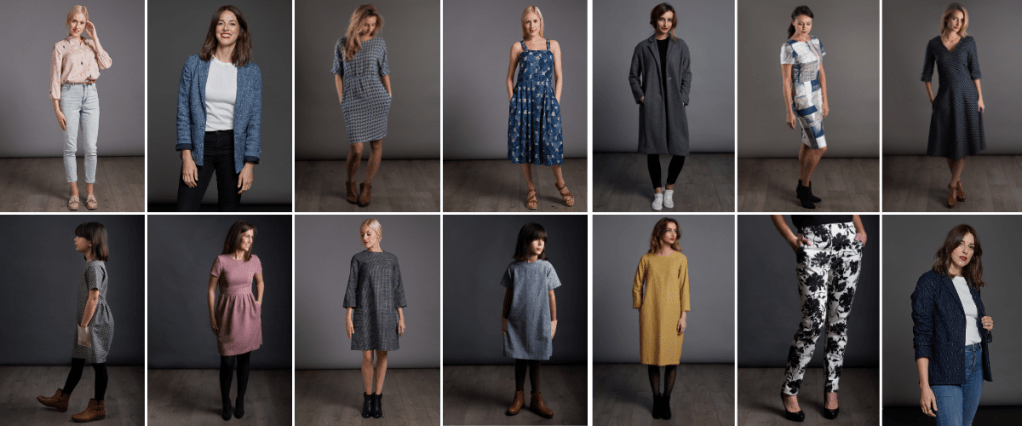
If you fancy some inspiration in choosing a sewing pattern, head to our collection ranging from beginners to advance. We’ll guide you through every step of creating a garment and you’ll have fun along the way.


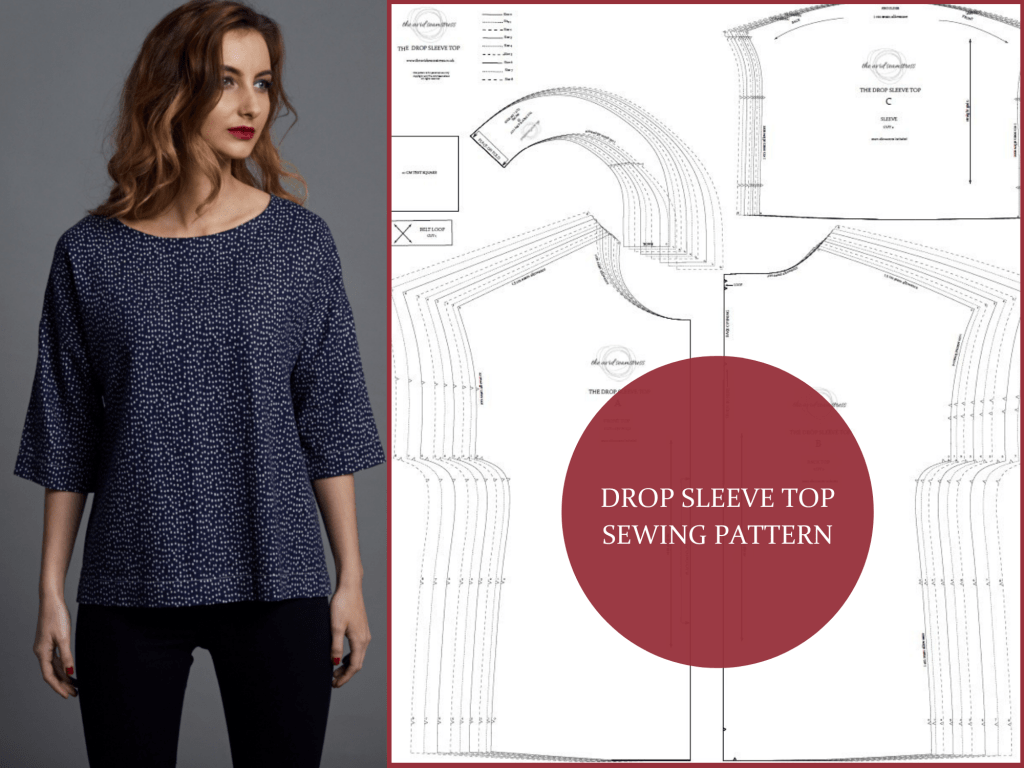
Fancy a free digital sewing pattern? Join The Avid Seamstress community today via our newsletter and be the first to hear about new releases, helpful tips and tricks, and special offers. You’ll also receive The Drop Sleeve Top digital sewing pattern completely free. Simple head to our website and you’ll either see a pop up screen or enter your email in the footer of the website. The Drop Sleeve Top is a great first make and, with our colour photography guiding you through every step, you’ll be on your way to making your first garment.
Our community is at the heart of everything we do here at The Avid Seamstress, and what better way to celebrate our incredible community than creating a space just for you and your Avid Seamstress creations. For a dose of inspiration, head over to @theavidseamstressmakers to see what Avid Seamstresses from around the world has been making with our patterns. Grab some fantastic ideas for fabric, patterns hacks and to see what our patterns look like on different shapes and sizes.⠀Our Facebook Makers Group is another place to connect, share your Avid Seamstress makes and meet a group of fellow makers.
In our next article, we cover the difference between buying printed vs digital sewing patterns and how to ensure that your digital pattern prints properly on your home computer. Read here.
Happy sewing!
