

THE WASH BAG
Supplies needed to make 1 bag:
Cotton/woven fabric 43cm wide / 107cm length
Includes 1.5cm seam allowances
Finished size 40cm x 50cm
Tips
- When making the wash bag, setting the iron on a very warm to hot setting will help to press the fabric edges. Test the heat of the iron on a spare piece of fabric first.
- We use an overlocker to neaten the edges of the fabric. If you don’t have an overlocker, you can use a simple zig-zag stitch but, be careful, as sometimes the zig-zag stitching can distort the perfectly cut raw edges of the fabric. It’s better to use a wider and longer zig-zag to prevent this from happening. Zig-zag stitching away from the raw edge (rather than right next to it) will prevent the stitches from twisting and distorting the shape. Most sewing machines have an additional presser foot that can be used for overlocking (often referred to as an overcasting presser foot) but these sometimes need to be purchased as an additional presser foot. Check the sewing machine’s manual to see what setting/presser foot they suggest for overlocking/overcasting/zig-zag stitching.

INSTRUCTIONS
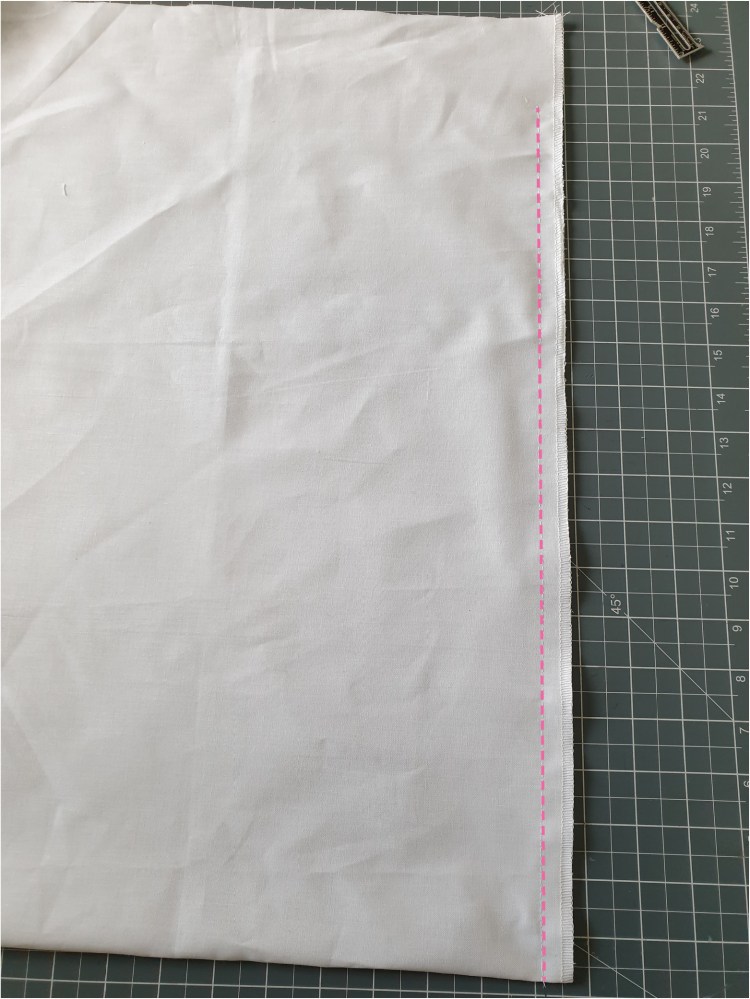
Overlock/zig-zag stitch one long edge. Leave the other long edge and upper edges raw.

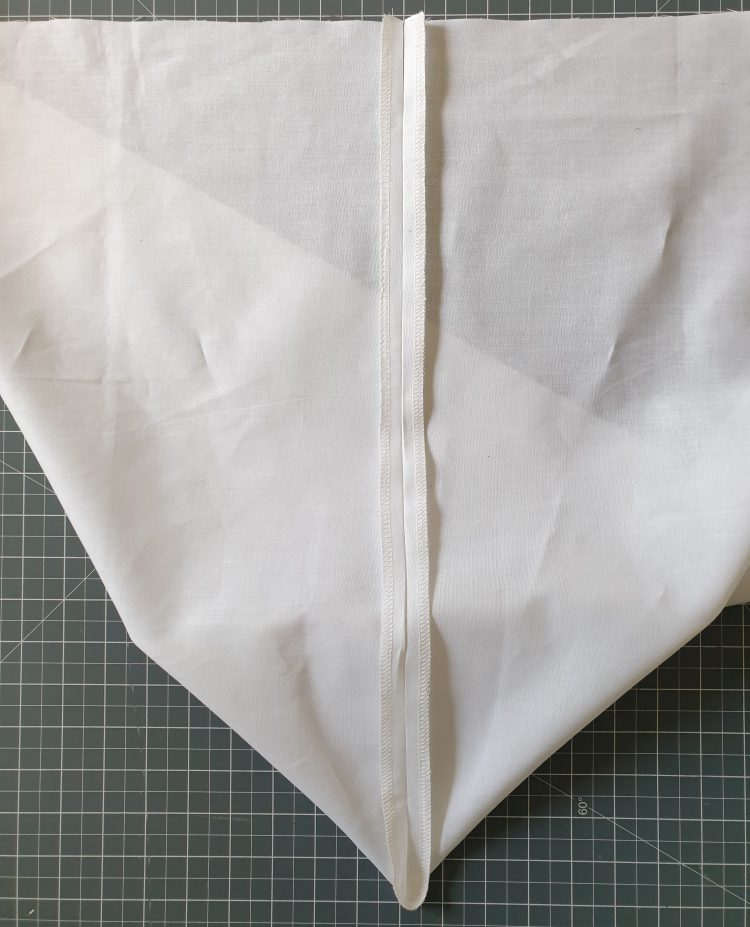
Fold the fabric in half, with the right sides together, so that the upper edges meet. Our overlocked side is now on the right.

On the side of the bag that has been overlocked/zig-zag stitched, pin the edges together on this side of the bag only.
On the same side, measure 6cm from the top edge down the side of the bag and place a pin horizontally into the fabric to mark this measurement. The 6cm section at the top will create the casing.

Stitch from the 6cm mark to the bottom of the bag, using a 1.5cm seam allowance. Don’t forget to reverse stitch at the start and finish.
Press the seam allowances open and, at the upper unsewn section, press the unsewn seam allowances open 1.5cm

On the right side of the fabric, topstitch these unsewn seam allowances flat. This will help keep the seams flat when feeding the tape through the casing. Follow the steps below to complete this in one step, without releasing the fabric from the machine.
- Start on the left side and on the right side of the fabric.
- Stitch until you reach the end of the 6cm opening.
- Keep the needle in the fabric, lift the pressure foot, and turn to sew across the bottom of the 6cm opening.
- Sew across the width
- Keeping the needle in the fabric, pivot and stitch up the other side of the 6cm opening.


Place the bag right sides together and pin the unsewn side. Stitch the edges together using a 1.5cm seam allowance. Don’t leave any opening at the top.

Overlock / zig-zag stitch the sewn edges together and press.

THE CASING
Slide the inside of the bag onto the ironing board so that the wrong side of the fabric is facing you. Turn over the upper edge 1cm and press the upper edge of the bag. Keep measuring as you work your way around the upper edge of the bag to ensure it stays at 1cm.

Ensure that the side seam openings match up when placed next to each other.

Turn over the pressed edge another 2.5cm and press again. This is creating the casing for the ties. Try to be as accurate as possible when turning over and pressing.

Ensure that the side seam openings match up with placed next to each other.

COMPLETING THE CASING
At this point you have 2 options:
OPTION 1
Sew the casing edge and then feed the tape through afterward:
Place pins into the upper edge to hold the casing in place. This will also help to prevent the fabric from stretching. Place the pins vertically into the upper edge so that they are easier to remove when stitching.

Stitch the turned over casing. The stitching line should be as close as possible to the lower edge of the turned over piece to create enough space for the tie to feed through.

Take a safety pin and secure it to one end of the tie tape. Feed the tape through the casing until it exits the other side and then tie both ends of the ties into a knot.

OPTION 2
Stitch the casing closed with tape already placed under the casing.
Slide the tape underneath the casing, fold over the casing and then sew the casing closed. This way the tie is already in the casing, saving you having to thread it through afterward. This option is great if you are confident you won’t sew over the tape when stitching the casing closed.

The pins can hold the casing in place. As you are stitching the casing closed, keep checking that you are not sewing over the tape and remove the pins before you sew over them. The stitching needs to be as close to the lower edge of the casing as possible.
Once complete, tie both ends of the ties.
COMPLETING THE BAG
Press the bag and turn it to the right side.
The bag is complete.

Hooray! Well done.
