COLLAR
Tip – Read through this section before starting as the images and instructions will help you see how we put this together.
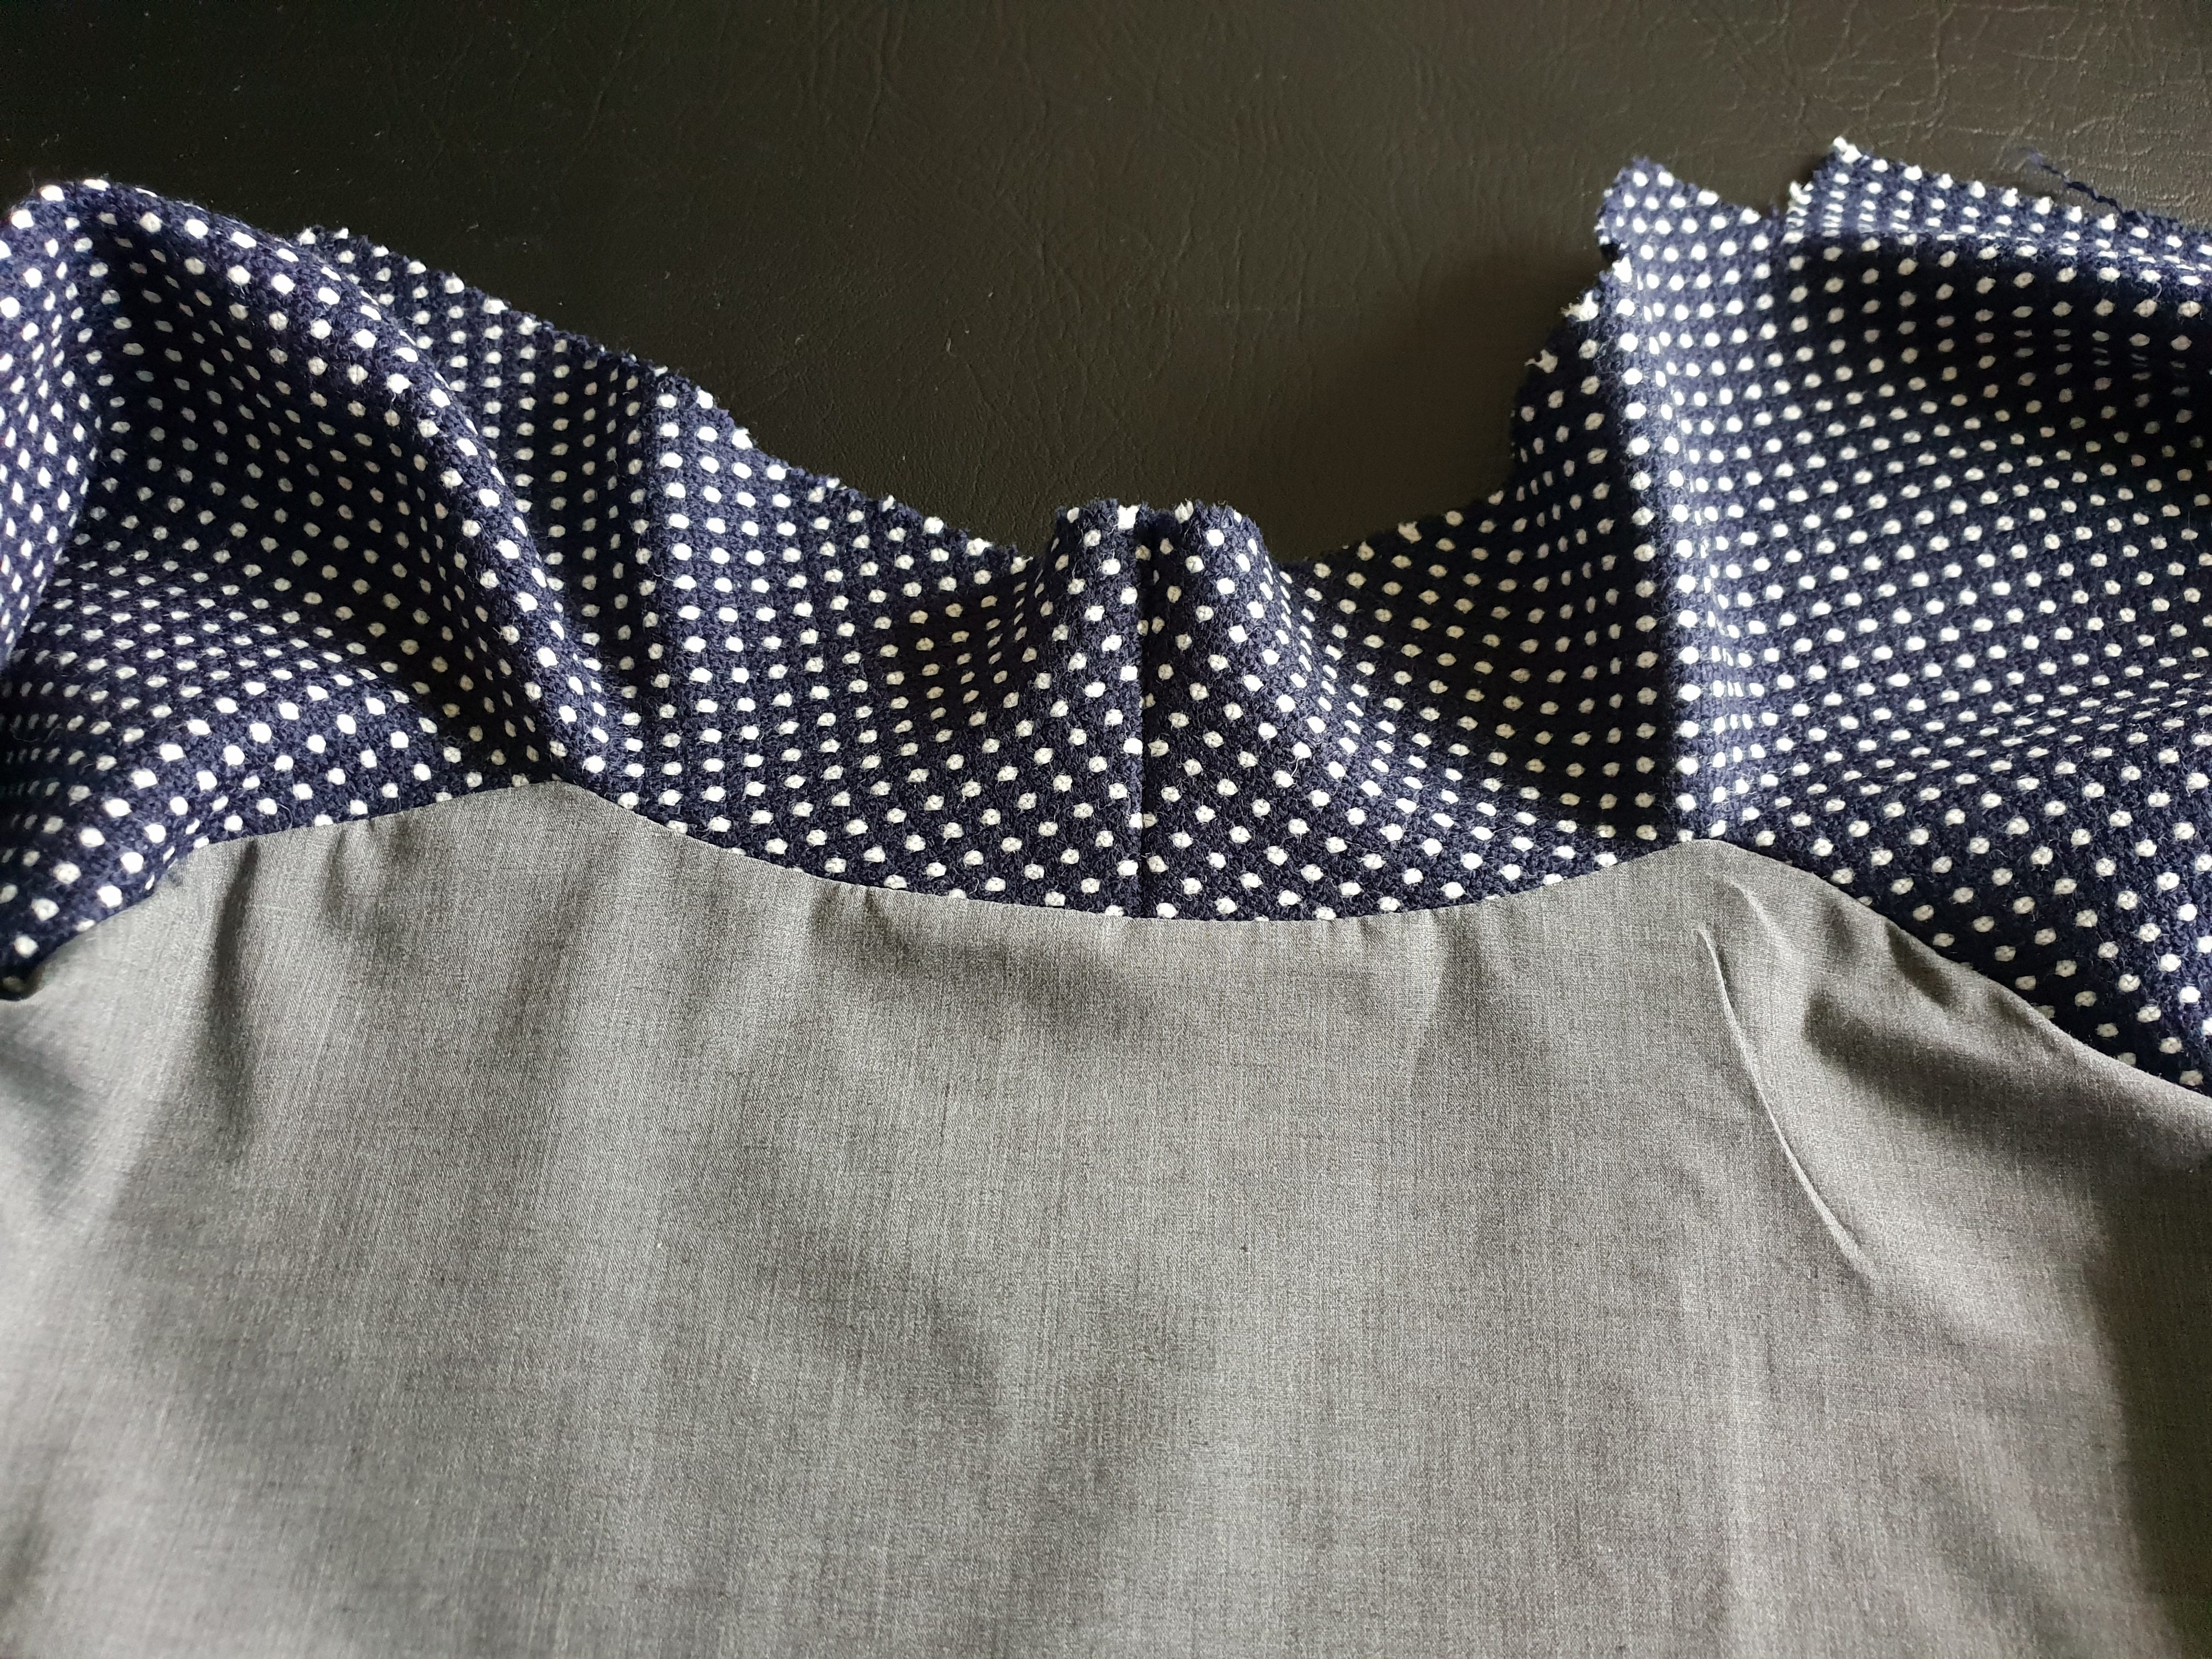
This image is just to show you how the collar looks from the right side once sewn in:

On the front pieces place your collar pieces right sides together and sew the top edges together using a 1.5cm seam allowance. This is the centre back of the neckline and will match up to the centre back of the garment back. Iron/press open.
It’s important to note the seam allowances:
back neck edge 1cm
shoulder edges 1.5cm

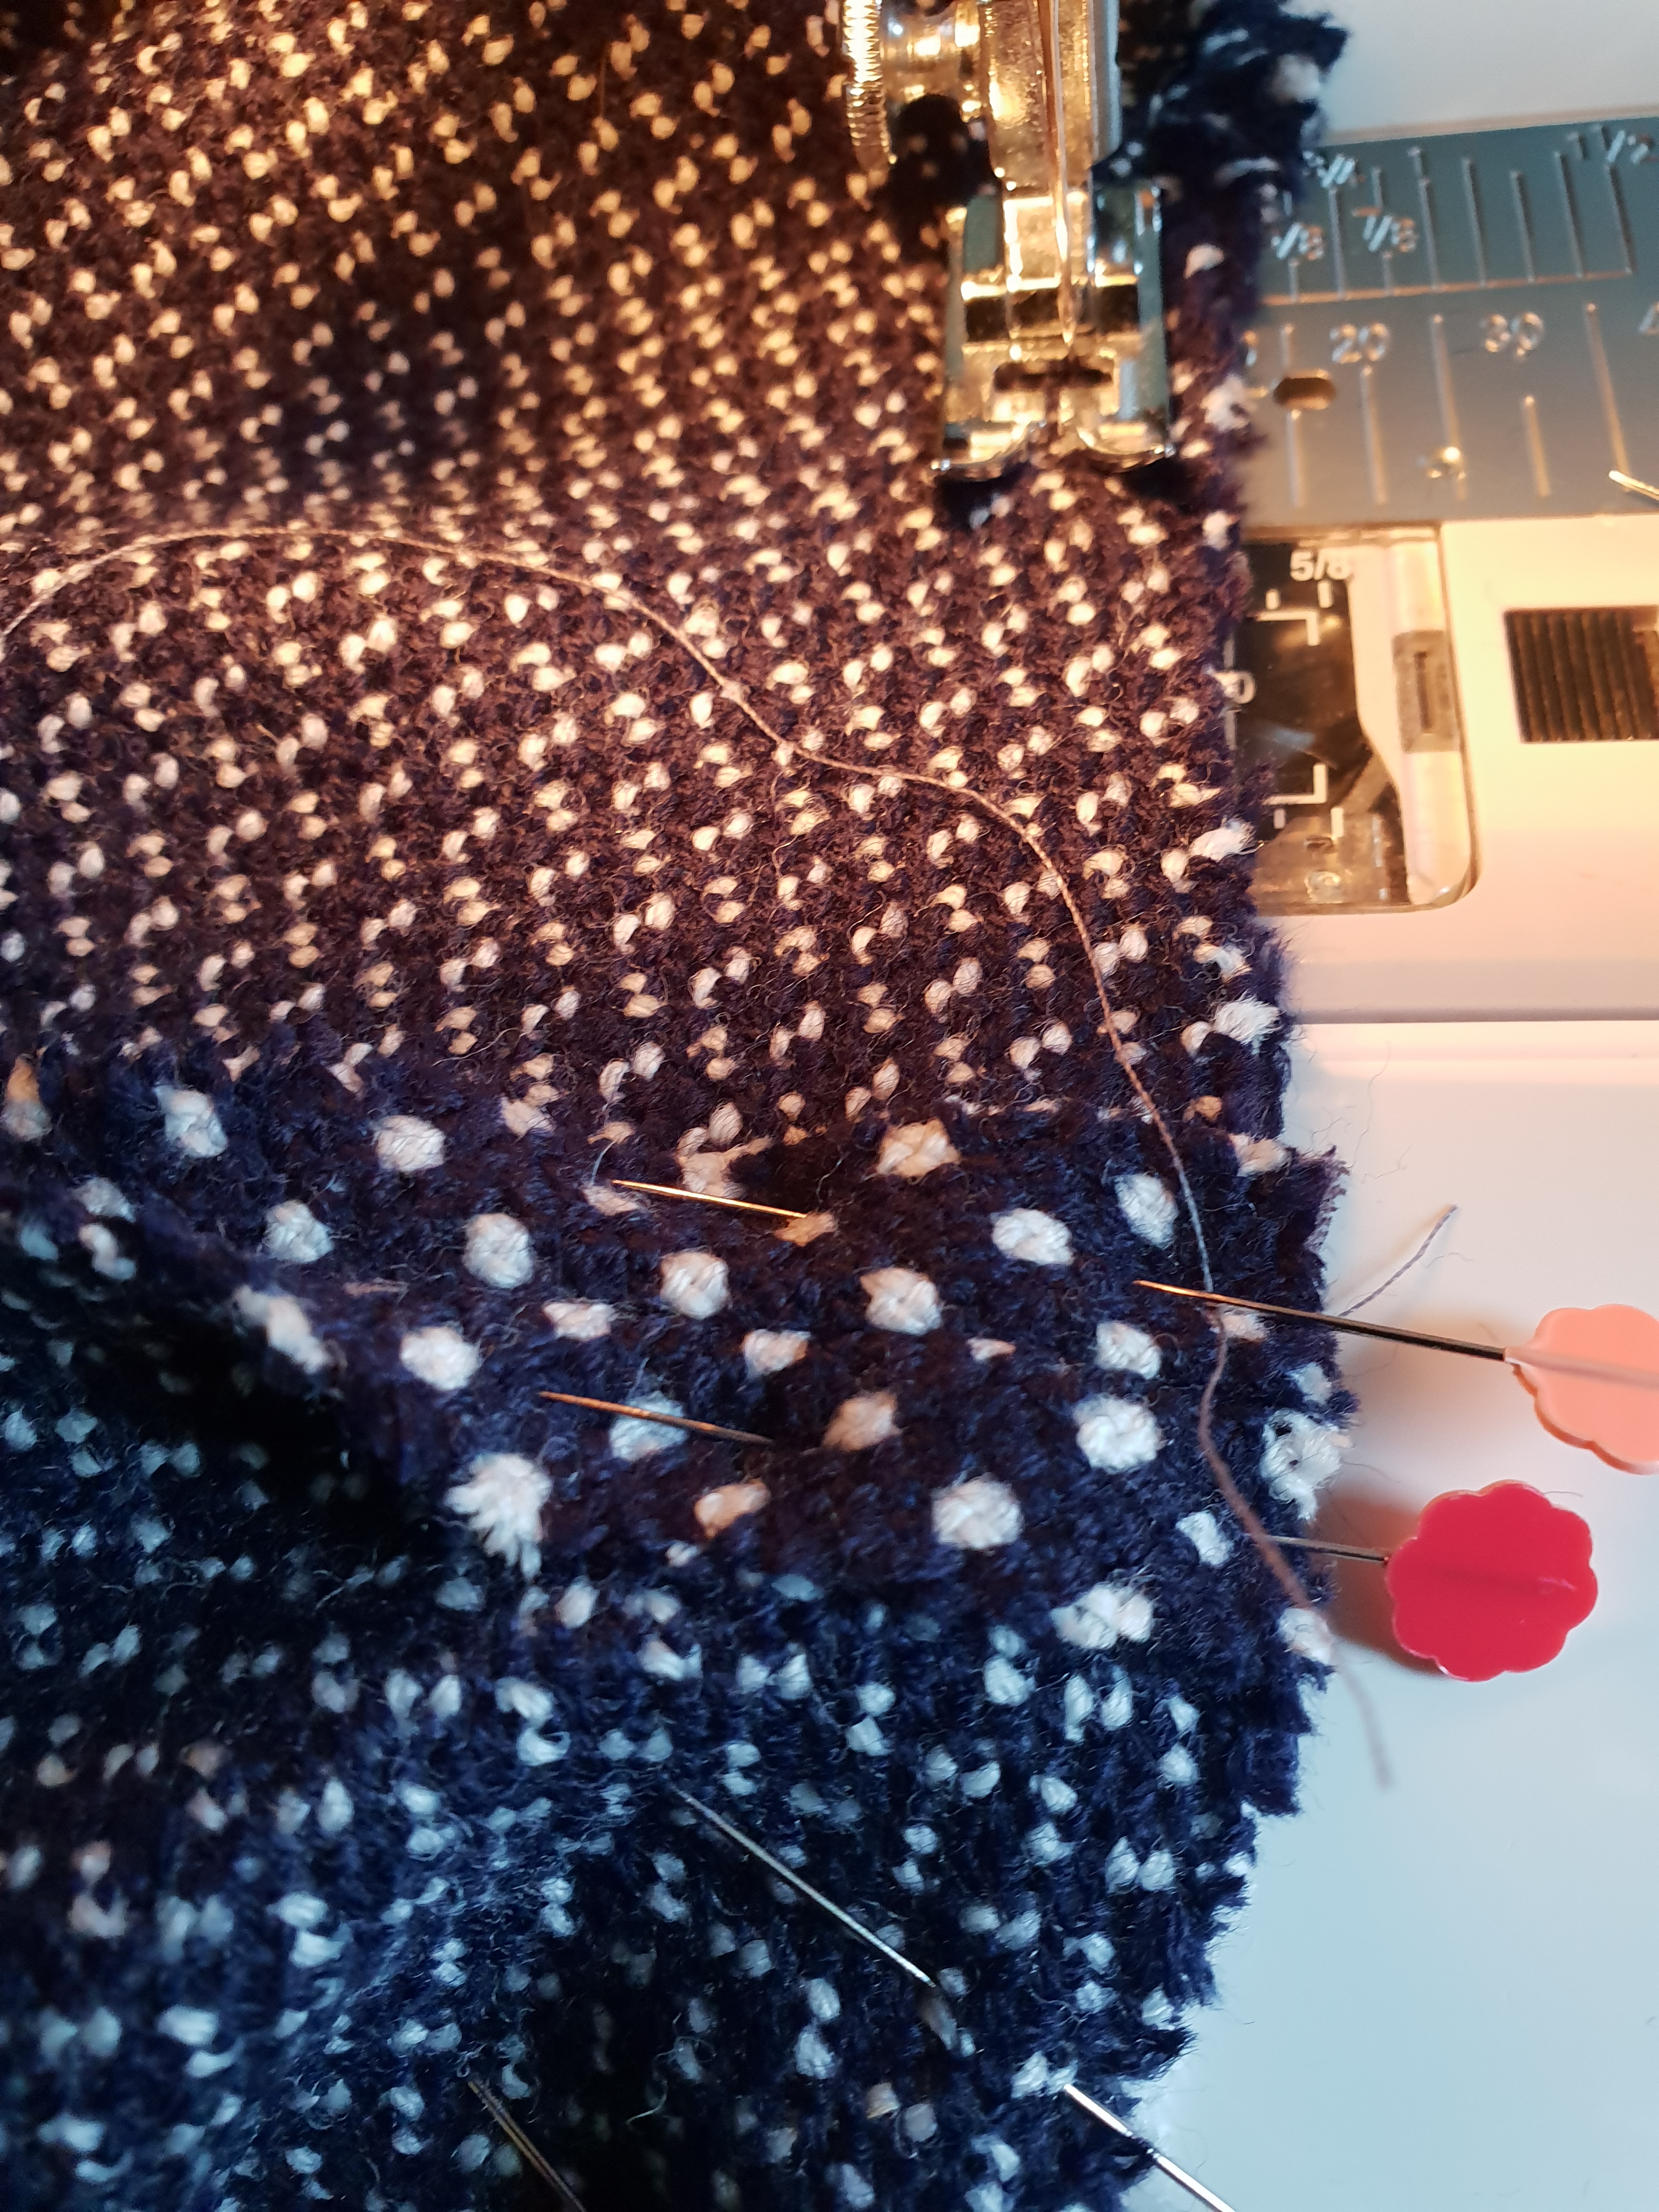
On the coat front and facing, ensure that you have transferred the dot from the pattern pieces. The dot indicates where to start and finish and/or to pivot the stitching line. Re-mark if necessary (where the pins below enter the fabric is the 2cm mark on the back piece).
With the wrong sides of the back garment facing you, measure 2cm from the tip where the shoulder and neck curve meet and mark with a dot on each side.

If the collar was being created as one continuous piece you would pivot at the dot.
We are assuming this is the first time that you are creating a notched collar so will be showing you how to do it in three stages. Once you are confident, you can create it as one continuous piece when you sew the next notched collar. For example, you could sew the facing collar first using our instructions that break it down into stages and then create the main collar as one continuous piece.
Working on the left side first, place the front piece right sides together, onto the back piece and line up the shoulder edges. Push a pin through from the dot on the back piece to the dot on the front piece. Keep this pin in place to ensure that the dots remain aligned. Look at the next image to see how we have held this in place.

Pin the shoulder seam from the armhole side to the pin that is marking the dot. Then move over to the right-hand shoulder side and repeat.
We have placed the pins vertically into the seam which helps shape the section and makes it easier to sew.

On the left side, start sewing (using a very accurate 1.5cm seam allowance) and stop when you reach the dot. Don’t forget to reverse stitch once you reach the dot. Move over to the other shoulder side, this
time starting from the dot and sewing across the shoulder piece.

There is now a loose section at the neck. Join up and pin the CB edges of the back piece with the front pieces that were stitched in step 8, ensuring that the seam allowances stay open and that the centre seams are aligned.

The next section of sewing is from the dot to the dot, completing the collar. Take this piece and lower the needle of the sewing machine into the end of the stitches of the shoulder seam and then drop the
presser foot.


Sew this section using a 1cm seam allowance. If you are finding it difficult to work on this piece, snip into the top point of the fabric to allow it to move more freely.


Repeat on the facing/lining pieces and then press/iron open the shoulder seam allowances on both the main garment and the facing/lining piece.
If you wanted to do this as a continuous piece, you would pivot at the dot to turn and sew the back neckline and then pivot again at the next dot to sew the shoulder seam.