We do love a high front neckline here at the HQ as seen in our two sewing patterns The Raglan and The Gathered Dress but we totally get that some people prefer to reveal a bit more of their décolletage.
Both of these sewing patterns have a dart at the shoulder and we are sure that the thought of trying to lower the front neckline and accommodate for the dart can feel like quite a task, especially as you’ll also need to make adjustments to the facing.
Dropping the curve at the front can make a big difference to the look of the dress. Just bear in mind that, when making adjustments, even small adjustments can change the whole shape of the garment. The tutorial below shows you how to drop the front neckline, making no changes to the shape at the back.

When you are making adjustments to sewing patterns, our golden rule is to take your time. Toile up the pattern first and then, when the fit is right, start to make adjustments. If you rush, you may end up with a garment that doesn’t fit and ends up in the “never getting finished” pile. If you make lots of adjustments it’s worth making up another toile. Taking your time means you have a perfect fit for you and can use the pattern over and over again. Not sure what a toile is? Read here

Trace your pattern pieces before you start making adjustments to them so that you still have the original pattern pieces in case it all goes horribly wrong – trust us, we’ve been there! Here’s our guide to tracing patterns
If you followed our tip and have made a toile, pop it on and then draw your new neckline shape onto the fabric. It’s important that you only start to draw the new shape from the shoulder dart join to the front on each side and you don’t try and “curve” out the whole neckline from the back to the front. We will then transfer the shape to your pattern pieces.
If you haven’t toiled up the dress and are 100% confident that the fit is going to work for you, you can mark your new neckline directly onto the pattern pieces.
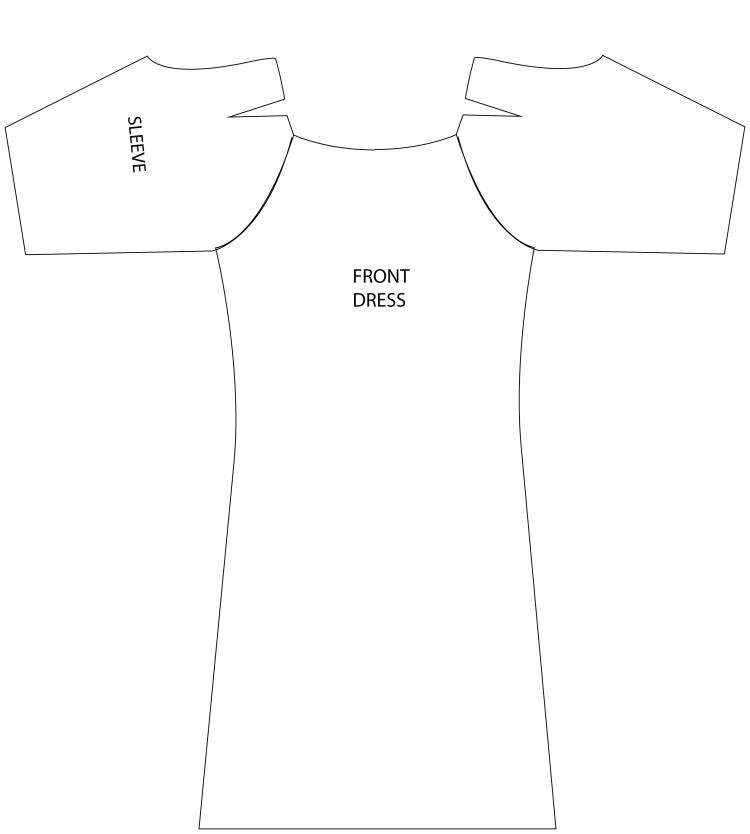
Step one – pin your (traced) pattern pieces together, concentrating on lining up the top edges so that your neckline has a perfect curve.

Step 2 – Pin the shoulder darts closed. It’s important to remember that the neckline shape already has a 1cm seam allowance included so bear this in mind when you are deciding how low to drop the neckline. It will actually be 1cm lower than your drawing, once you have sewn the facing to the neckline.
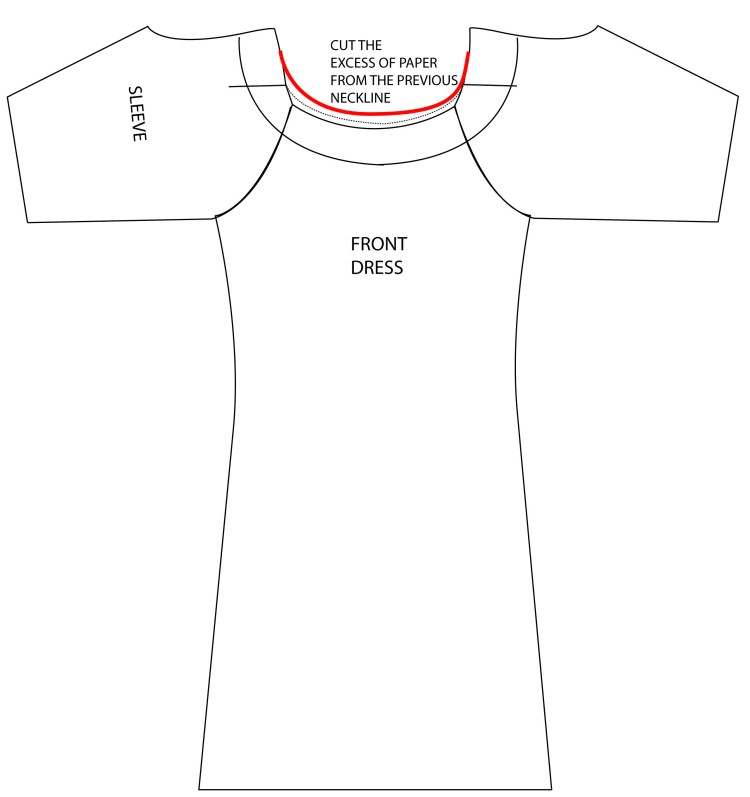
If you referring to the shape you drew on your toile, we assume you have drawn where you want the “finished” (where it sits once sewn) neckline to be. You will need to now add a 1cm seam allowance.
As mentioned before, as we are only adjusting the front shape, you should be drawing the new curve from the dart to the front on each side. Make sure that the curve is the same on each side.

Step 3 – join your facing pieces together and lay on top of your garment pattern. Trace through your new shape. You can then cut away the excess paper from the pattern pieces and the facing.

We hope that this tutorial gives you enough confidence to change the shape of the front neckline on these two gorgeous dresses.
The Avid Seamstress Team
