
The measurements you need to create The Sun Dress include, the bust (fullest part of your bust – over the nipple usually), waist and hip measurement.
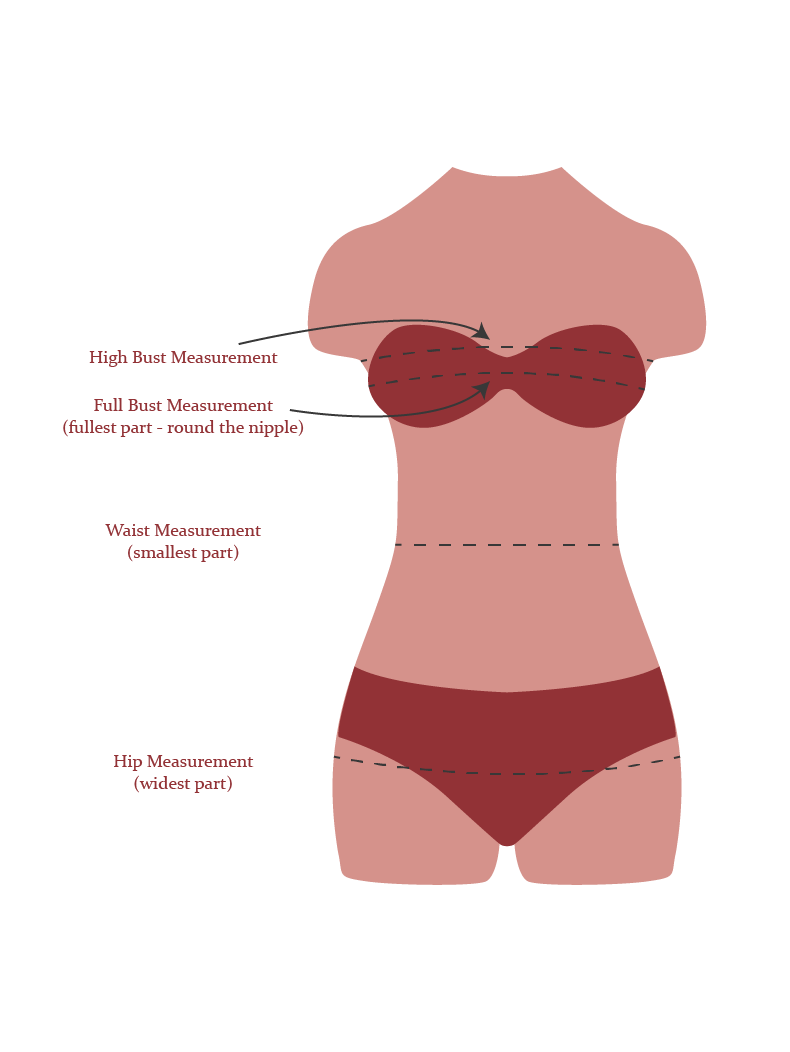
To create a Full Bust Adjustment (FBA) you’ll need to measure your High Bust, this will help you work out how much you need to adjust your pattern.
Measure around your High Bust by placing the tape measure under your arms, around your back and over the upper part of your bust.
If your bust measurement is 94cm but your high bust measurement is 86cm, the difference is 8cm which means you’ll have to adjust your pattern by 4cm as we are working with half the measurement on this pattern as it is in two pieces! We only need to work with half the measurement required.
We now need to establish where the bust point is:
Before we go any further, it’s important to note we will be cutting up your sewing pattern. It’s always better to trace off your original sewing pattern rather than cutting up your original, that way you have the original copy to refer back to and intact in case you want to make any other pattern alterations. Make sure you copy across all important balance marks and other marks such as the grainline!
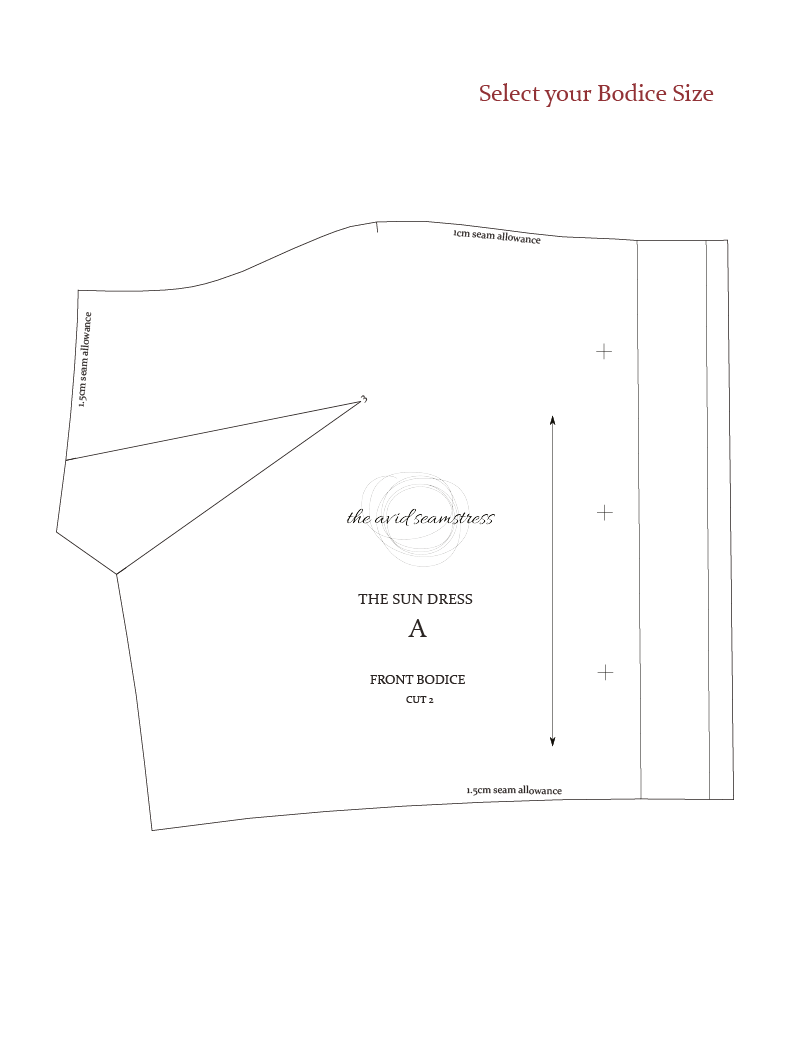
Ok, now we have a copy of our pattern, we can get started. Firstly, fold your front bodice pattern piece along the line next to the button balance marks to help find the centre front:
Next, stand in front of a mirror and place the bottom of your front bodice pattern piece on your waistline. Make sure the button balance marks (crosses) are in the centre of your body, the side seam should be 1.5cm further round towards your back.
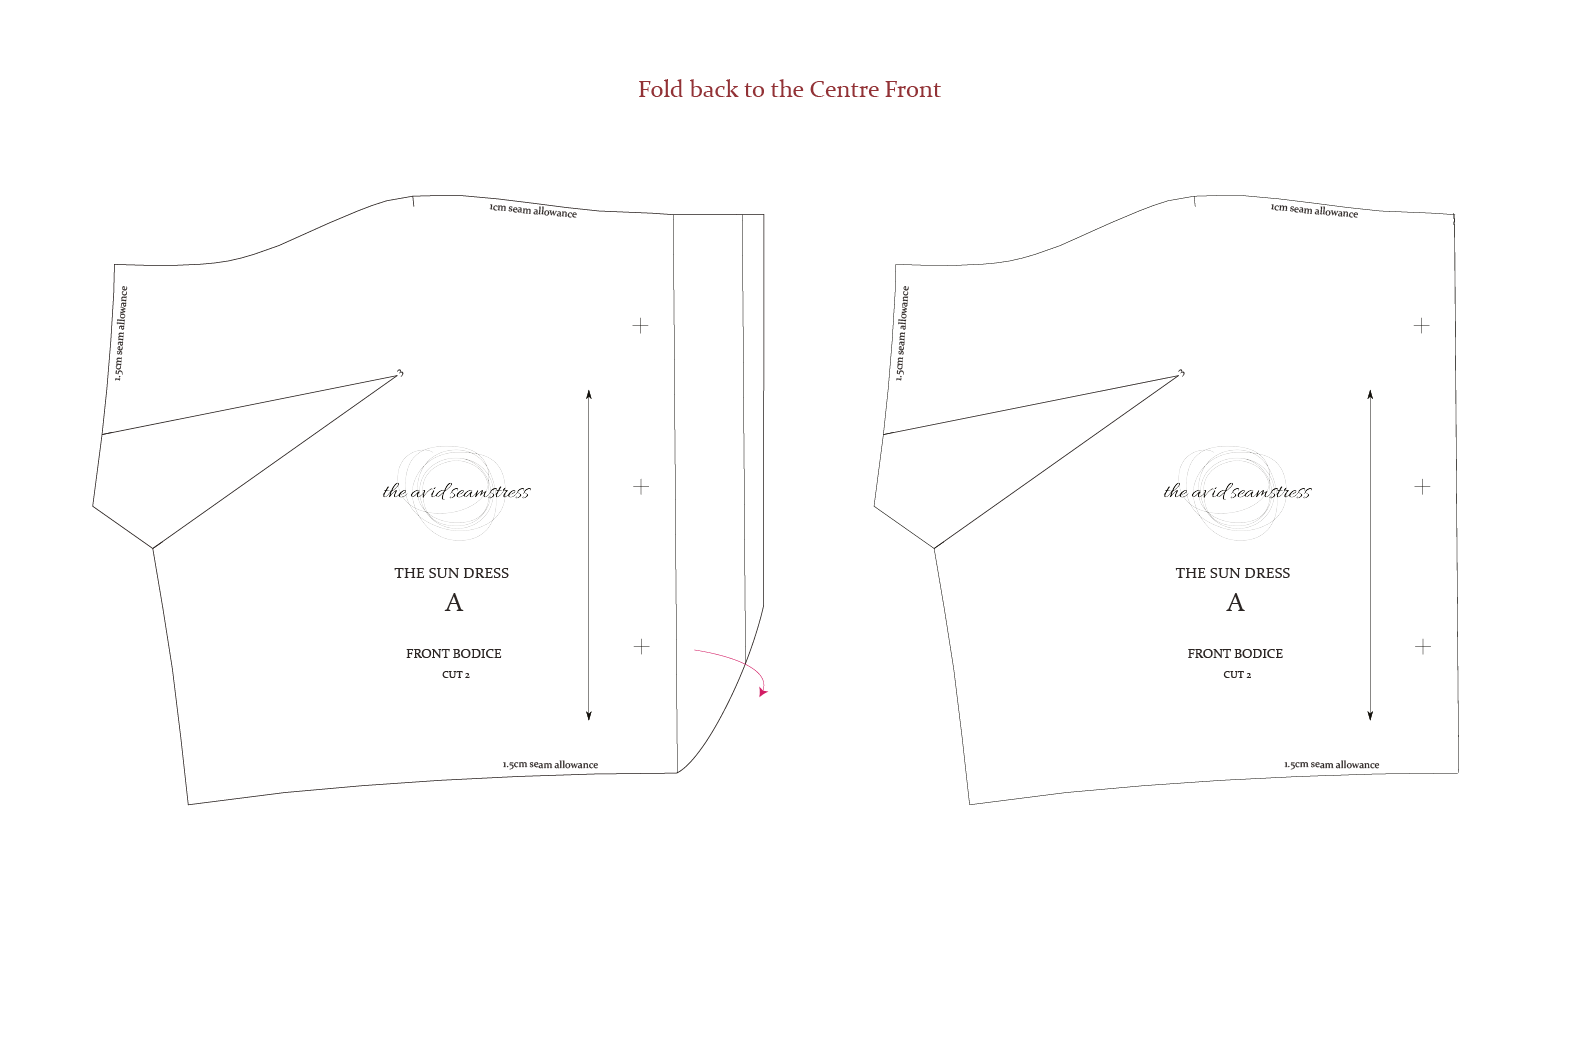
Then we need to mark a point on the pattern indicating the bust point. This is the fullest part of your bust usually around the nipple area. Mark this on your sewing pattern.
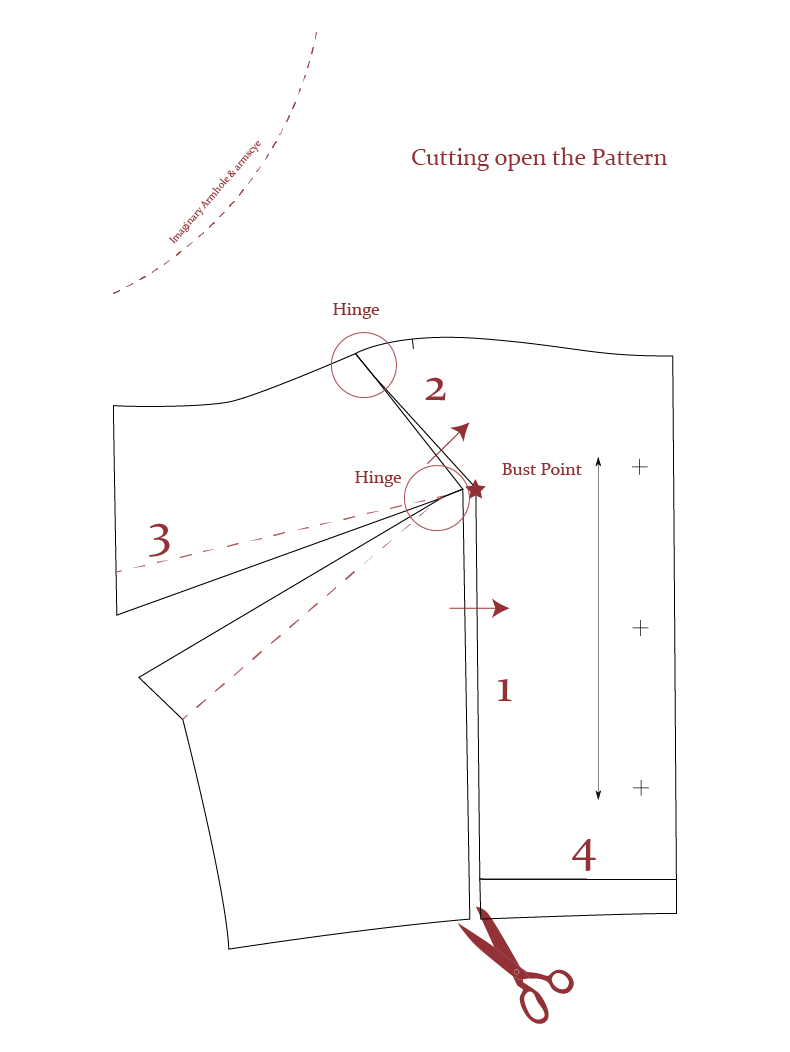
Ok, now we are going to draw a vertical line on your pattern down to the hem of the piece, which is the waistline. Make sure this vertical line is parallel to the Grainline and Centre Front, where the buttons are located.
From this line, draw another line, this time going up towards the armhole so it hits the armhole around the lower third – this should be somewhere near the armscye.
PLEASE NOTE: This sewing pattern has a front band above the bodice which doesn’t have an armhole, use the image as a guide to position your second line, it should be somewhere to the left of the balance mark. Don’t worry too much about the position of this – it’s just a guide.
The next line we need to create goes through the centre of the existing bodice dart and meets the first line at the bust point.
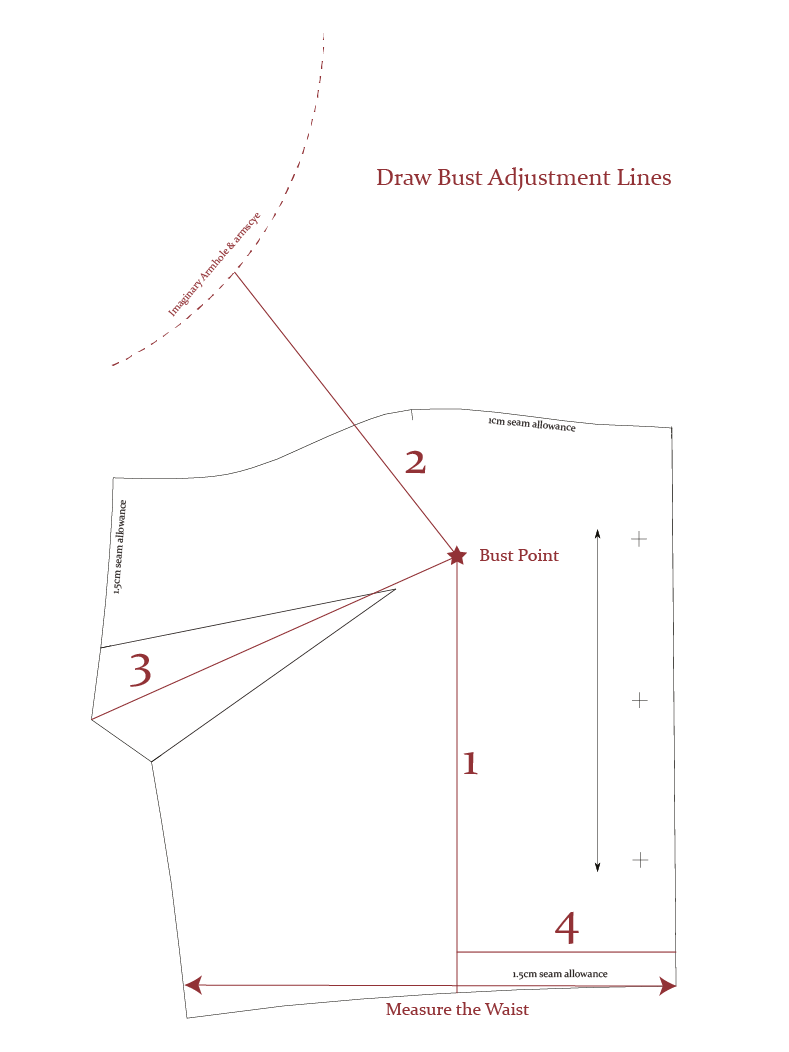
The last line to draw is a horizontal line near the hem of the bodice about 2cm from the waistline.
Before we can get scissor happy, it’s wise to note the measurement of the bodice from the Centre Front (where we folded back the front placket) to the side seam. We will need to use this measurement later on!
Now for the fun bit! Using a pair of paper scissors, cut up line number 1 through the bust point up to line number 2 stopping about 0.5cm from the edge of the pattern. This creates a little hinge for us to use and open up the pattern.
Cut through the middle of the dart towards the bust point, again stopping 0.5cm from the bust point to create a little hinge to move around, which will open up the bust dart.
Place a piece of paper underneath so that you have something to tape the new opening to. Open out the piece by your bust adjustment measurement and tape the left side of the pattern piece down only at the bust point area.
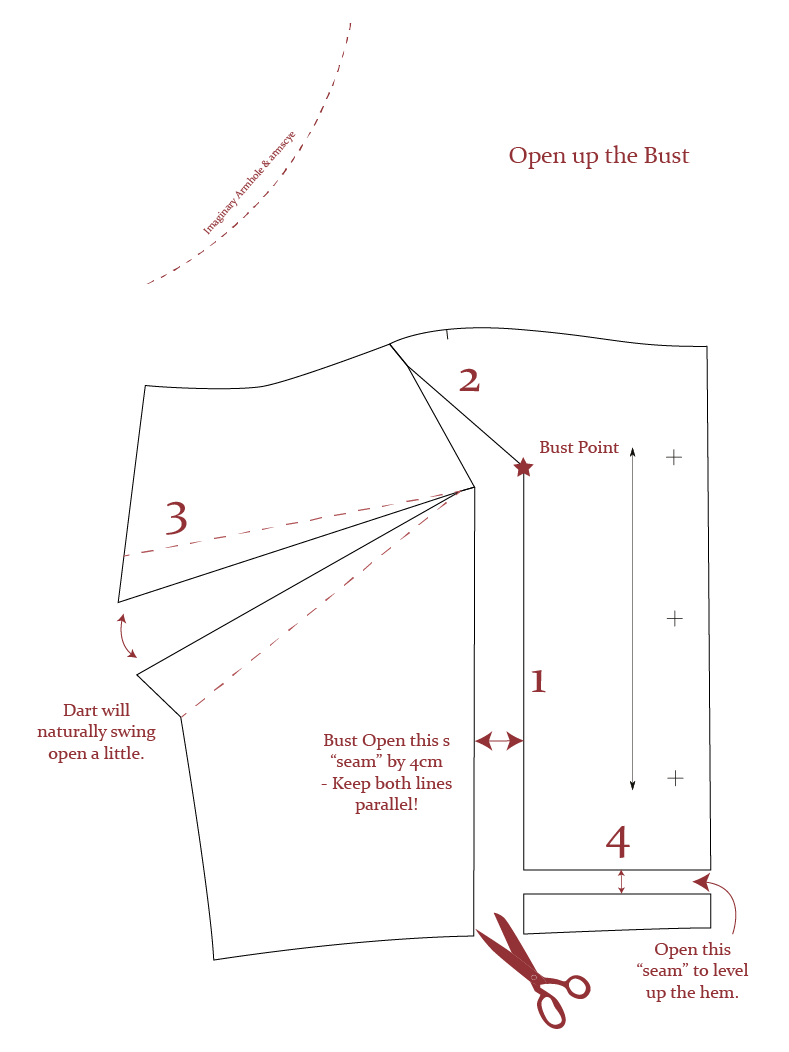
The hem of the bodice is now uneven. Cut along line number 4, the whole way across. Line the hem up so the bottom of cut line number 1 is even, ensuring the CF edge stays perfectly straight.
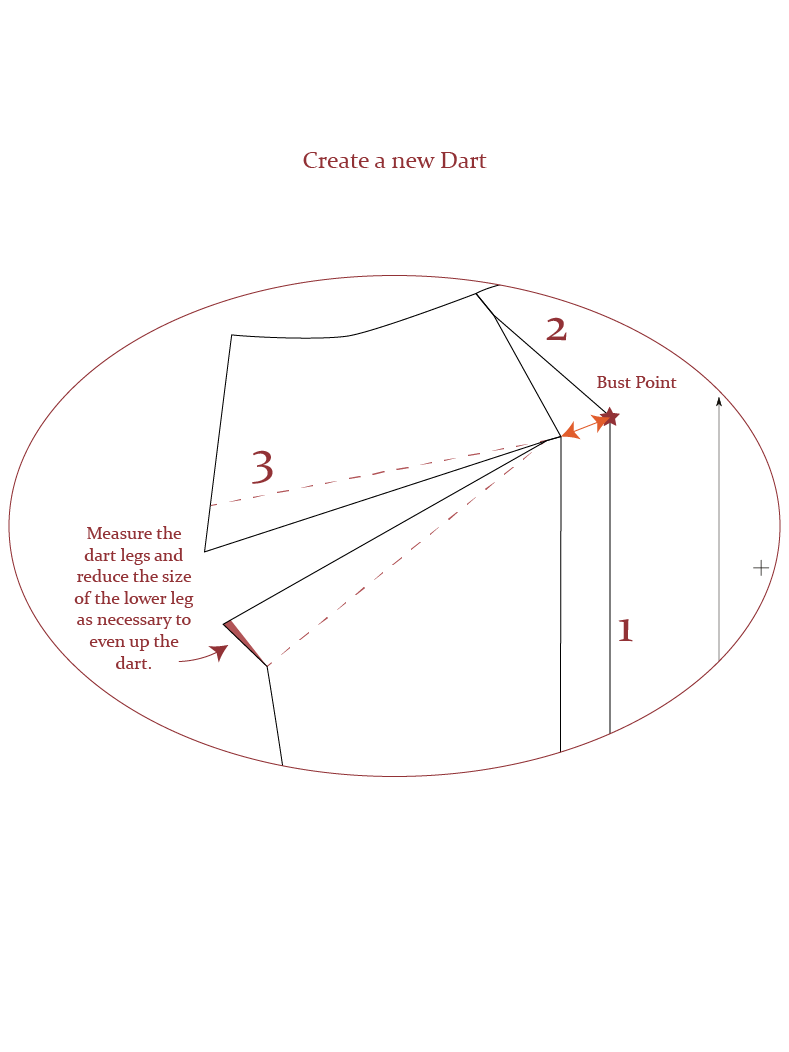
We now need to even up the dart which has been opened up. Using the original dart legs, finish the new dart 5cm from the bust point, even up the dart legs, you might find the lower leg is longer than the top leg. Measure the top leg reduce the lower leg as necessary so they become the same length.
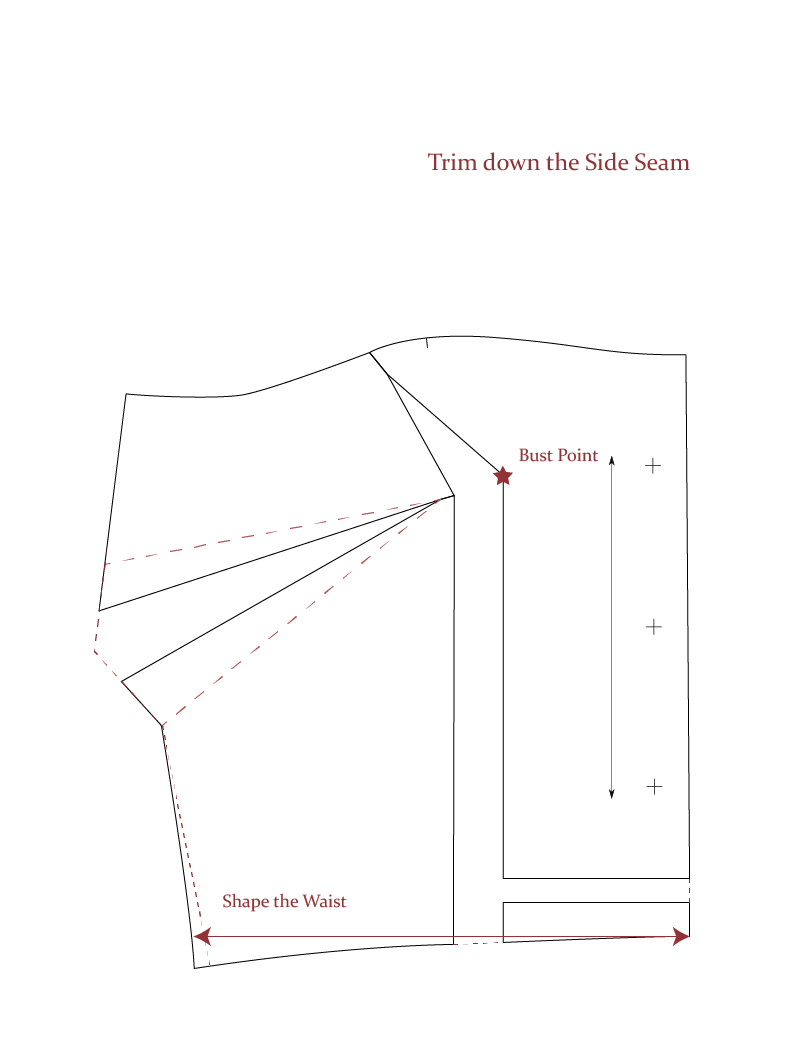
You may also notice that there is now extra width on the waist from opening up the line number one. Remember the measurement we took before chopping into the pattern? We are going to need it now, starting from the folded back Centre Front edge, measure to the side seam and mark this point. From the bottom leg of the dart, draw in a new side seam, the amount you reduce the side seam by is up to you, you might want to keep this fullness in or you could even create a dart with it for added shaping at the waist.
And there we have it, a new pattern piece adjusted to your bust measurement. It’s a good idea now to create a toile of the bodice, even if it’s just this top part of the Sun Dress to make sure your adjustments fit you well and you’re happy with the placement of your new dart. Creating a wearable toile is a great way of practicing this technique and gaining an extra garment! Win win!
You may find you need to adjust the skirt pattern pieces as your bodice is now bigger than your skirt, this can be done one of two ways, either make your pleats slightly smaller so the fabric of the skirt goes further towards the side seams by the same amount your bodice has increased. Or you could cut your skirt pattern to be bigger on the side seam by the same amount your bodice has increased.
This will also apply to your bodice Front Band and Facing, add extra fullness onto your side seam to accommodate your fuller bust as necessary.
If you need any help along the way, don’t hesitate to contact us at hello@theavidseamstress.co.uk
