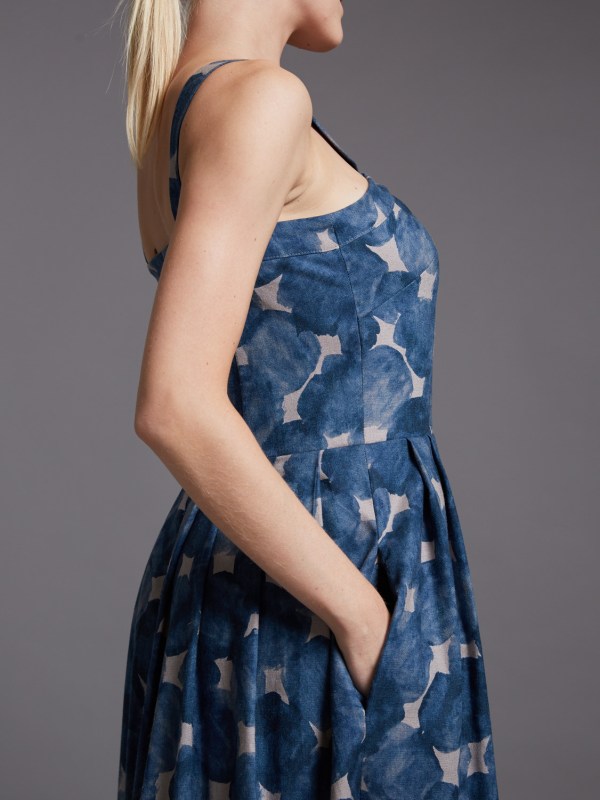
When making the Sun Dress, we advise making a toile of the bodice before you start using the main fabric. The top band should fit flush underneath the arm and not gape at the side seam. We have some helpful tips on creating a beautiful bodice and prevent any gaping at the side seam.
THE FABRIC
- When folding the fabric in half selvage to selvage, ensure that the fabric has been placed so that the grainline of the fabric is running parallel to the selvage.
BLOCK FUSING THE PATTERN PIECES
- Use a good quality interfacing.
- Interfacing has a grainline. Ensure that, when fusing the interfacing to the fabric, you are placing the interfacing so that the grainline runs in the same direction as the fabric.
- Block fuse ALL of the band pieces:
- Front Bodice Band D
- Back Bodice Band E
- Front Bodice Facing F
- Back Bodice Facing G
THE PATTERN PIECES
- When placing the pattern pieces onto the fabric take extra attention when placing the Front Bodice Band D, the Back Bodice Band E, the Front Bodice Facing F and the Back Bodice Facing G. The grainline lines on the pattern pieces must lay parallel to the selvage of the fabric. If these are not placed correctly the fabric for those pieces will have stretch and the bands will stretch out when sewing.
If you have taken all the above steps and found that the side seams are gaping, you can follow these steps to adjust the pattern pieces.
The following adjustment will only be made on the back pieces – Back Bodice Band E and the Back Bodice Facing G. This adjustment will take 5mm off each underarm and a total of 1cm off the entire circumference of the band.
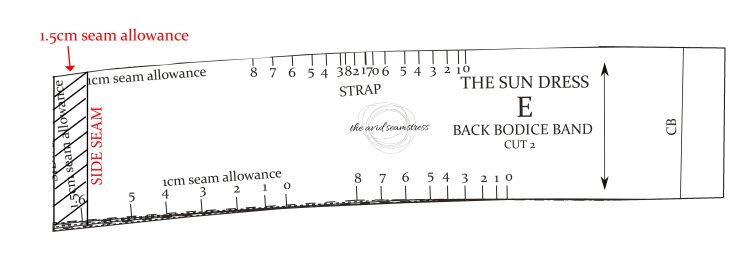
Seam allowances are included in the pattern pieces.
Trace the Back Bodice Band E. Ensure that you have correctly marked the side seam on the traced piece. Mark the CB on the opposite side plus all the notches. It’s really important that the traced piece is an exact replica of the pattern piece. For the purpose of this tutorial, we are using the actual pattern piece so all the markings for all the sizes are still on the pattern piece. We are using the first size 0 for this tutorial.
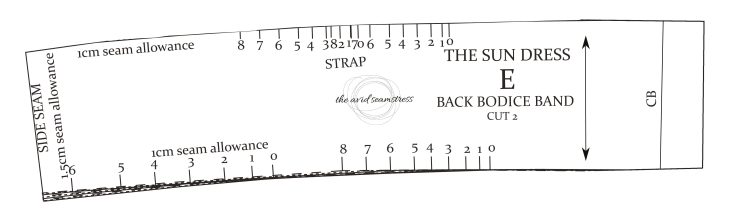
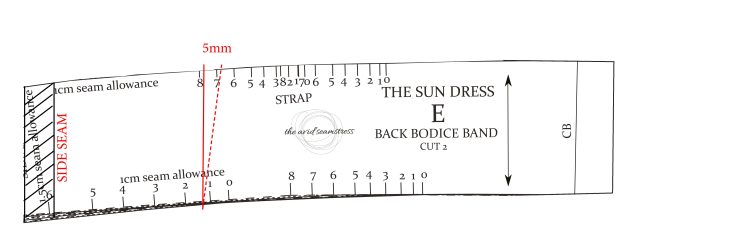
At the side seam and at the upper edge only, measure 5mm across from the side seam and mark.
From the new 5mm mark, draw a vertical line meeting up with the side seam edge at the bottom of the band.
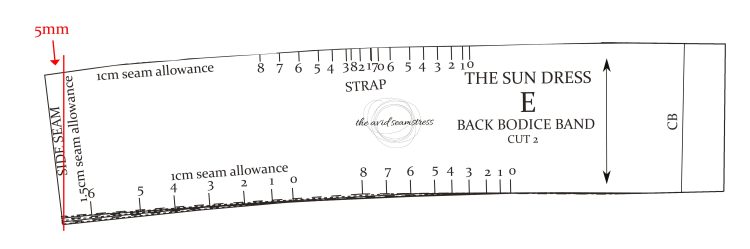
We’ve drawn the seam allowance to illustrate that it is already included in the pattern piece.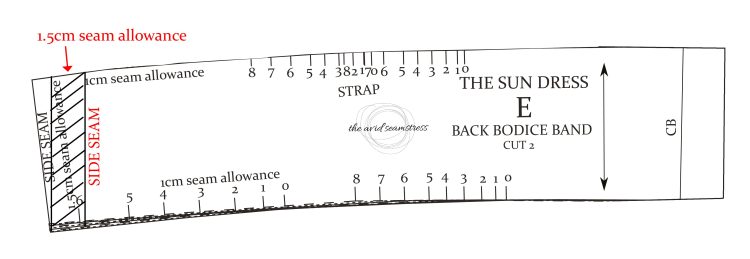
Cut the excess off the side seam edge. Write SIDE SEAM on the new side seam edge.
Repeat on the Back Bodice Facing G
Do not make any adjustments to the Front Bodice Band D or Front Bodice Facing F
This adjustment is quick and straightforward and will tighten up the bodice band. It will remove 1cm across the entire width of the band.
STILL GAPING?
There is an additional adjustment you can make to the Back Bodice Band E and the Back Bodice Facing G which will bring the side seam in another 5mm on each side.
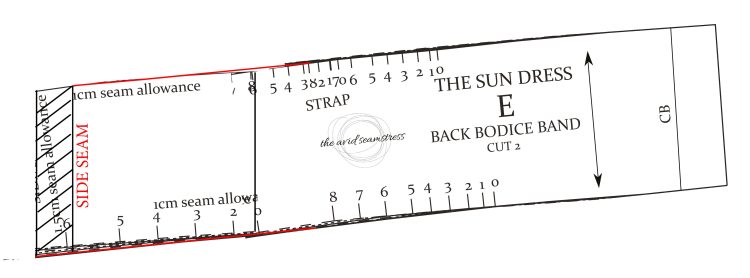
Measure 8.5cm in from the “new” side seam position and draw a line that is parallel to the CB edge.

Measure 5mm across (towards the CB) and draw a line meeting up with the lower edge.
Cut along the second line, separating the pieces. Join the edges together and glue/tape in place.
Redraw the upper and lower edges so that the run is smooth.
Replicate this adjustment on the Back Bodice Facing G. Lie both pieces on top of each other and double-check they are exactly the same.
SEWING THE BODICE BANDS & FACING BANDS.
Ensure that, when sewing the bodice bands and facing, you are not stretching or pulling the fabric as you are sewing. Ensure that only woven fabrics are being used.
If you need any additional help, please let us know at hello@theavidseamstress.co.uk
VIEW THE SUN DRESS HERE