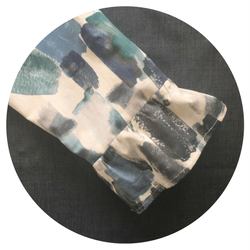
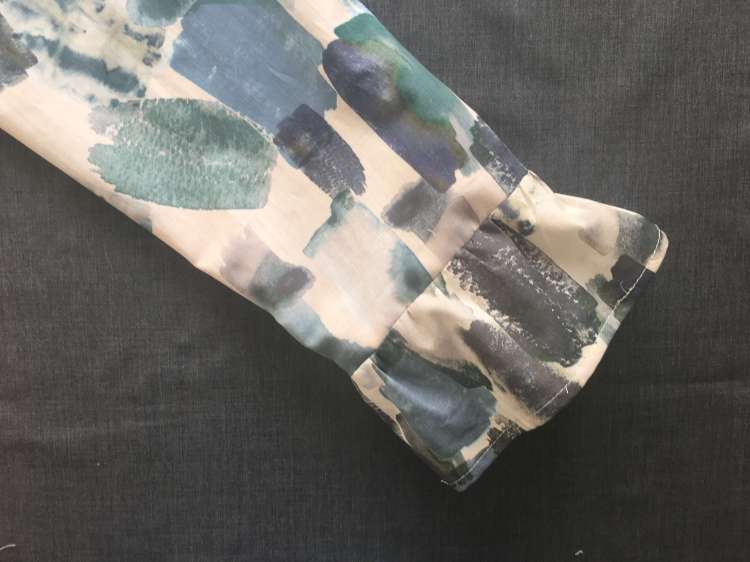
The gathered cuff is so easy to do and will update your Day Dress in no time at all.
There are two ways of creating the gathers – either with elastic or with hand/machine stitching. This tutorial will cover both plus three ways of finishing the cuff. We suggest you read the whole tutorial and then decide how you want to finish the cuff.
Firstly, you need to lengthen the sleeve as shown here and then, using the new sleeve pattern, you can work on this tutorial.
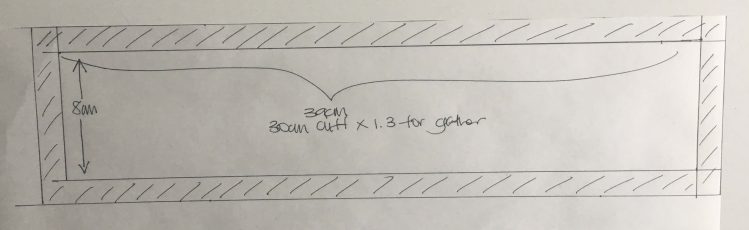
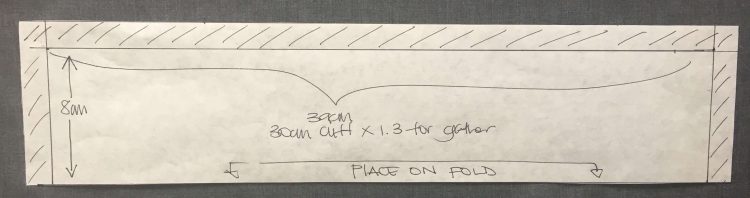
For our cuff, we wanted a finished cuff width of 8cm but you can make your cuff as wide as you want!
CUFF 1 – TURNED UP HEM – using elastic for gathering
You’ll need:
* Elastic – approximately 70cm)
To work out how wide you want your cuff to be we have taken the finished cuff width of the sleeve and multiplied the measurement by 1.3
Finished cuff width
Size 1 (UK 8) = 29cm
Size 2 (UK 10) = 30cm
Size 3 (UK 12) = 31cm
Size 4 (UK 14) = 32cm
Size 5 (UK 16) = 33cm
Size 6 (UK 18) = 34cm
Example – For cuff size 2 we took the finished measurement of 30cm x 1.3 to give us 39cm.
For a more gathered effect, you could multiply the measurement by 1.5 or even by 2 for an extremely gathered cuff. Why not play around and make up the cuff in scrap fabric to decide which finish you like?
Step 1 – Draw a rectangle 8cm wide by your new finished cuff width – in this example it is 39cm. Add on a 1cm seam allowance. Cut 2 – one for each sleeve.
Step 2 – cut out your new cuffs and sleeves.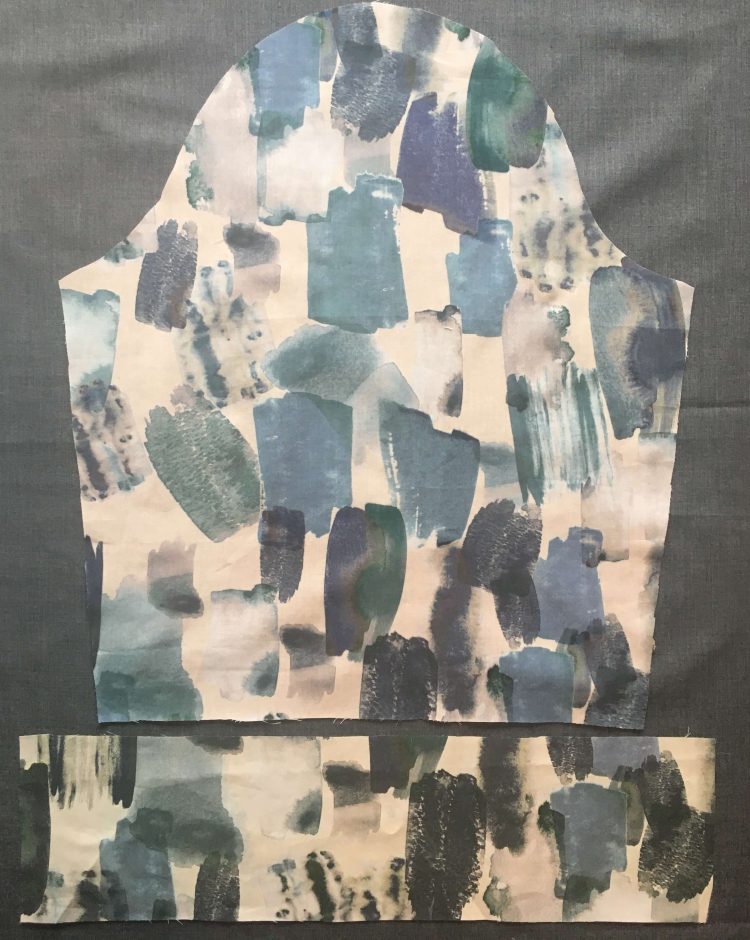
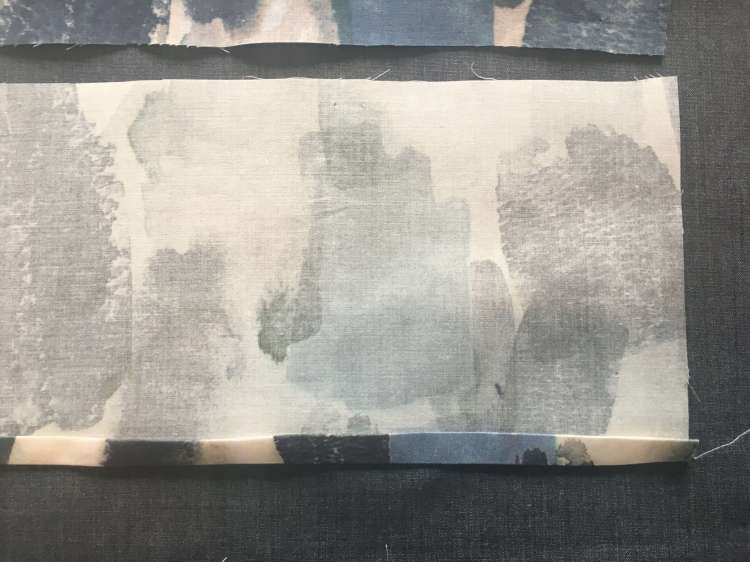
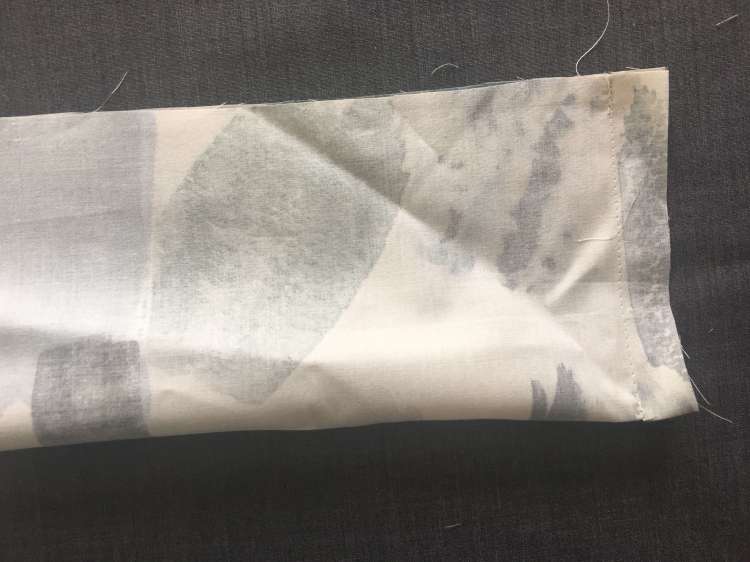
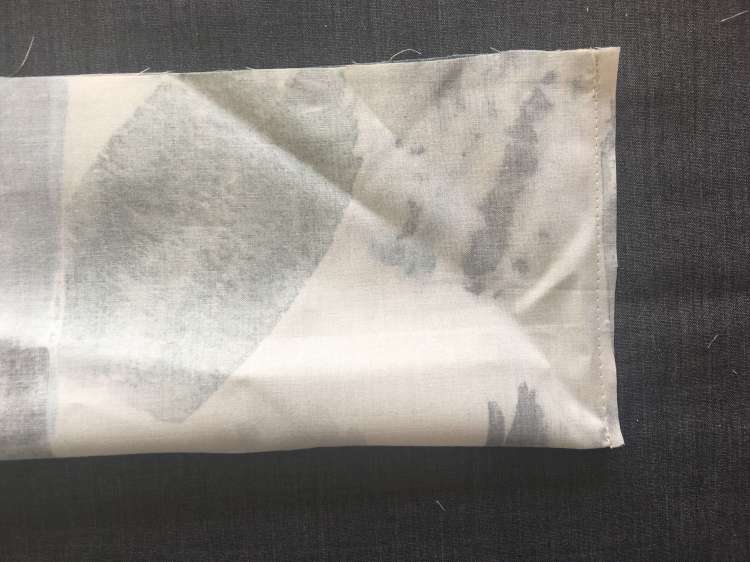
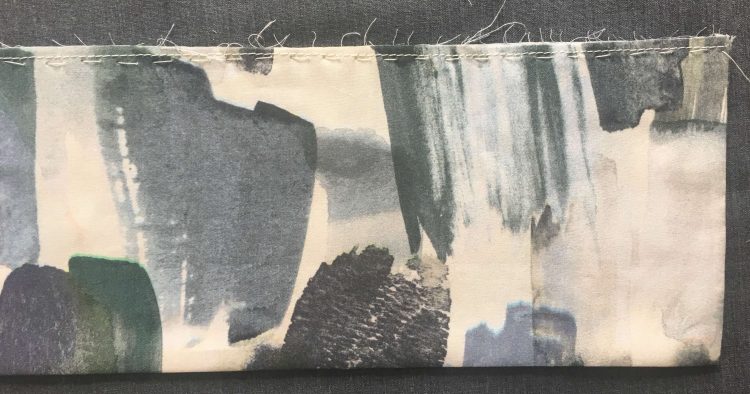
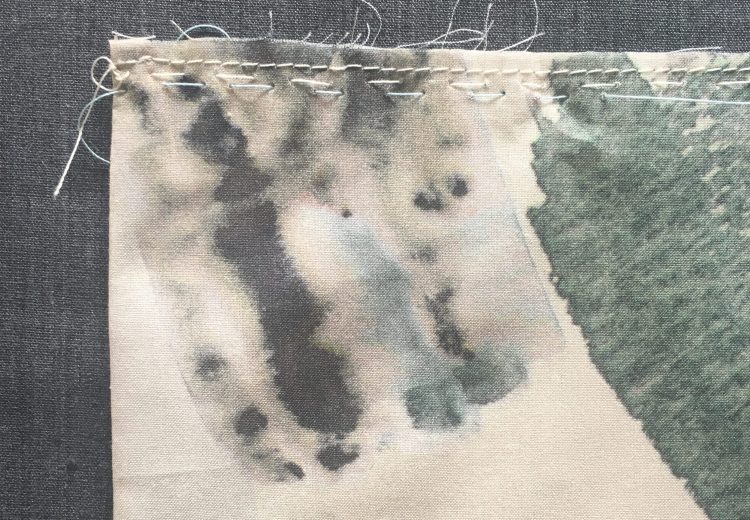
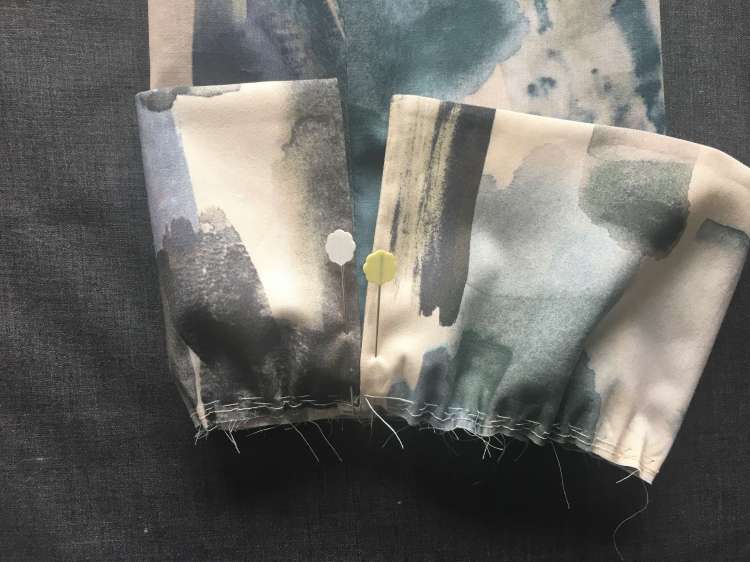
Step 3 – on the wrong side and at the cuff edge, turn up your seam allowance of 1cm and iron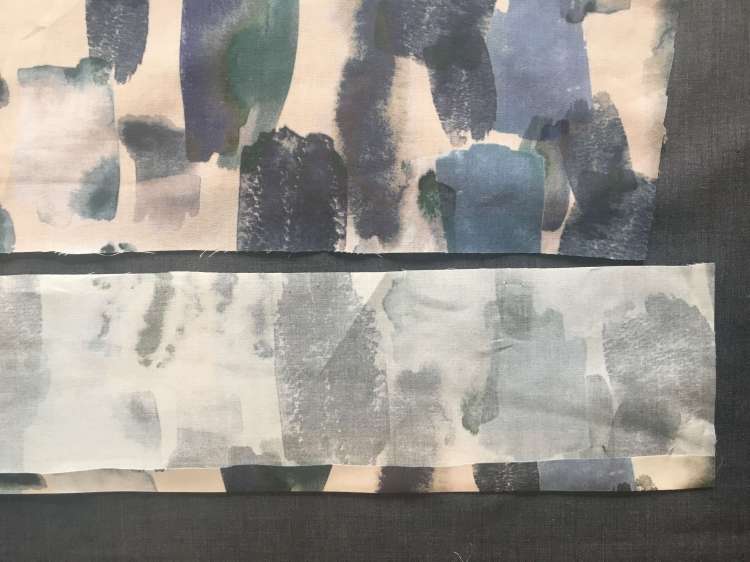
Step 4 – open out and turn in the seam allowance so that you now have a double 5mm hem. Give it a good iron and then unfold for the next steps.
Step 5 – cut 2 pieces of elastic. The elastic measurement is the same measurement as the finished cuff size.
Size 1 (UK 8) = 29cm
Size 2 (UK 10) = 30cm
Size 3 (UK 12) = 31cm
Size 4 (UK 14) = 32cm
Size 5 (UK 16) = 33cm
Size 6 (UK 18) = 34cm
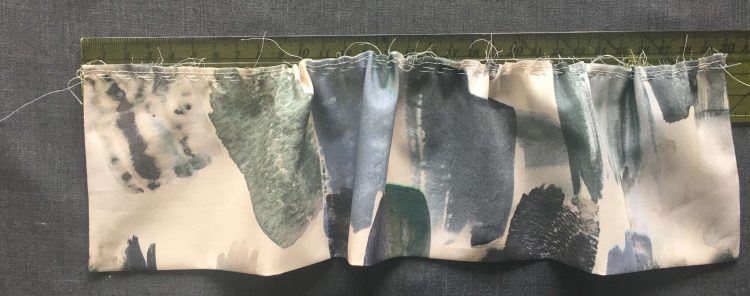
Step 6 – place the elastic along the top edge of the cuff (still working on the wrong side of the fabric), starting the elastic 1cm from the edge of the side. Place a pin to hold the elastic in place.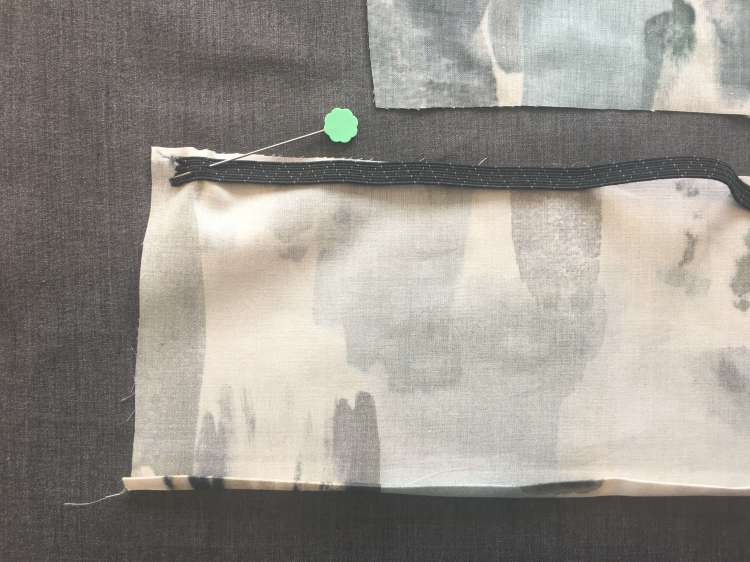
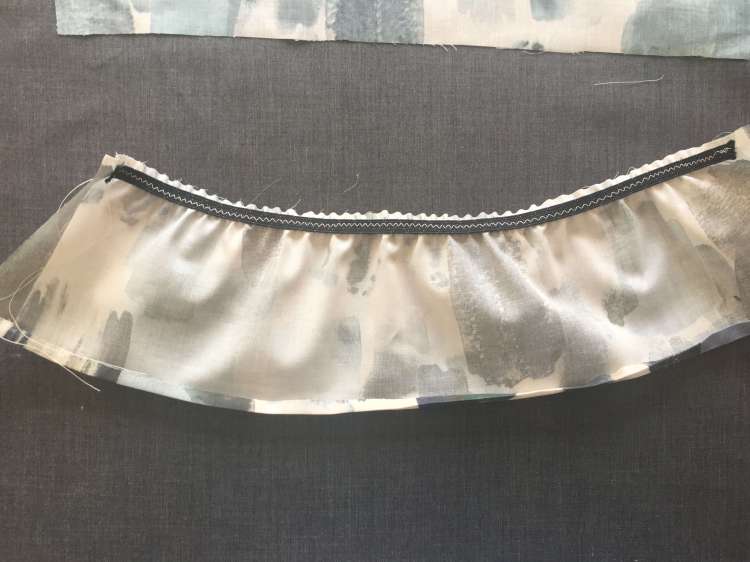
Step 7 – take this piece to your sewing machine and set your machine stitch to a small zig-zag stitch. Starting at the pinned side, create a few stitches to hold the elastic in place.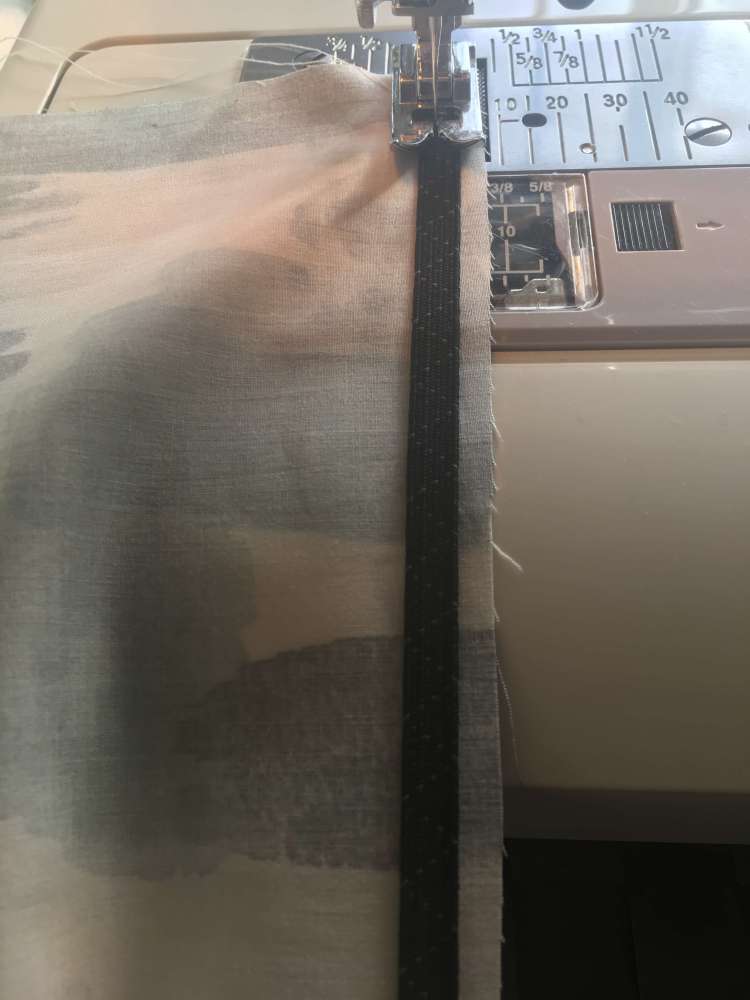
Step 8 – keeping the needle in the fabric/elastic move down to the end of the elastic/other cuff edge. Using your hand, hold the loose elastic in place so that it stretches across the width of the cuff – to fit the cuff. Continue to sew, ensuring the elastic stays stretched across the piece. You will see the fabric start to gather as you are sewing. Don’t forget to set your machine back to straight stitching.
This is how your finished piece will look:
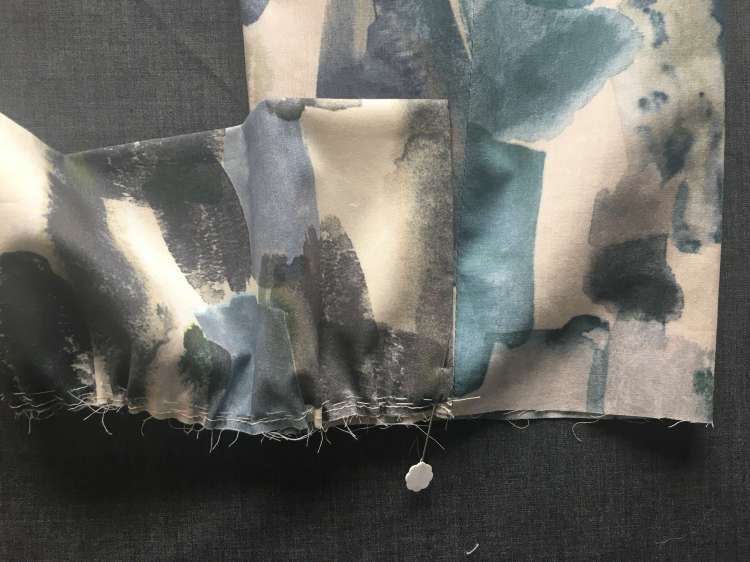
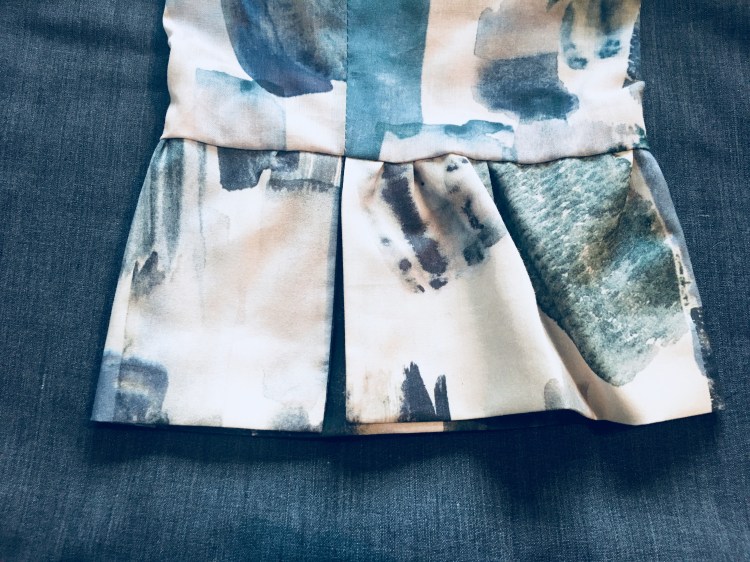
Step 9 – Place your gathered cuff edge right sides together onto the sleeve and pin the edges.
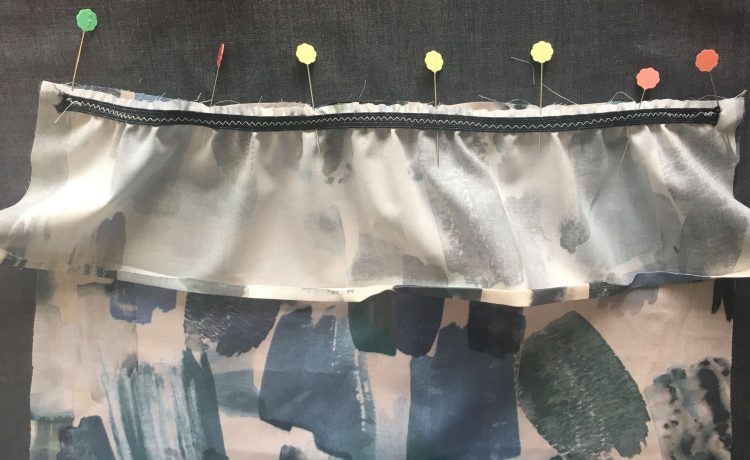
Step 10 – Sew the cuff to the sleeve, using a 1cm seam allowance.
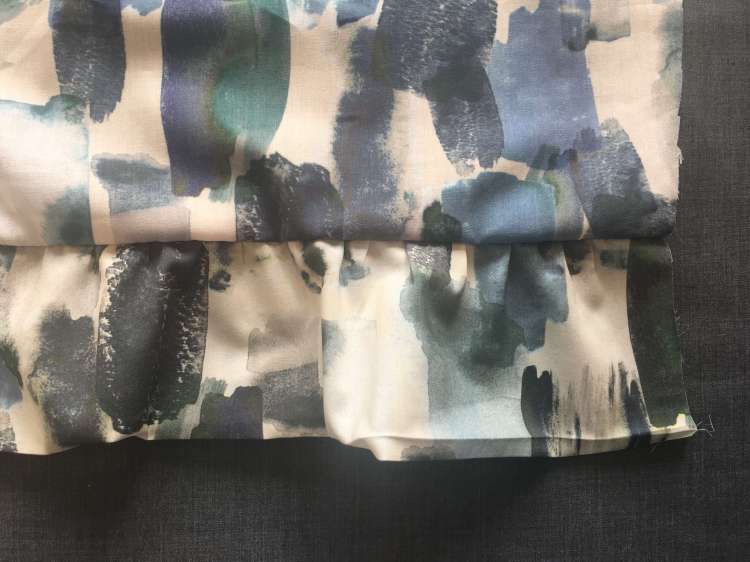
Step 11 – Continue to make the rest of the garment and when you are ready to complete the sleeves, pin the edges together, matching up the cuff and ensuring that the bottom edges of the cuff are flat and open.
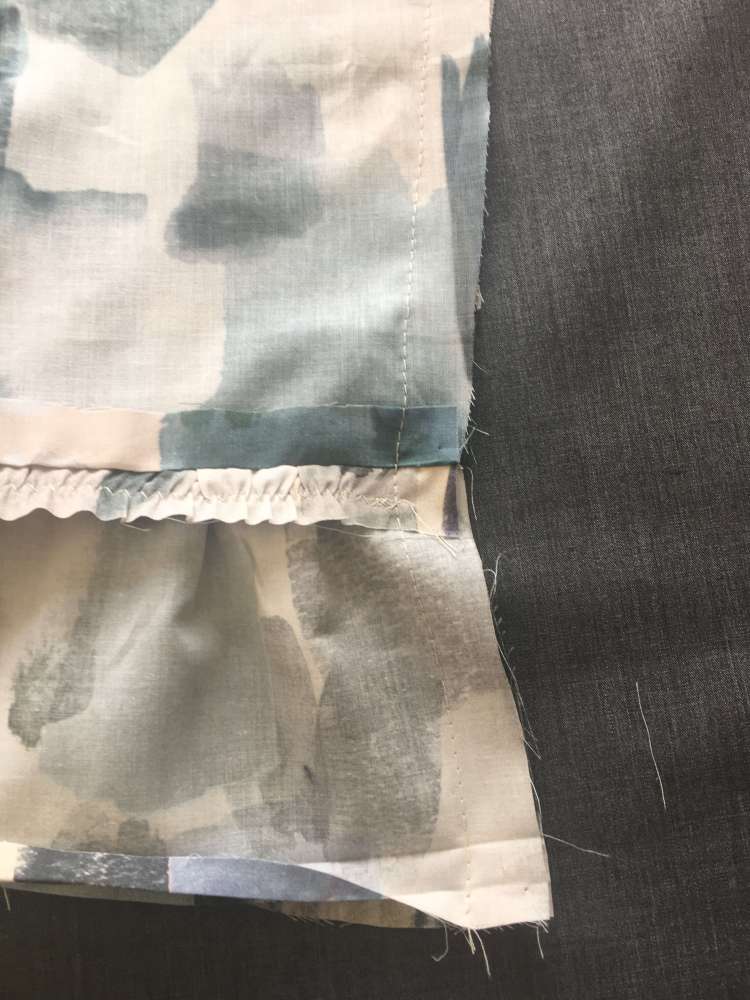
Lastly, turn in your double hem and sew in place.
With the above method you see the stitching at the hem of the cuff. With the next method you won’t see any stitching as it is a double cuff.
CUFF 2 – DOUBLE TURNED CUFF OPEN AT SLEEVE SEAM – elastic gathering done with hand stitching
Create the same rectangle as for cuff 1, following the measurement guidelines.
When adding on your seam allowances, you don’t need to add seam allowances on the bottom edge as this will be placed on the fold of the fabric.
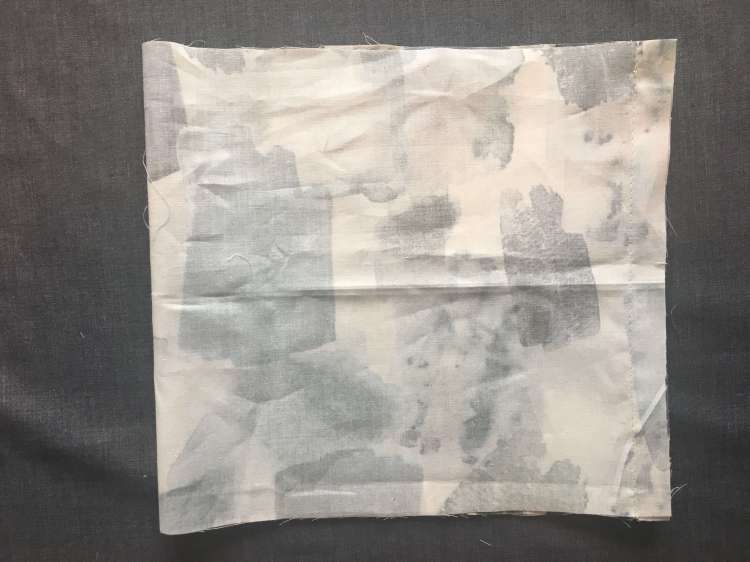
Step 1 – cut out your two cuffs (placed on the fold of the fabric). Fold wrong sides together and sew each side seam using a 1cm seam allowance.
Step 2 – cut away some of the seam allowance to reduce the bulk
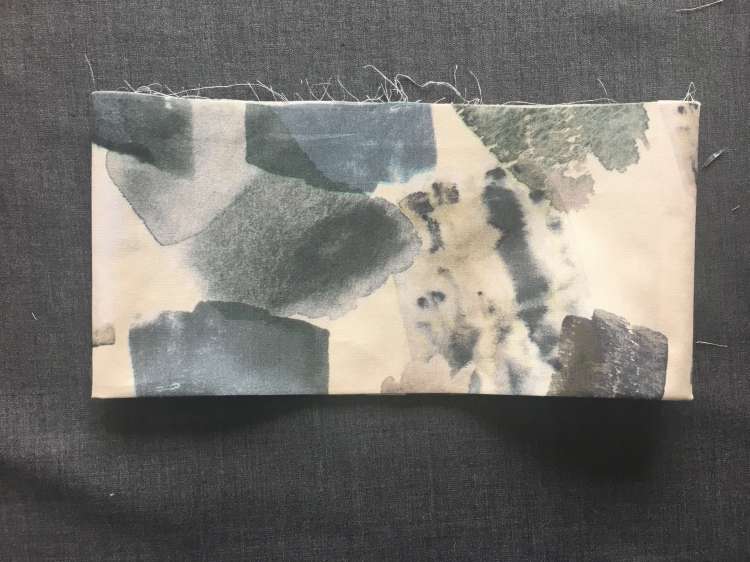
Step 3 – Turn to the right side, push out the corners and iron flat. With your sewing machine, sew the two top edges of the cuff together to prevent them from moving when you do the gathers.
Step 4 – To create the gathers we are going to create two rows of small hand stitches. From the right-hand side of the cuff start a row of stitches across the top.
Don’t knot the thread on the right-hand side, but keep yourself a long thread to pull on later. Evenly spaced, small stitches will give you gorgeous gathers so take your time here. When you get to the left-hand side you can knot and cut the thread.
Then, starting on the left-hand side start a row of stitches just underneath the stitches you have just done, this time keeping the thread long on the left and when you get to the right-hand side you can close knot and cut the thread.
You are ideally ending up with is a long thread on either side that you can pull on which will create the gathers.
** If you did the above method with a sewing machine, simply make your stitch length as long as possible and loosen your tension
Step 5 – you can now start to pull gently on each side of the long threads BUT it’s important to note that you only want to gather so that the piece finishes your finished cuff width.
Size 1 (UK 8) = 29cm
Size 2 (UK 10) = 30cm
Size 3 (UK 12) = 31cm
Size 4 (UK 14) = 32cm
Size 5 (UK 16) = 33cm
Size 6 (UK 18) = 34cm
Once you have pulled each side and it fits the finished cuff width you can close and knot the loose threads that you used to pull the gathers. Don’t worry if the gathers aren’t even now, just focus on getting the width right. Once you have the width right, you can even out the gathers before attaching to the cuff.
Step 6 – Take your sleeve and turn it to the right side. Place your one side of the cuff as shown, so that the edge of the cuff matches up with the side seam of the sleeve. Pin in place.
Step 7 – Then, take the other side of the cuff and match it up with the side seam. Pin in place.
Step 8 – you can now work your way around the cuff and sleeve, ensuring that the edges match up. Fit the cuff to the sleeve and sew, using a 1cm seam allowance.
Your lovely cuff! If you don’t want to have the cuff edges separate scroll on to see how to create it as one piece.
CUFF 3 – DOUBLE TURNED CUFF CLOSED AT SIDE SEAM
Step 1 – Make your rectangle as in the above instructions and cut out the shape. Unfold the fabric and place the sides of the cuffs right sides together. Sew the sides of the cuff, using a 1cm seam allowance.
Step 2 – turn to the right side and fold so that you have your continuous cuff. Iron in place and sew across the very top edge to keep the fabric from moving whilst you create the gathers – either with elastic or hand/machine gathering.
Now that you can see how the cuff can be made you can be creative with our wide and how gathered your cuff can be!
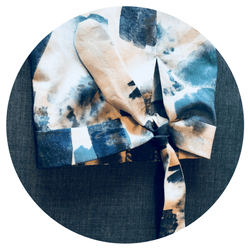
Ready to try the tie sleeve? Click on the image to pop along to the tutorial.