
Guest post – Abigail @absewlutely.abigail
As soon as I saw The Day Dress pattern at a Knitting and Stitching Show a few years ago, I knew that it would become one of my favourites. It is exactly the style of dress that I had already been wearing in ready to wear and was looking to replicate in my sewing. I was so impressed with the instructions and loved the fit of the dress straight away with no alternations needed. This is a great pattern if you are a confident beginner and want to try an invisible zip for the first time as the instructions are amazing.


My favourite thing about the Day Dress is its classic style; a fitted bodice, capped sleeves and a gathered skirt. It is quite a simple base to then be able to slightly alter or hack to make a wide range of dresses using just one pattern. Recently, I have made a midi version with a butterfly sleeve for work and a lined maxi version out of sequins for a wedding.


I had wanted to make a Vampire Wife style dress for a while. I have a lot of maxi dresses with gathered skirts and frills but they are all the oversized ‘buffet-style dresses and I wanted one that was fitted. Initially, this only required a few alterations to get the look I wanted. I kept the bodices the same and lengthened the skirt pieces by 20cm. I then cut a 25cm frill that was twice the width of the skirt pieces. I also prefer a bias binding for the neckline to a facing so cut that out of the fabric too. The dress is fitted but I wanted to add waist ties to just bring it in a tiny bit more and as a feature, I cut out two strips with tapered ends for the ties that I sewed in the side seams.
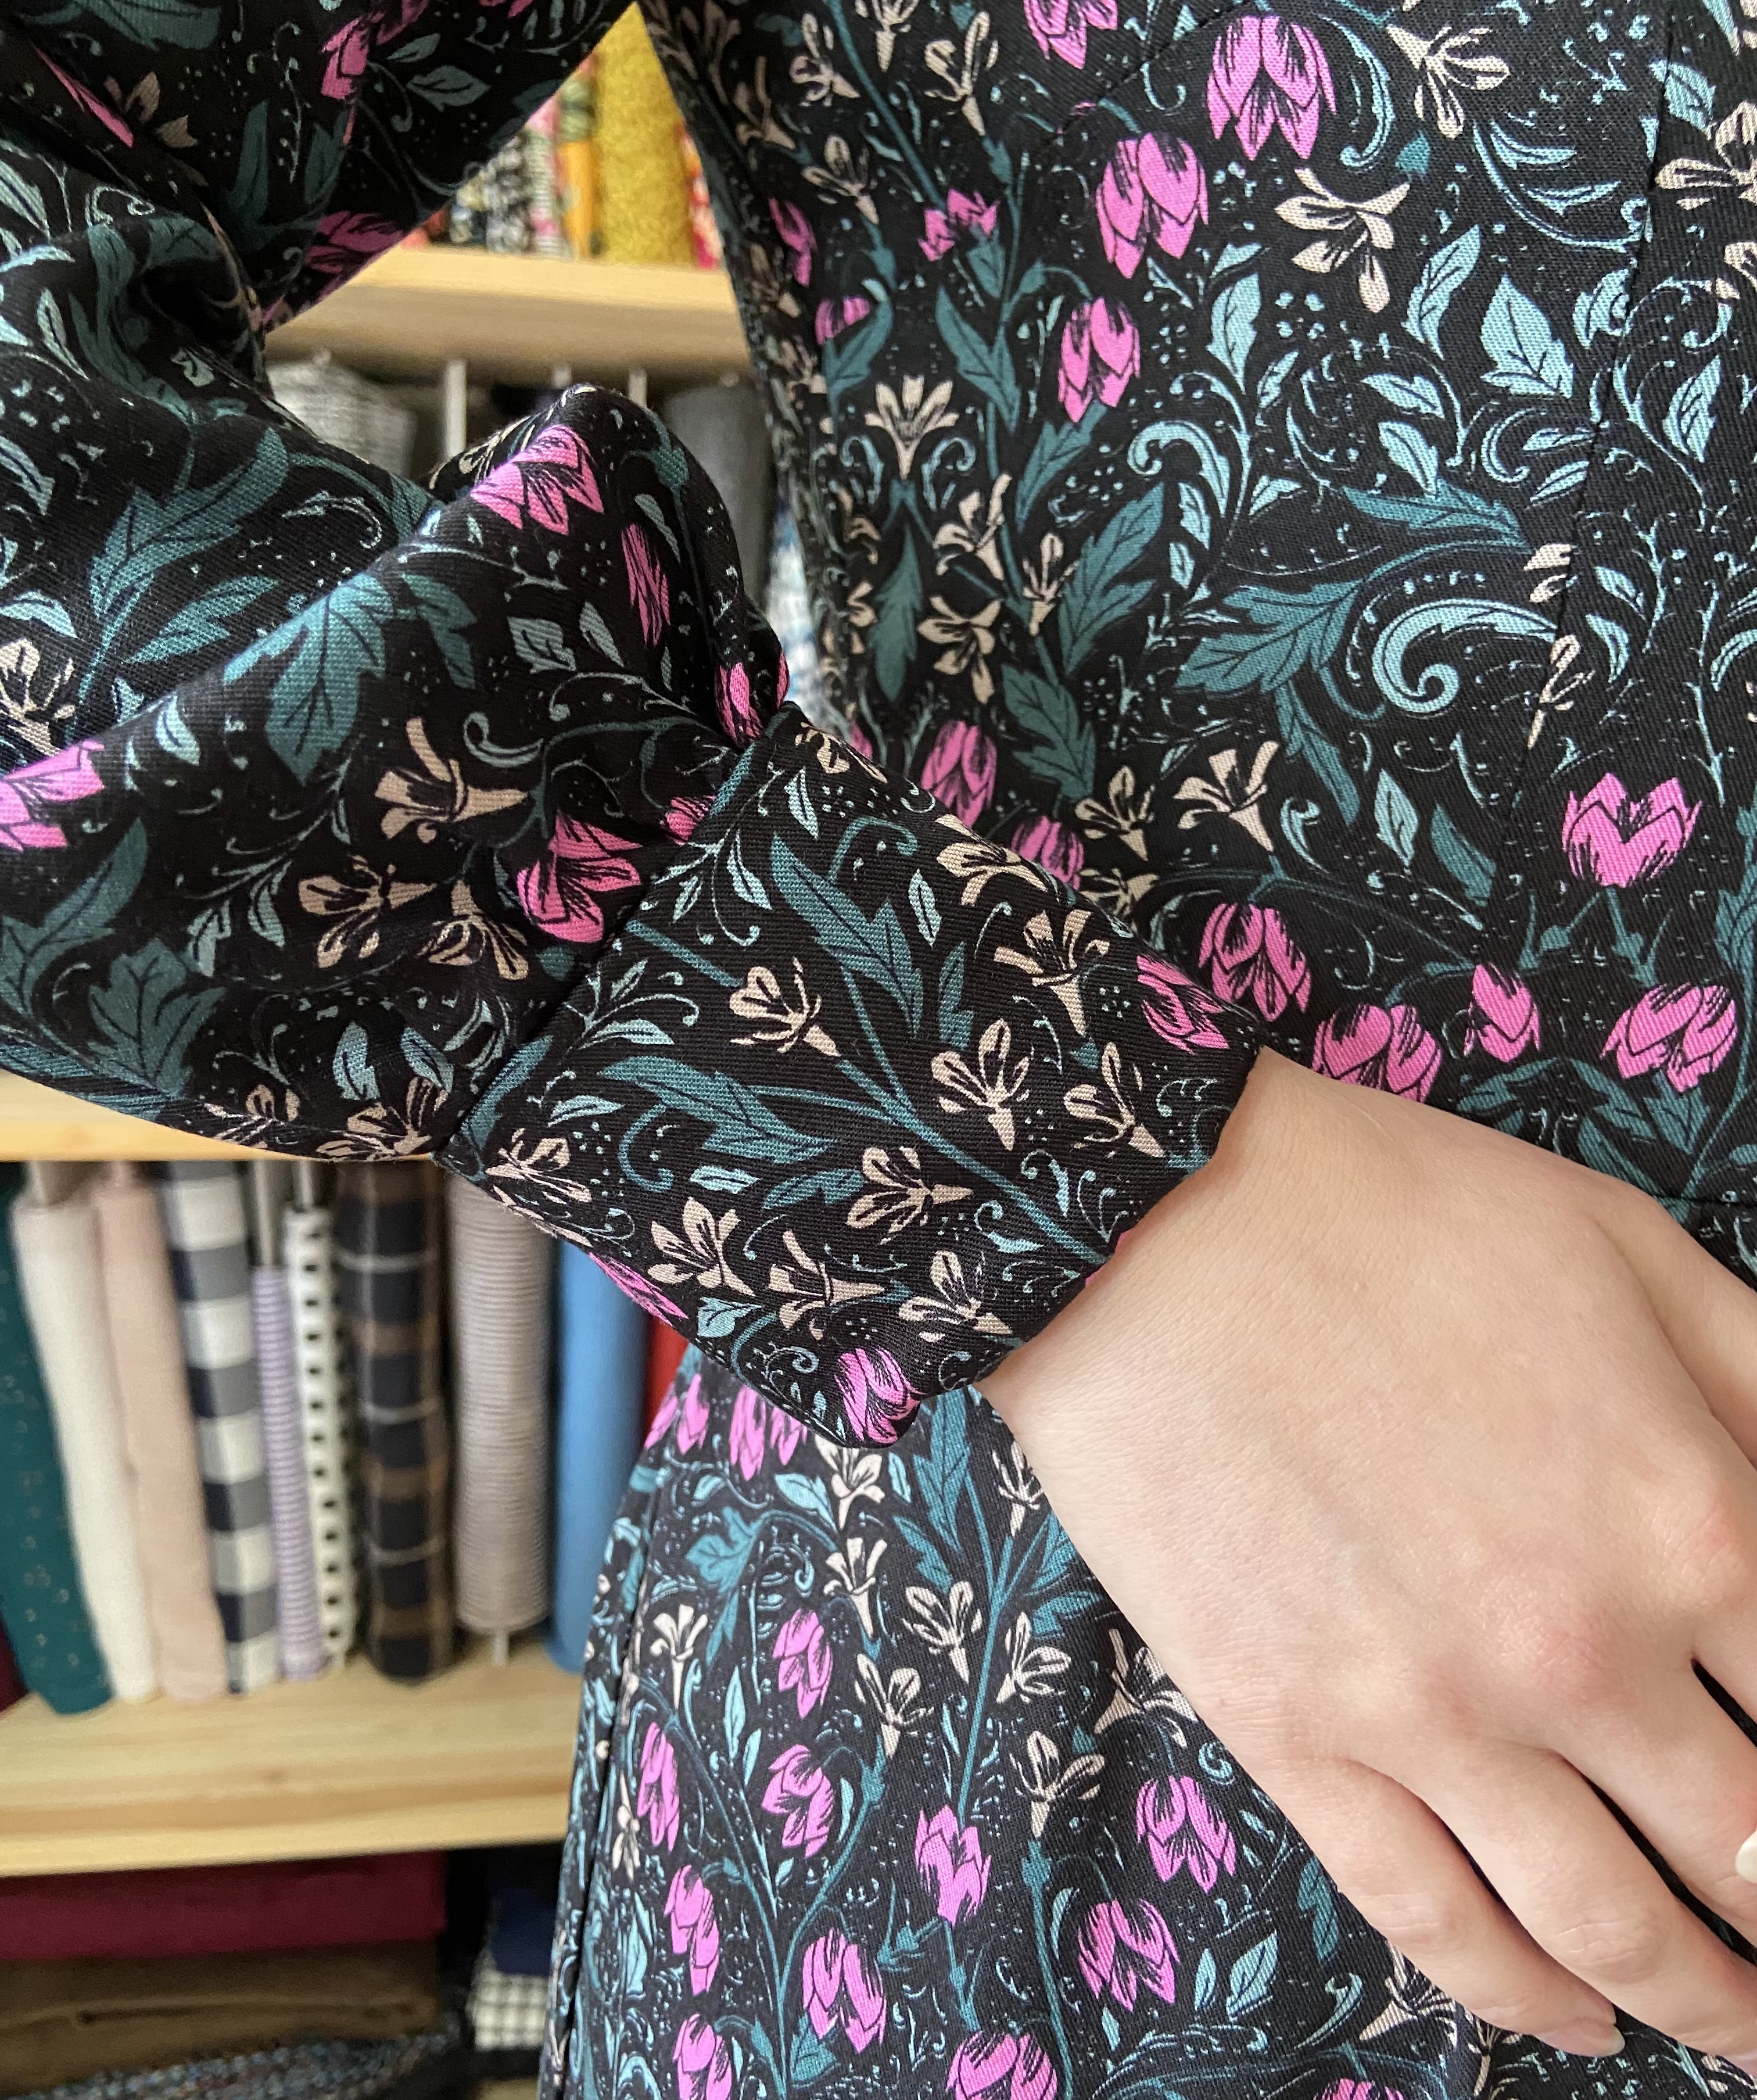

I had a few different ideas for the sleeves but I settled on long sleeves as I thought from the fabric that it was more of a wintery make. The long sleeves were then gathered onto a cuff, only with a little volume, and a little ruffle on the sleeve head. The busy print of the fabric does make these features a little hard to see though! I wish I was artistic enough to be able to draw sketches of my designs before I make them, however, my ideas are all just swirling around in my head most of the time and I was so happy that the dress came out just how I had imagined it.
I traced out the sleeve head again and then drew a 40cm line straight down from either end. I used another sleeve pattern to judge how long I wanted the sleeve. As I was gathering the bottom of the sleeve onto the cuff I wasn’t too worried about the width and wanted some fullness. I measured loosely around my wrist and added seam allowance to give me the cuff width. I chose the cuff to be 7cm so doubled this and added seam allowance to give the height. I did think about doing a buttoned cuff but this would have been a lot of extra work!


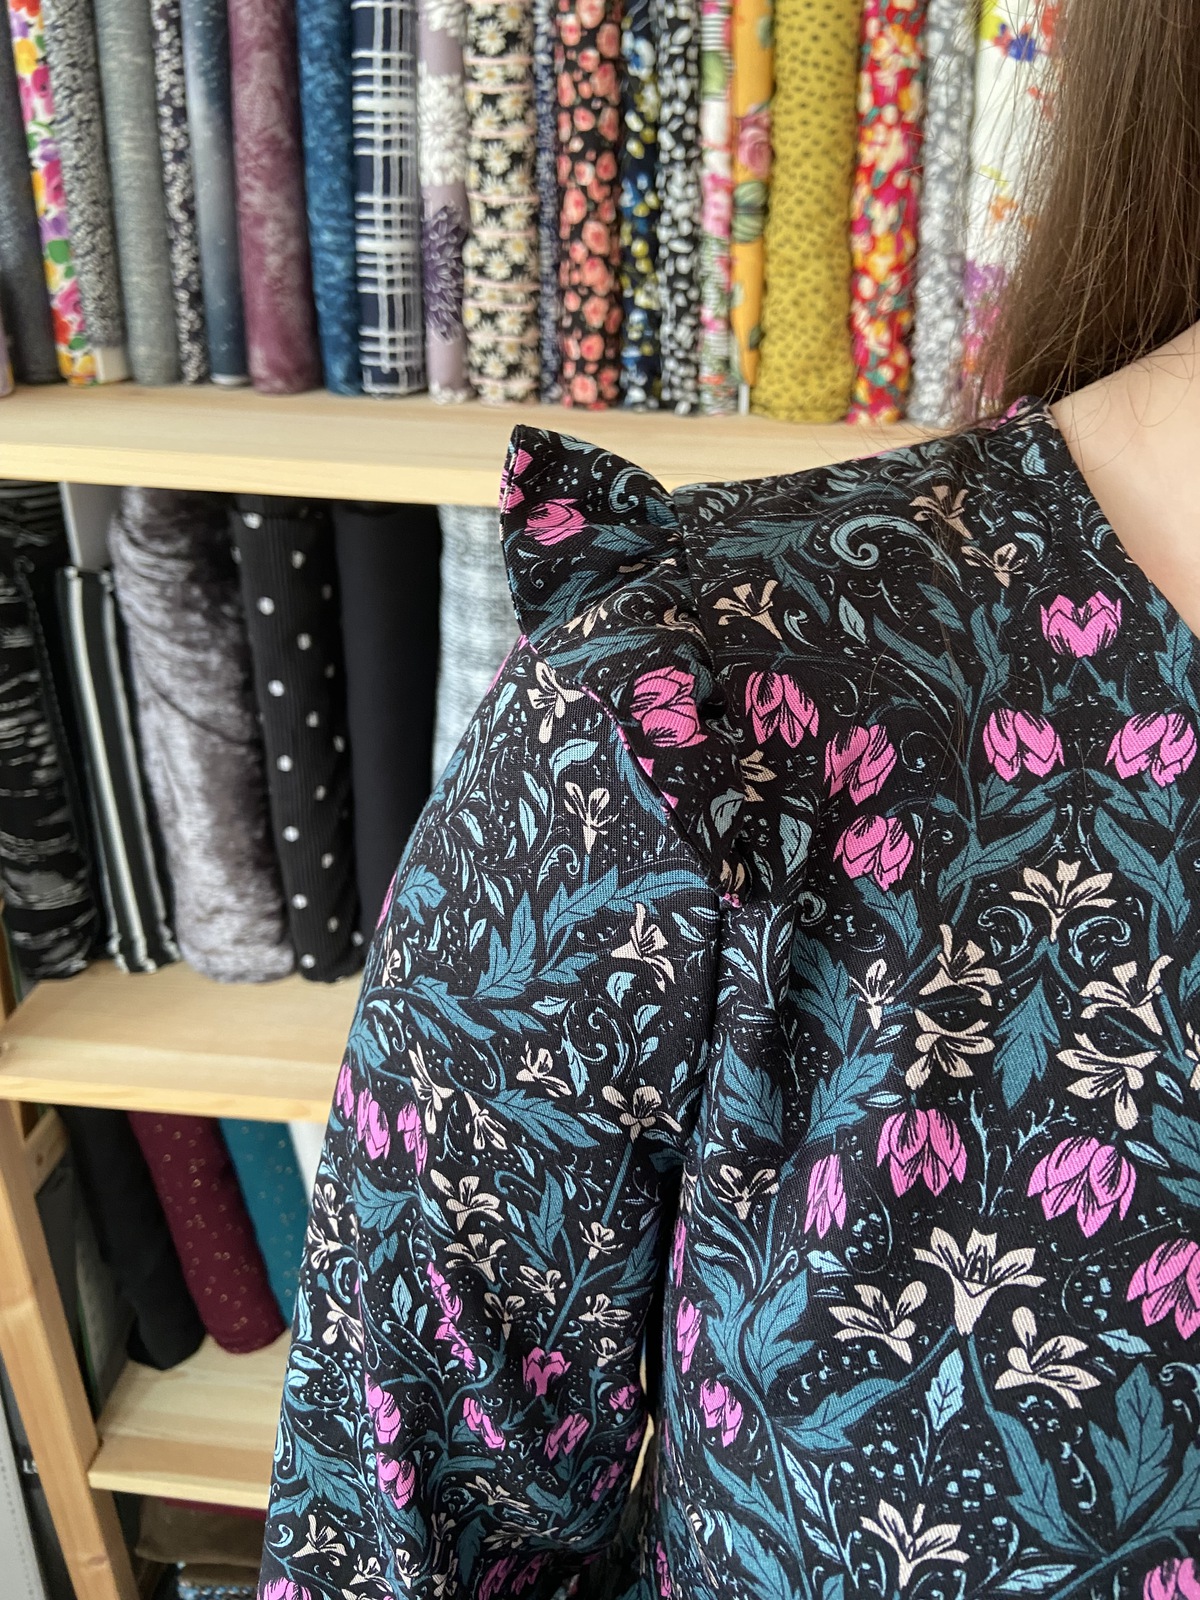
I had seen a few dresses recently with a little ruffle at the sleeve head and thought that it would be a cute feature to add this too. There are quite a few similar tutorials online so I just followed those. I drafted a rectangle that was 40cm by 5cm. Then 10cm from each edge I drew a curve that tapered to the corner on one side of the rectangle. I marked the middle as a notch.
I then cut out four of these in fabric and stitched the straight edges wrong side together with a 0.5cm seam allowance and turned them the right way out to give the finished outer edge. I then sewed two rows of gathering stitches at 0.5cm and 1cm. I then gathered it up till it was 12cm long from the middle notch on each side. Matching the middle notch to the shoulder seam, I then basted them in the seam allowance for the sleeve on the bodices after I had sewn the shoulder seam. This did make the sleeve seam a little bulky but worth it for the cute ruffle!
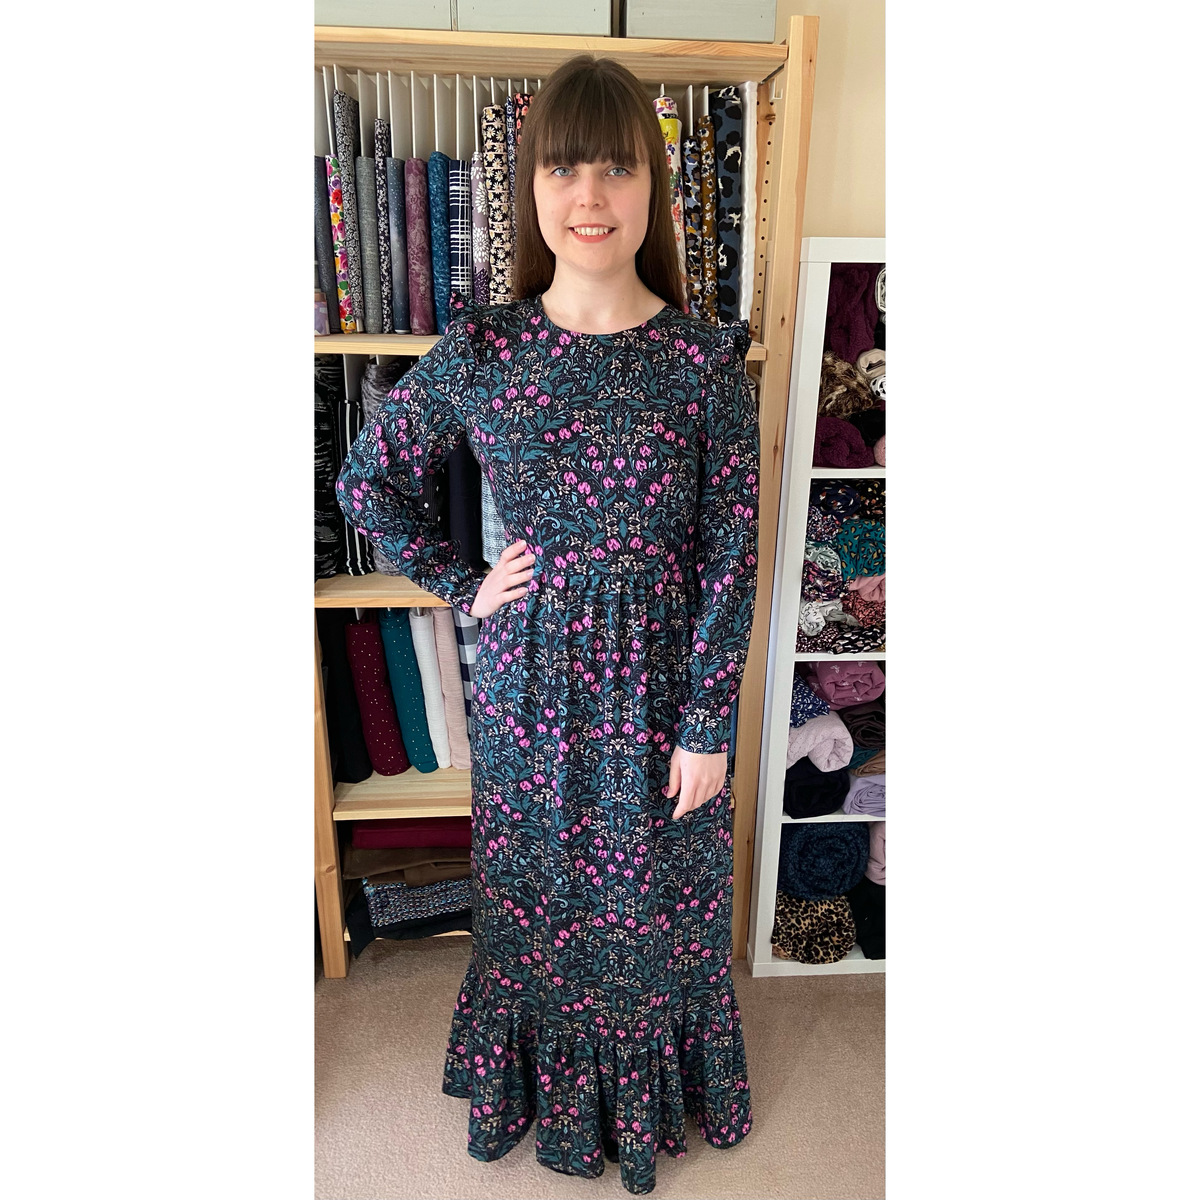
I used this gorgeous viscose twill, it is super soft and flowy but still has a little structure, which was perfect for this dress. I didn’t have to worry about pattern matching which is always a bonus! Though it took me a while to decide which way the pattern went, I decided on the yellow flowers facing up and the pink down and made sure all the pieces were cut the right way up! The dress turned out quite fancy, though because of the black background I probably wouldn’t wear it to a wedding, and it is far too nice to wear to work or lounging around the house. Hopefully, there will be an event soon that I can wear it to! I have lots more Day Dress hacks planned, with lots of different sleeves and ruffles. Soon I will need a separate wardrobe for just my Day Dresses!
From The Avid Seamstress team: This is exactly what we love about sewing, the ability to create your own versions of garments to suit your style and creativity. We are so inspired by this dress and how pretty it is. Thank you Abigail xx

Abigail you mention that you made a lined version of the day dress. I wonder whether you would be able to do a blog detailing the process please. I have pattern and fabric plus lining material. I know I made similar when much younger but I’ve lost the confidence I used to have.
Hello :)
It’s Lisa – I’m going to get in touch with Abigail to see if she has any pics or info on the lined version.
xx
Thank you Lisa