
The Wimborne Coat, featured in TAUKO Issue 5 was designed by Lisa Falconer AKA The Avid Seamstress. TAUKO produced the actual sewing pattern and instructions and we’d like to compliment their well written instructions with some additional photographs and instructions of our own. This tutorial is for the lined version.

WIMBORNE is a cocoon-shaped coat with a wide stand collar band and a soft dropped shoulder. The design has unique balloon sleeves and deep inseam pockets.
The coat is designed to be closed edge-to-edge at the front. However, if you wish, you can make a tie belt from the same fabric and add it to your waist. You may want to give even more structure to the sleeves by supporting them with fusible woven interfacing. If you wish, you can also add interfacing to the collar band. For a simpler and lighter coat version, you can make this design from boiled or felted wool without lining. This coat looks incredible in a lightweight fabric for the summer season.
How gorgeous is this incredible Wimborne Coat by Christina @ccmadethat


SIZING
Sizes 1 -9: The coat is a loose-fit design. Choose your size based on your bust measurement. Add a recommended positive ease of approximately 16″/40 cm at the bust. Pick the size that is the best match for your bust. It’s important to note that this pattern hasn’t been drafted off our block so please don’t assume the size you are making based on other Avid Seamstress garments.
TIP – the feedback we have had from sewists that have made The Wimborne Coat is that they have tended to made the smaller of the size so that it doesn’t become too oversized.


TUTORIAL
We selected a boiled wool with 60% wool / 40% viscose and, although boiled wool doesn’t need to be lined, we chose to line it to add some body to the coat. We chose this beautiful, bold pattern for the lining and pockets.
We chose not to interface the collar as we wanted to see the structure with the boiled wool. However, we suggest interfacing the collar as it also helps to give a crisp fold line on the collar edge. Using a clapper for boiled wool will also help to reduce the moisture from the iron and set the shape.
Fabric Requirements:
For sizes 1 (2, 3, 4, 5) (6, 7, 8, 9)
Main fabric: width 55″/140 cm, length 77.2 (80.7,82.3, 86.6, 89) (96.5, 102, 106.3, 113)”inches / 196 (205, 209, 220, 226) (245, 259, 270,287) cm
Lining: width 55″/140 cm, length 53.5 (57.1,59.1, 60.6, 70.1) (81.9, 83.5, 89.8, 92.9)”inches / 136 (145, 150, 154, 178) (208, 212, 228,236) cm
Cutting:
All patterns include a 0.4″/1 cm seam allowance unless otherwise indicated. If you are tracing the pattern pieces directly from the TAUKO magazine, please note that the pieces need to be joined together to make a full front / back / front lining / back lining etc.
Main fabric:
2 x front (A & C)
1x back on fold (A & C)
2 x centre front (A & C)
4 x sleeve (C)
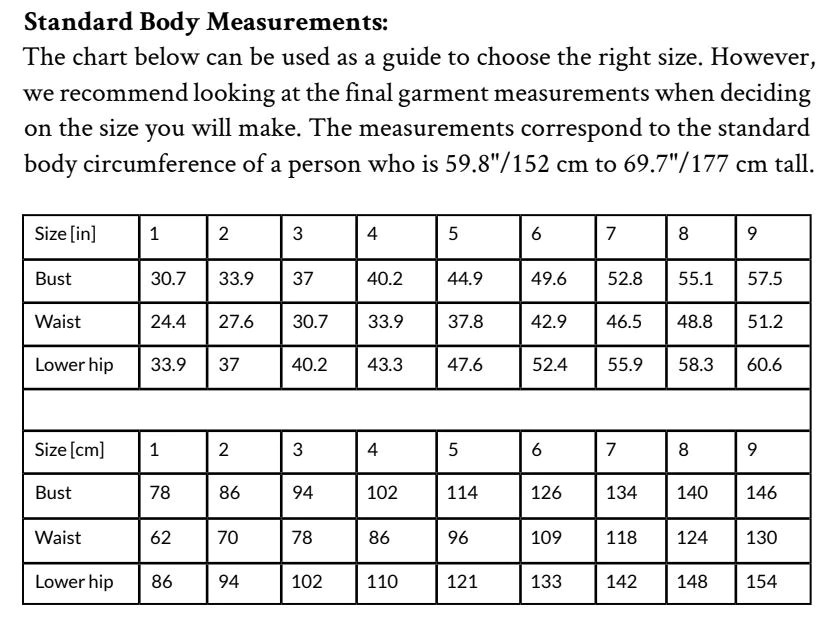
4 x pocket (G) Note: Depending on the thickness of your fabric, you may want to make the pockets from your lining or another thinner fabric.
Lining (optional):
2 x front lining (E & G)
1 x back lining on fold (E & G)
4 x sleeve lining (E)
Interfacing:
Optional for the centre front (A & C)
and the sleeves (C)
Sewing:
Preparing the pieces:
Remember to prewash or preshrink the fabric with steam, and be sure to transfer all markings onto your fabric after cutting.
TOP TIP – the notches on this garment are very important so ensure to mark them clearly and accurately.
If you feel like interfacing the sleeves and the centre front pieces, now is a good time to do it. We love block fusing as this creates a really crisp finished for the pieces as the garment is cut post fusing the interfacing. The notches on the Wimborne Coat are SUPER important so mark them clearly!
Instructions
Basting the pockets:
First, finish the raw edges of all four pocket pieces with a serger or zigzag stitch. You only need to do this is the fabric frays.
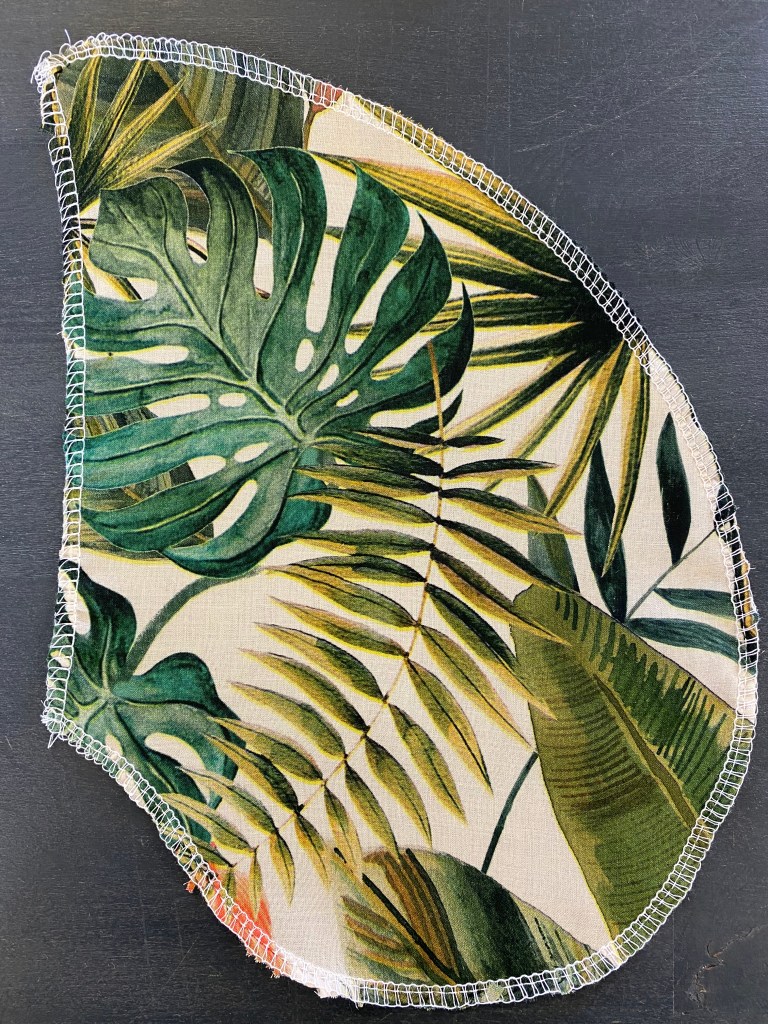
Lay out the coat front pieces with the right sides of the fabric facing up. With the right sides together, pin the pocket pieces at the side seams, matching the notches. Sew the pockets to the side seams 0.4″/1 cm from the raw edge. Repeat with the remaining pocket pieces to the side seams of the coat back.
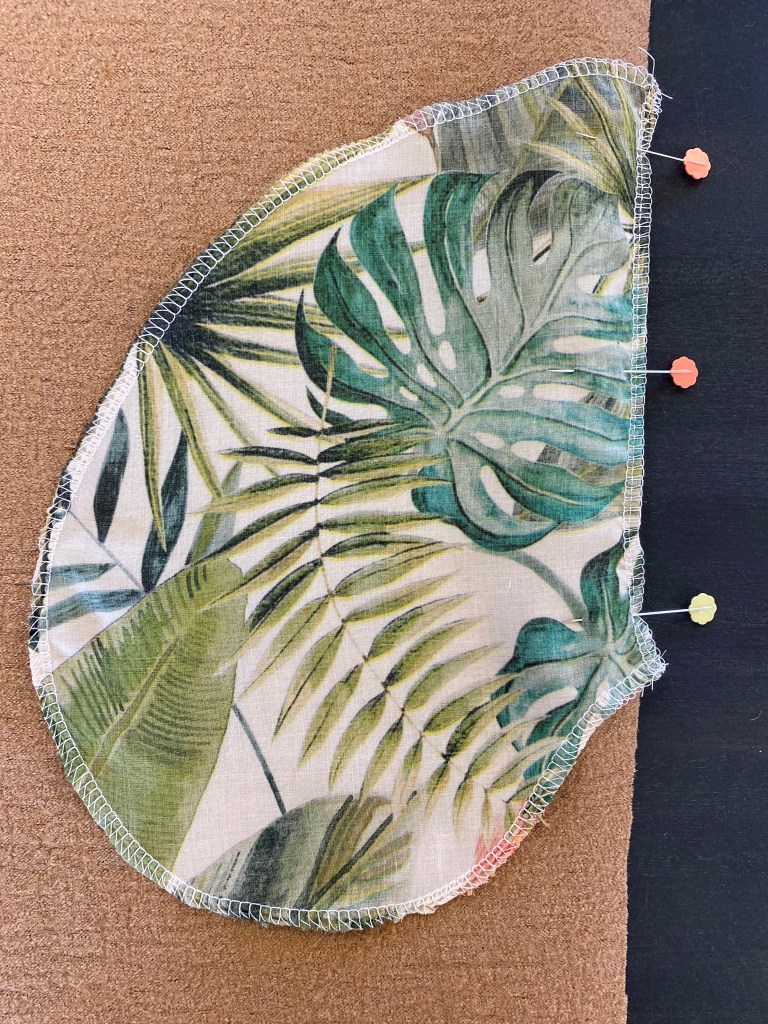
Press the pocket bags away from the bodice.
SEWING THE OUTER SHELL

Pin the back and front pieces at the shoulder seams, right sides of the fabric together.
Stitch together at a 0.4″/1 cm seam allowance and use an iron to press the seams open.

Next, take two of the sleeve pieces. With the right sides of the fabric together, start by sewing the sleeve’s upper seam using a 0.4″/1 cm seam allowance. Use an iron to press the seam open. Repeat for the other sleeve.
Press the sleeve hems in by 2″/5 cm. Obtain a well pressed line for the hem which will help the sleeve to sit beautifully, especially if you are lining the garment.
After pressing, unfold again.

Open the bodice assembly and lay it flat with the right side of the fabric facing up. Align the sleeve cap with the bodice armscye and match the upper seam of the sleeve with the shoulder seam of the bodice.
Flip the sleeve over so that the sleeve is right sides together with the garment. Ensure that the seam allowances stay open on both the garment and sleeve and match up those shoulder and sleeve joins perfectly as this seam will be very noticeable from the right side.
Pin the shoulder/sleeve join and then pin the underarm sleeve to the underarm of the bodice on each side. Easing the sleeve into the garment, pin the sleeve and armscye together.
Sew the sleeve cap to the bodice with a 0.4″/1 cm seam allowance.
Repeat for the other sleeve and press the seams open.

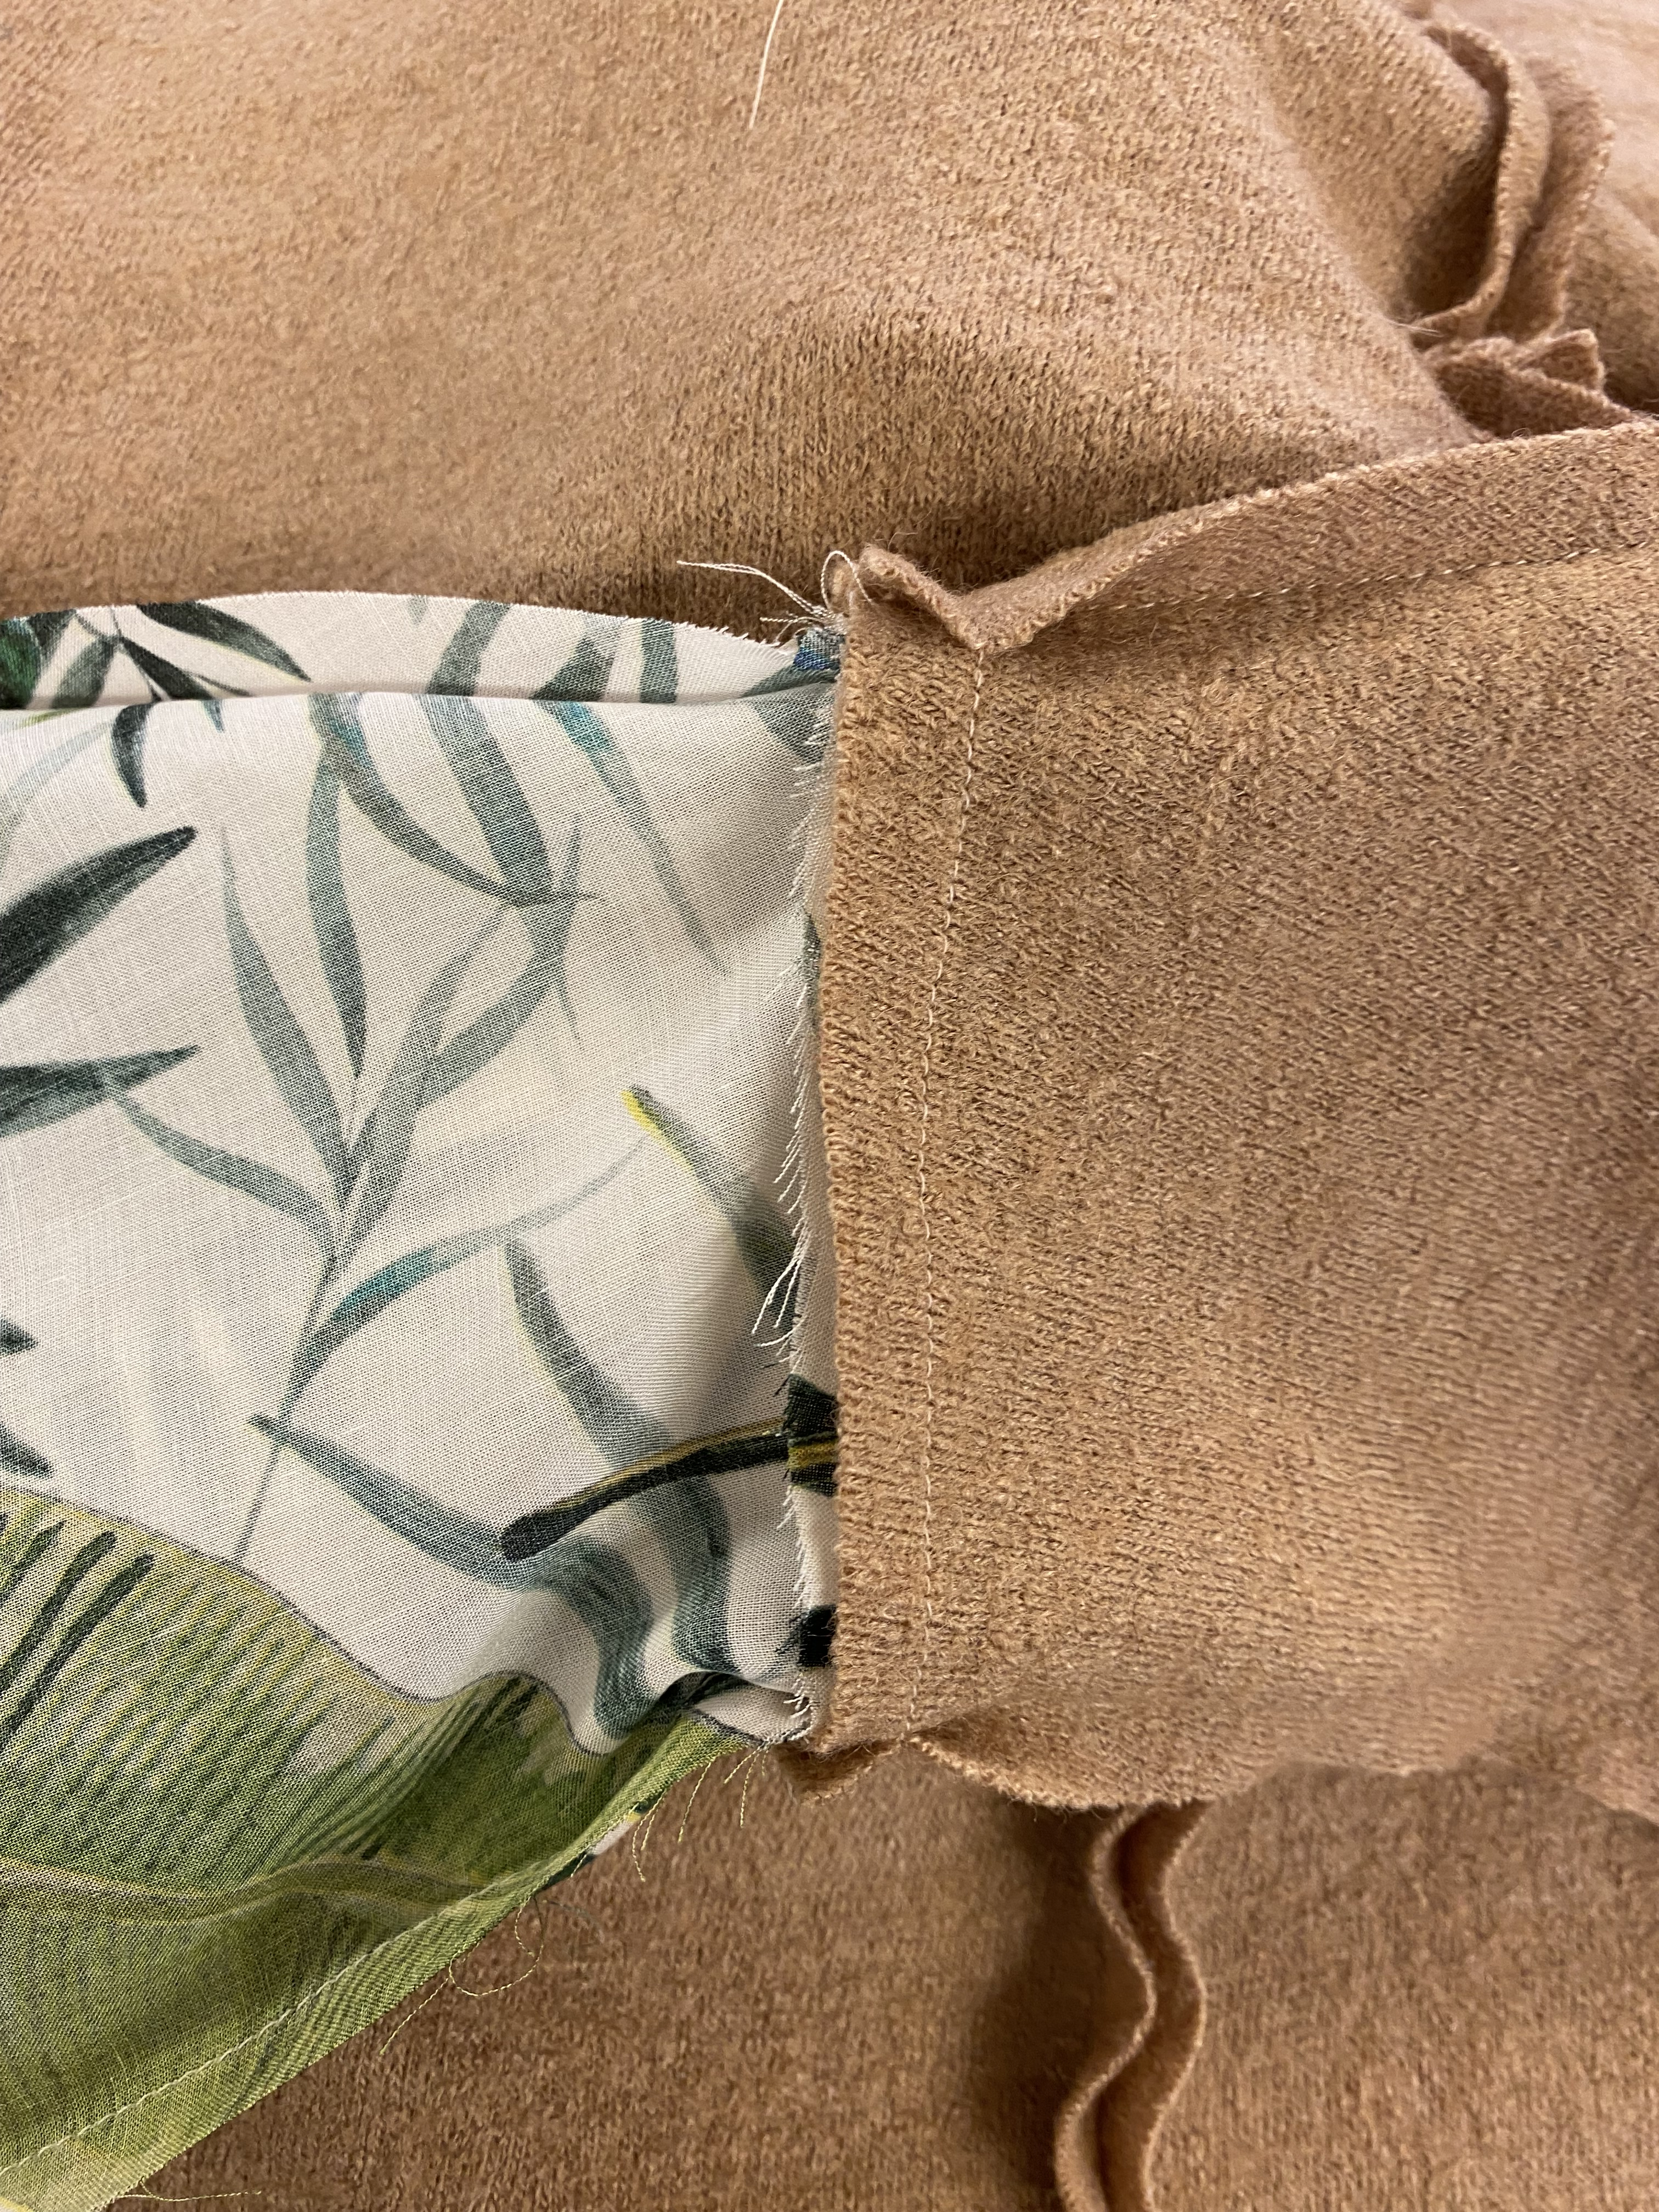
Lay the front piece over the coat back, right sides of the fabric together. Pin the sleeve’s underarm seam and the side seams. Ensure the sleeve hem is unfolded on the pressed edge.
With a 0.4″/1 cm seam allowance, stitch the sleeve’s underarm seam and side seam with one continuous line of stitching, pivoting and stitching around the pockets.
Press the seam allowances open, clipping carefully at the underarm intersection and just above and below the pockets so that you can press the pockets towards the front of the coat.

Turn the coat to the right side.
ASSEMBLING THE COLLAR
To create the collar, join the two pieces at the CB with a 0.4″/1 cm seam allowance, right sides of the
fabric together, aligning the notches and stitching the centre back neckline seam. Press the seam open.

Fold the joined collar piece in half lengthwise, right sides of the fabric together. Then pin the raw short edges together at both ends and stitch with a 0.4″/1 cm seam allowance. Turn the collar piece right side out and press. Use a point-turner to get the corners nice and sharp. Our image is showing once side stitched and the other turned through.
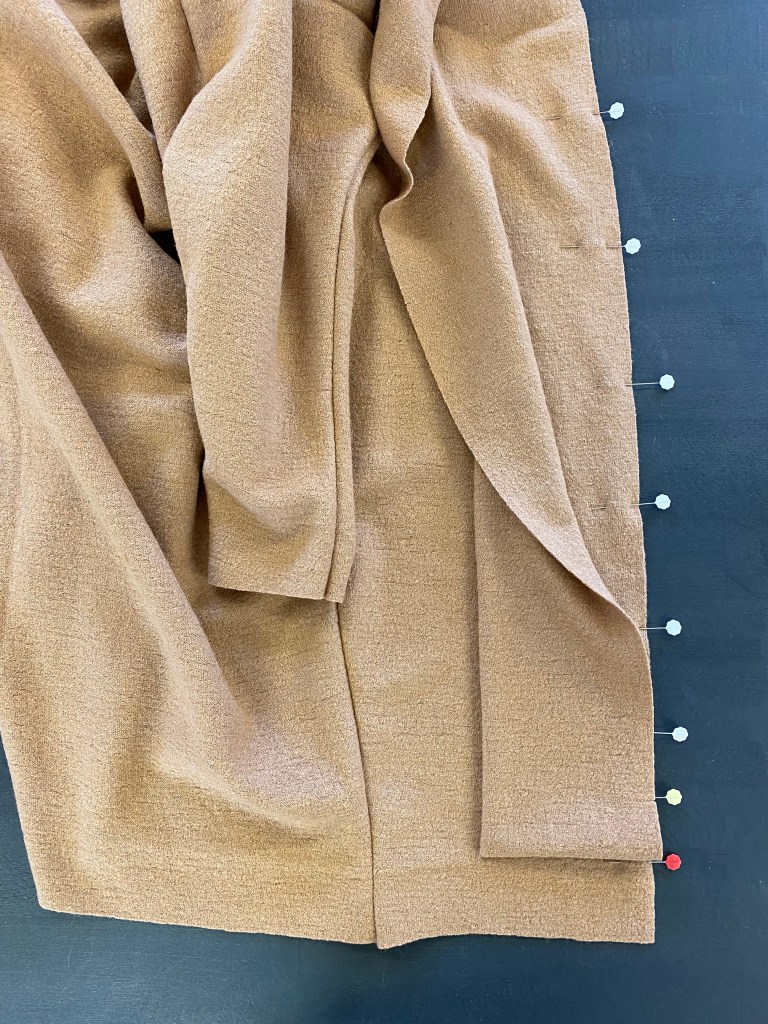
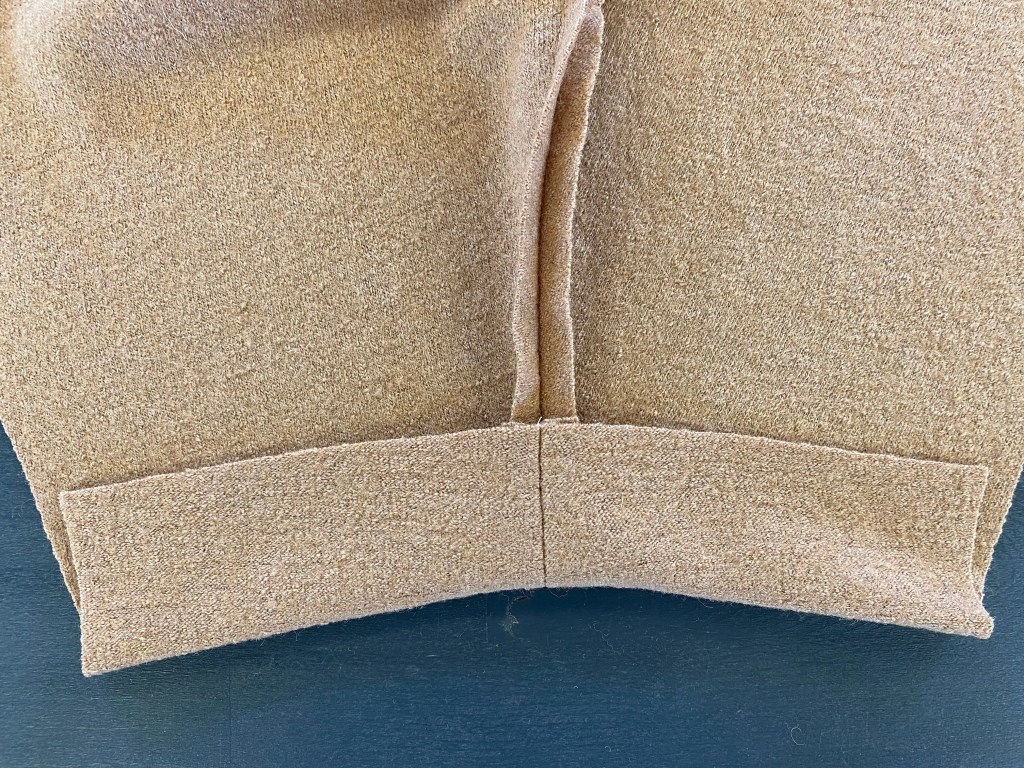
Pin one long edge of the collar piece with the right sides together, all along the bodice’s neckline and down the centre fronts. Remember to align the seams and notches carefully. The bottom of the collar should sit at the lower notch 2″/5cm from the hem (the red pin).

At the hem, open out the collar seam (inside the collar) and continue pinning the collar to the bodice centre front until the 0.4″/1 cm notch mark that is on the front garment (green pin in image).
Stitch all the way from one bottom hem to the other and press the seam towards the bodice.
There is now 0.4″/1 cm at the bodice bottom hem that is left unstitched to the collar piece. This is where the lining will be attached.
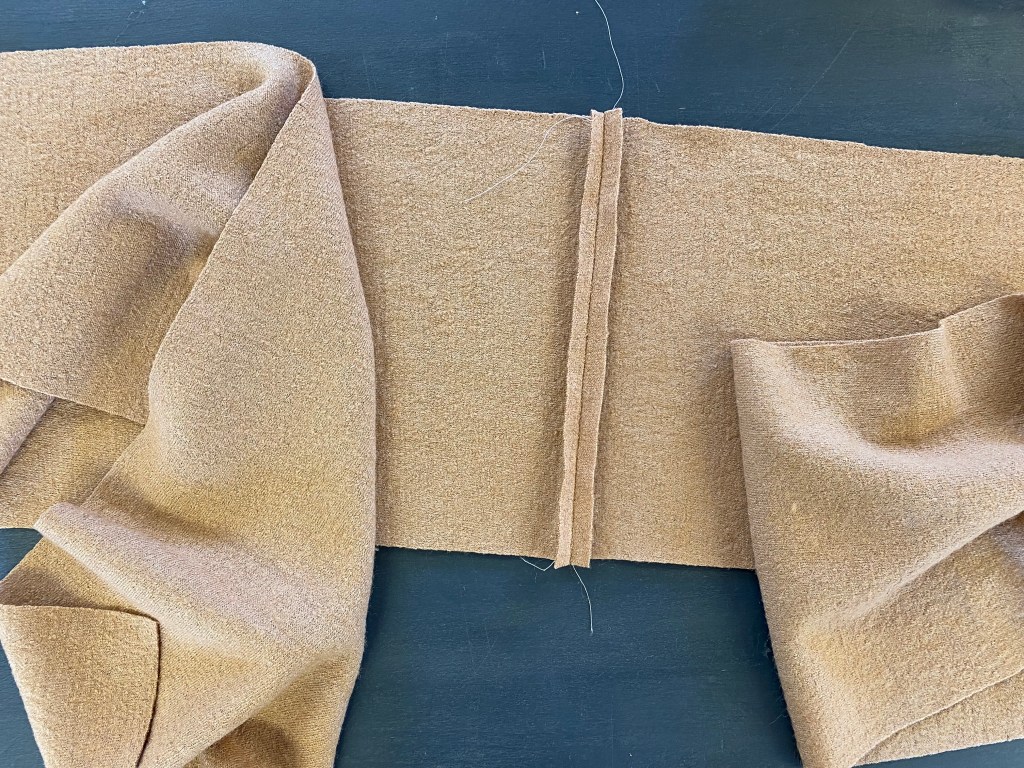
ASSEMBLING THE LINING

Note – In the instructions provided by TAUKO it mentions that the back lining has a pleat. It does not have a pleat so this step (17) in their instructions should be ignored.
Shoulder seams – Stitch the front and back together at the shoulders with a 0.4″/1 cm seam allowance.
Sleeves – Join the sleeve lining pieces on the upper arm seams, leaving an opening of about 6″/15 cm in the middle of one of the upper arm seams (this is where the coat will be pulled through to the right side).
Join sleeve to lining shell – Join the sleeve to the lining front and back in the same way as you did with the outer shell. Remember to work with the right sides of the fabric together.
Sew sleeve / shell at side seams – Lay the front lining piece over the back lining piece, right sides of the fabric together. Pin the sleeve’s underarm seam and the side seams and stitch with a 0.4″/1 cm seam allowance. Use an iron to press the seam allowances open.
The image shows the lining completed.
ATTACHING THE LINING TO THE OUTER SHELL

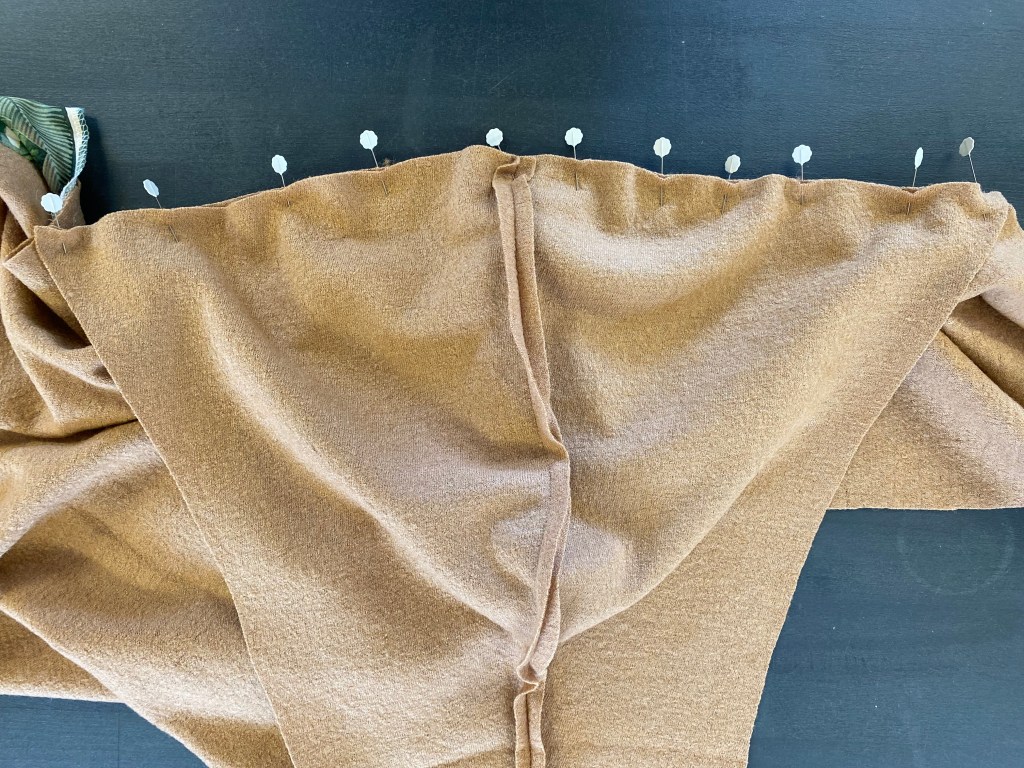
Pin the lining to the coat shell, matching the CB of the collar and the lining back and moving down each side of the front, right sides of the fabric together matching notches. See next images for how to pin the lining at the hem.
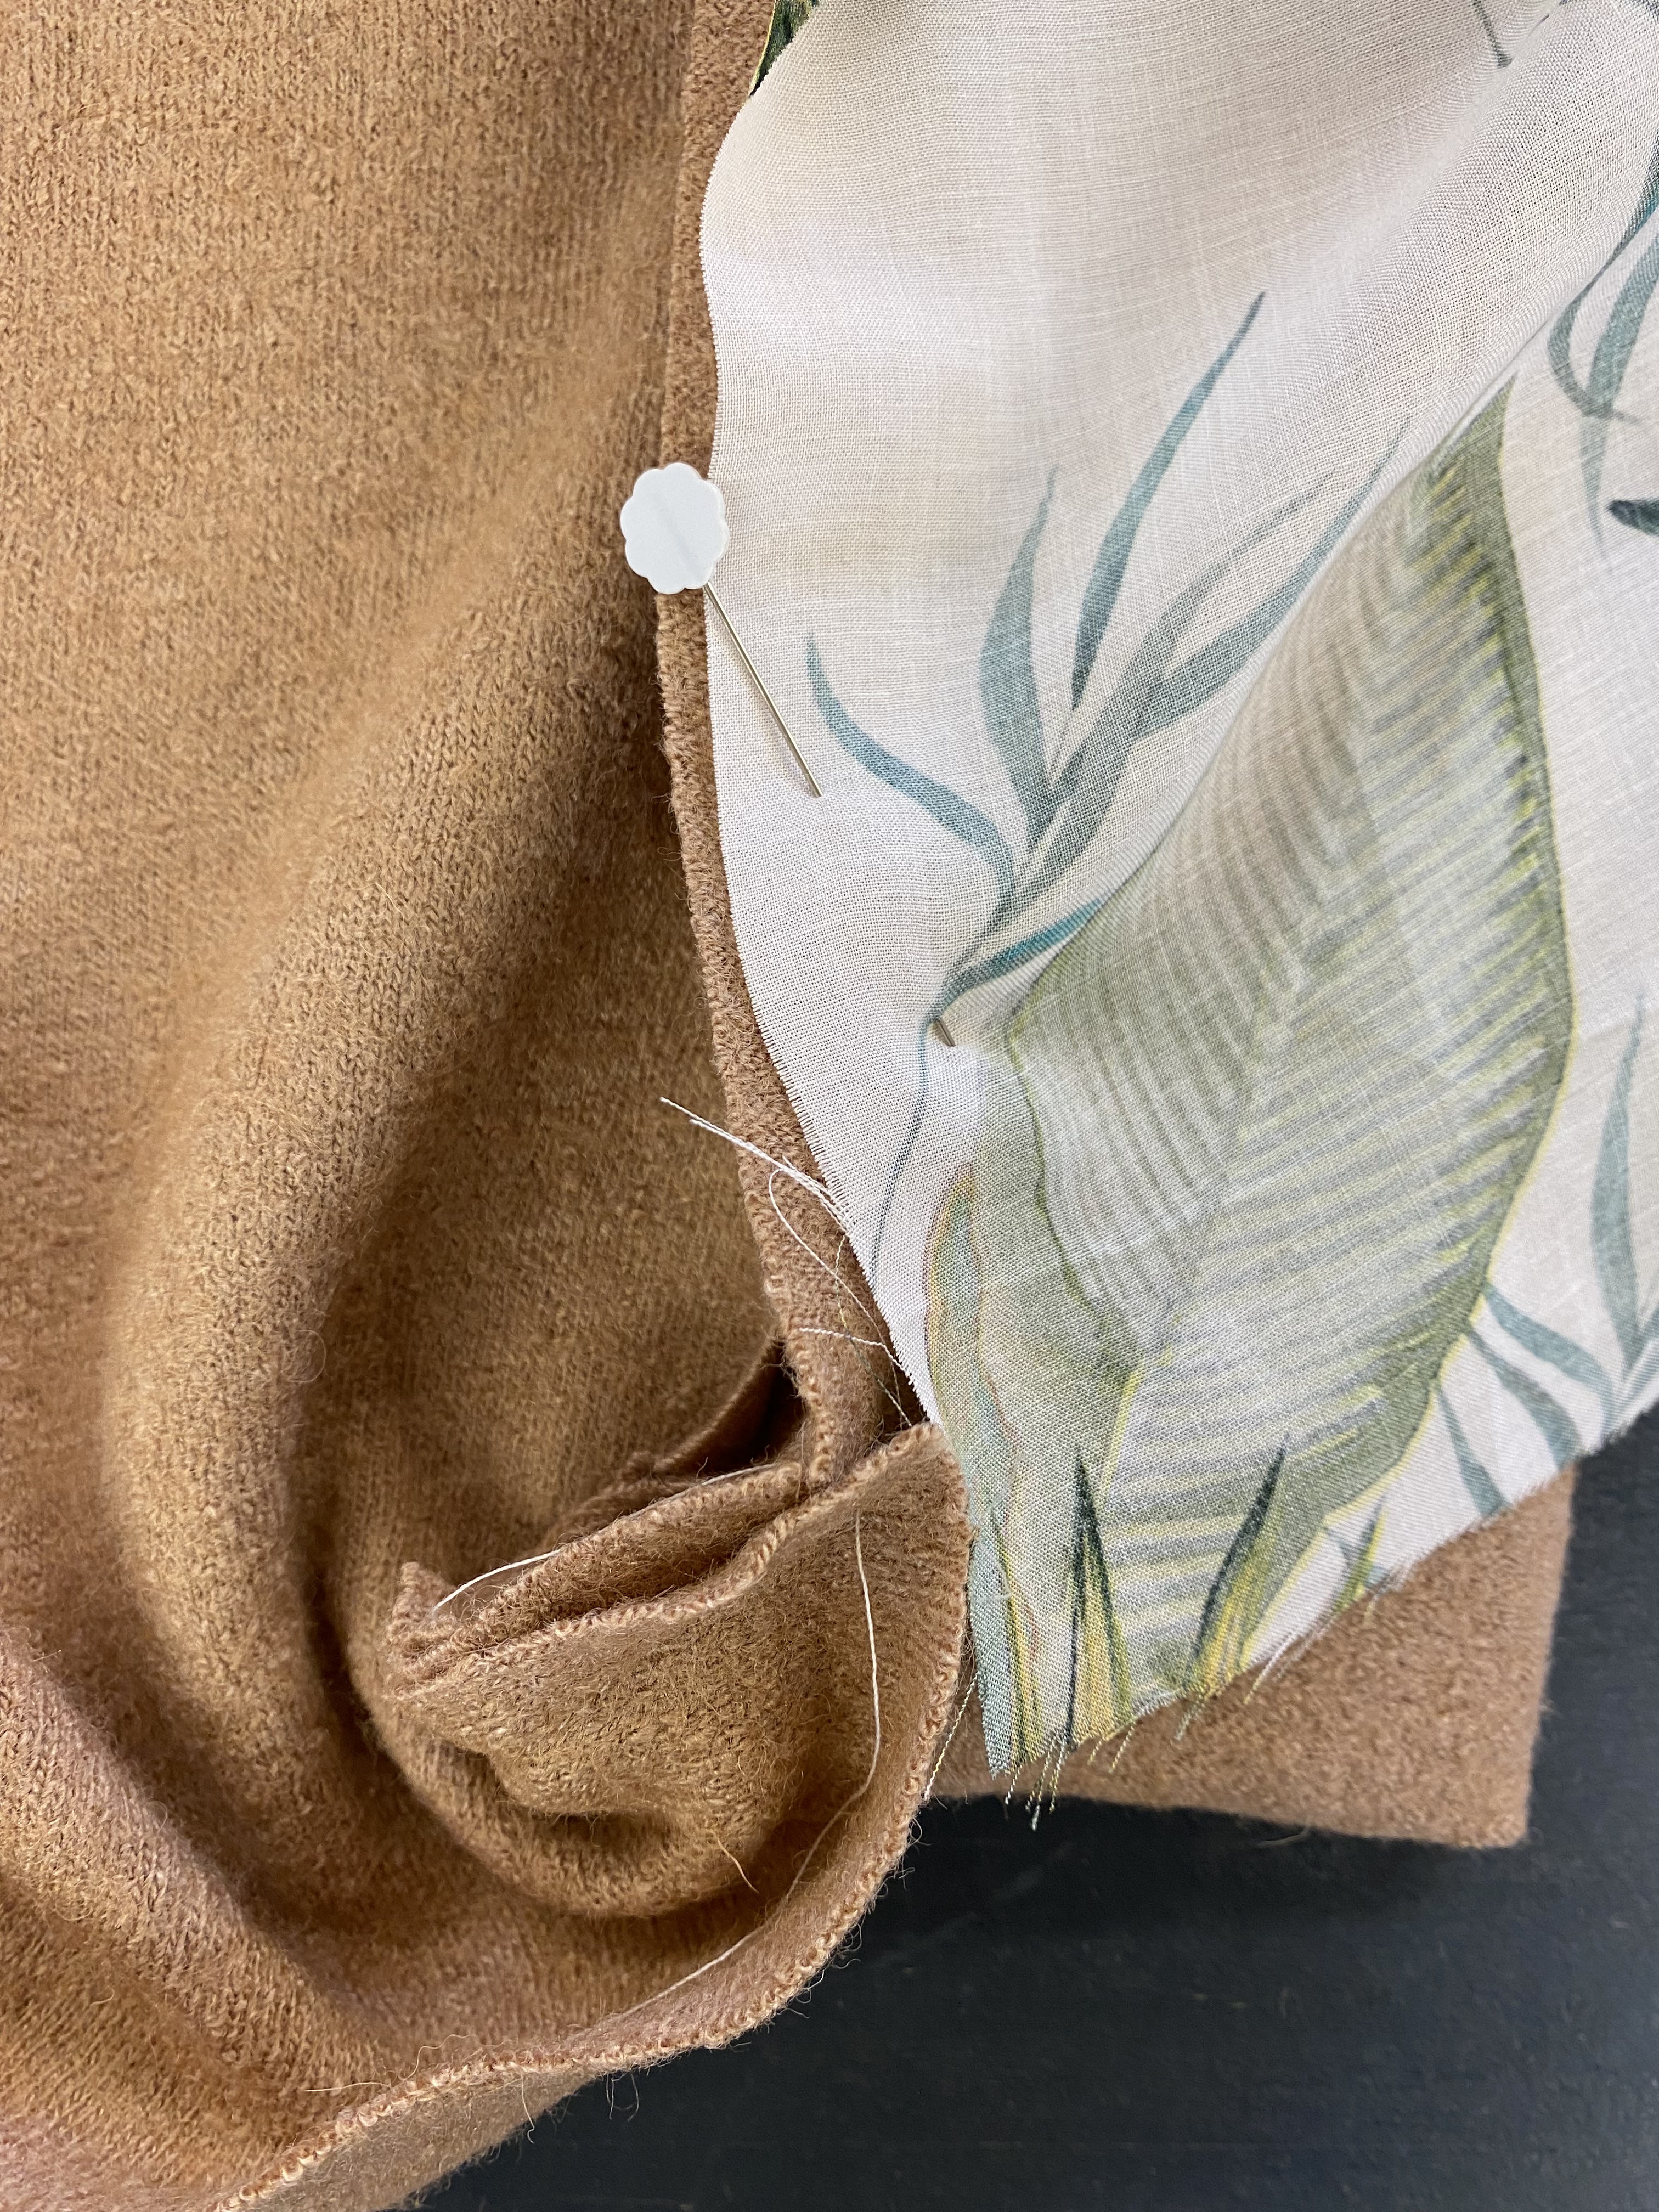
Place the garment with the wrong side facing up and the collar in the turned out position with the collar right sides out (image 1). Lay the lining right side to the unsewn collar edge and just pop a pin to hold the lining fabric in place (image 2) so that you can work on the next step (this pin is just to hold the fabrics together and not in a specific measurement to anything.
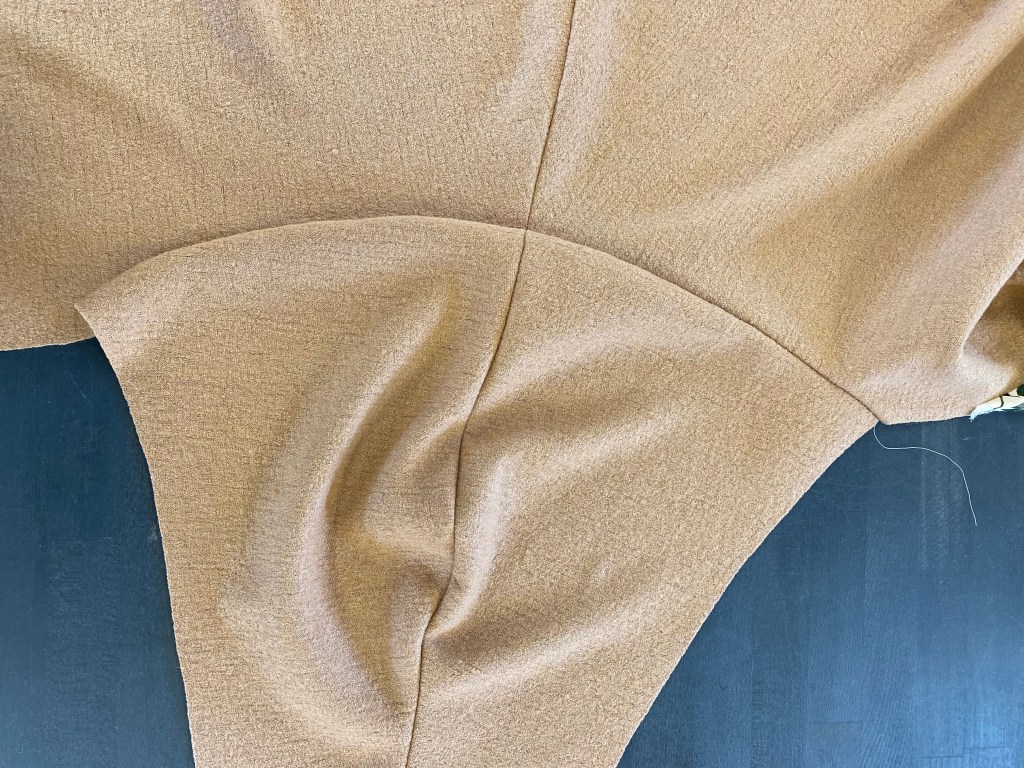
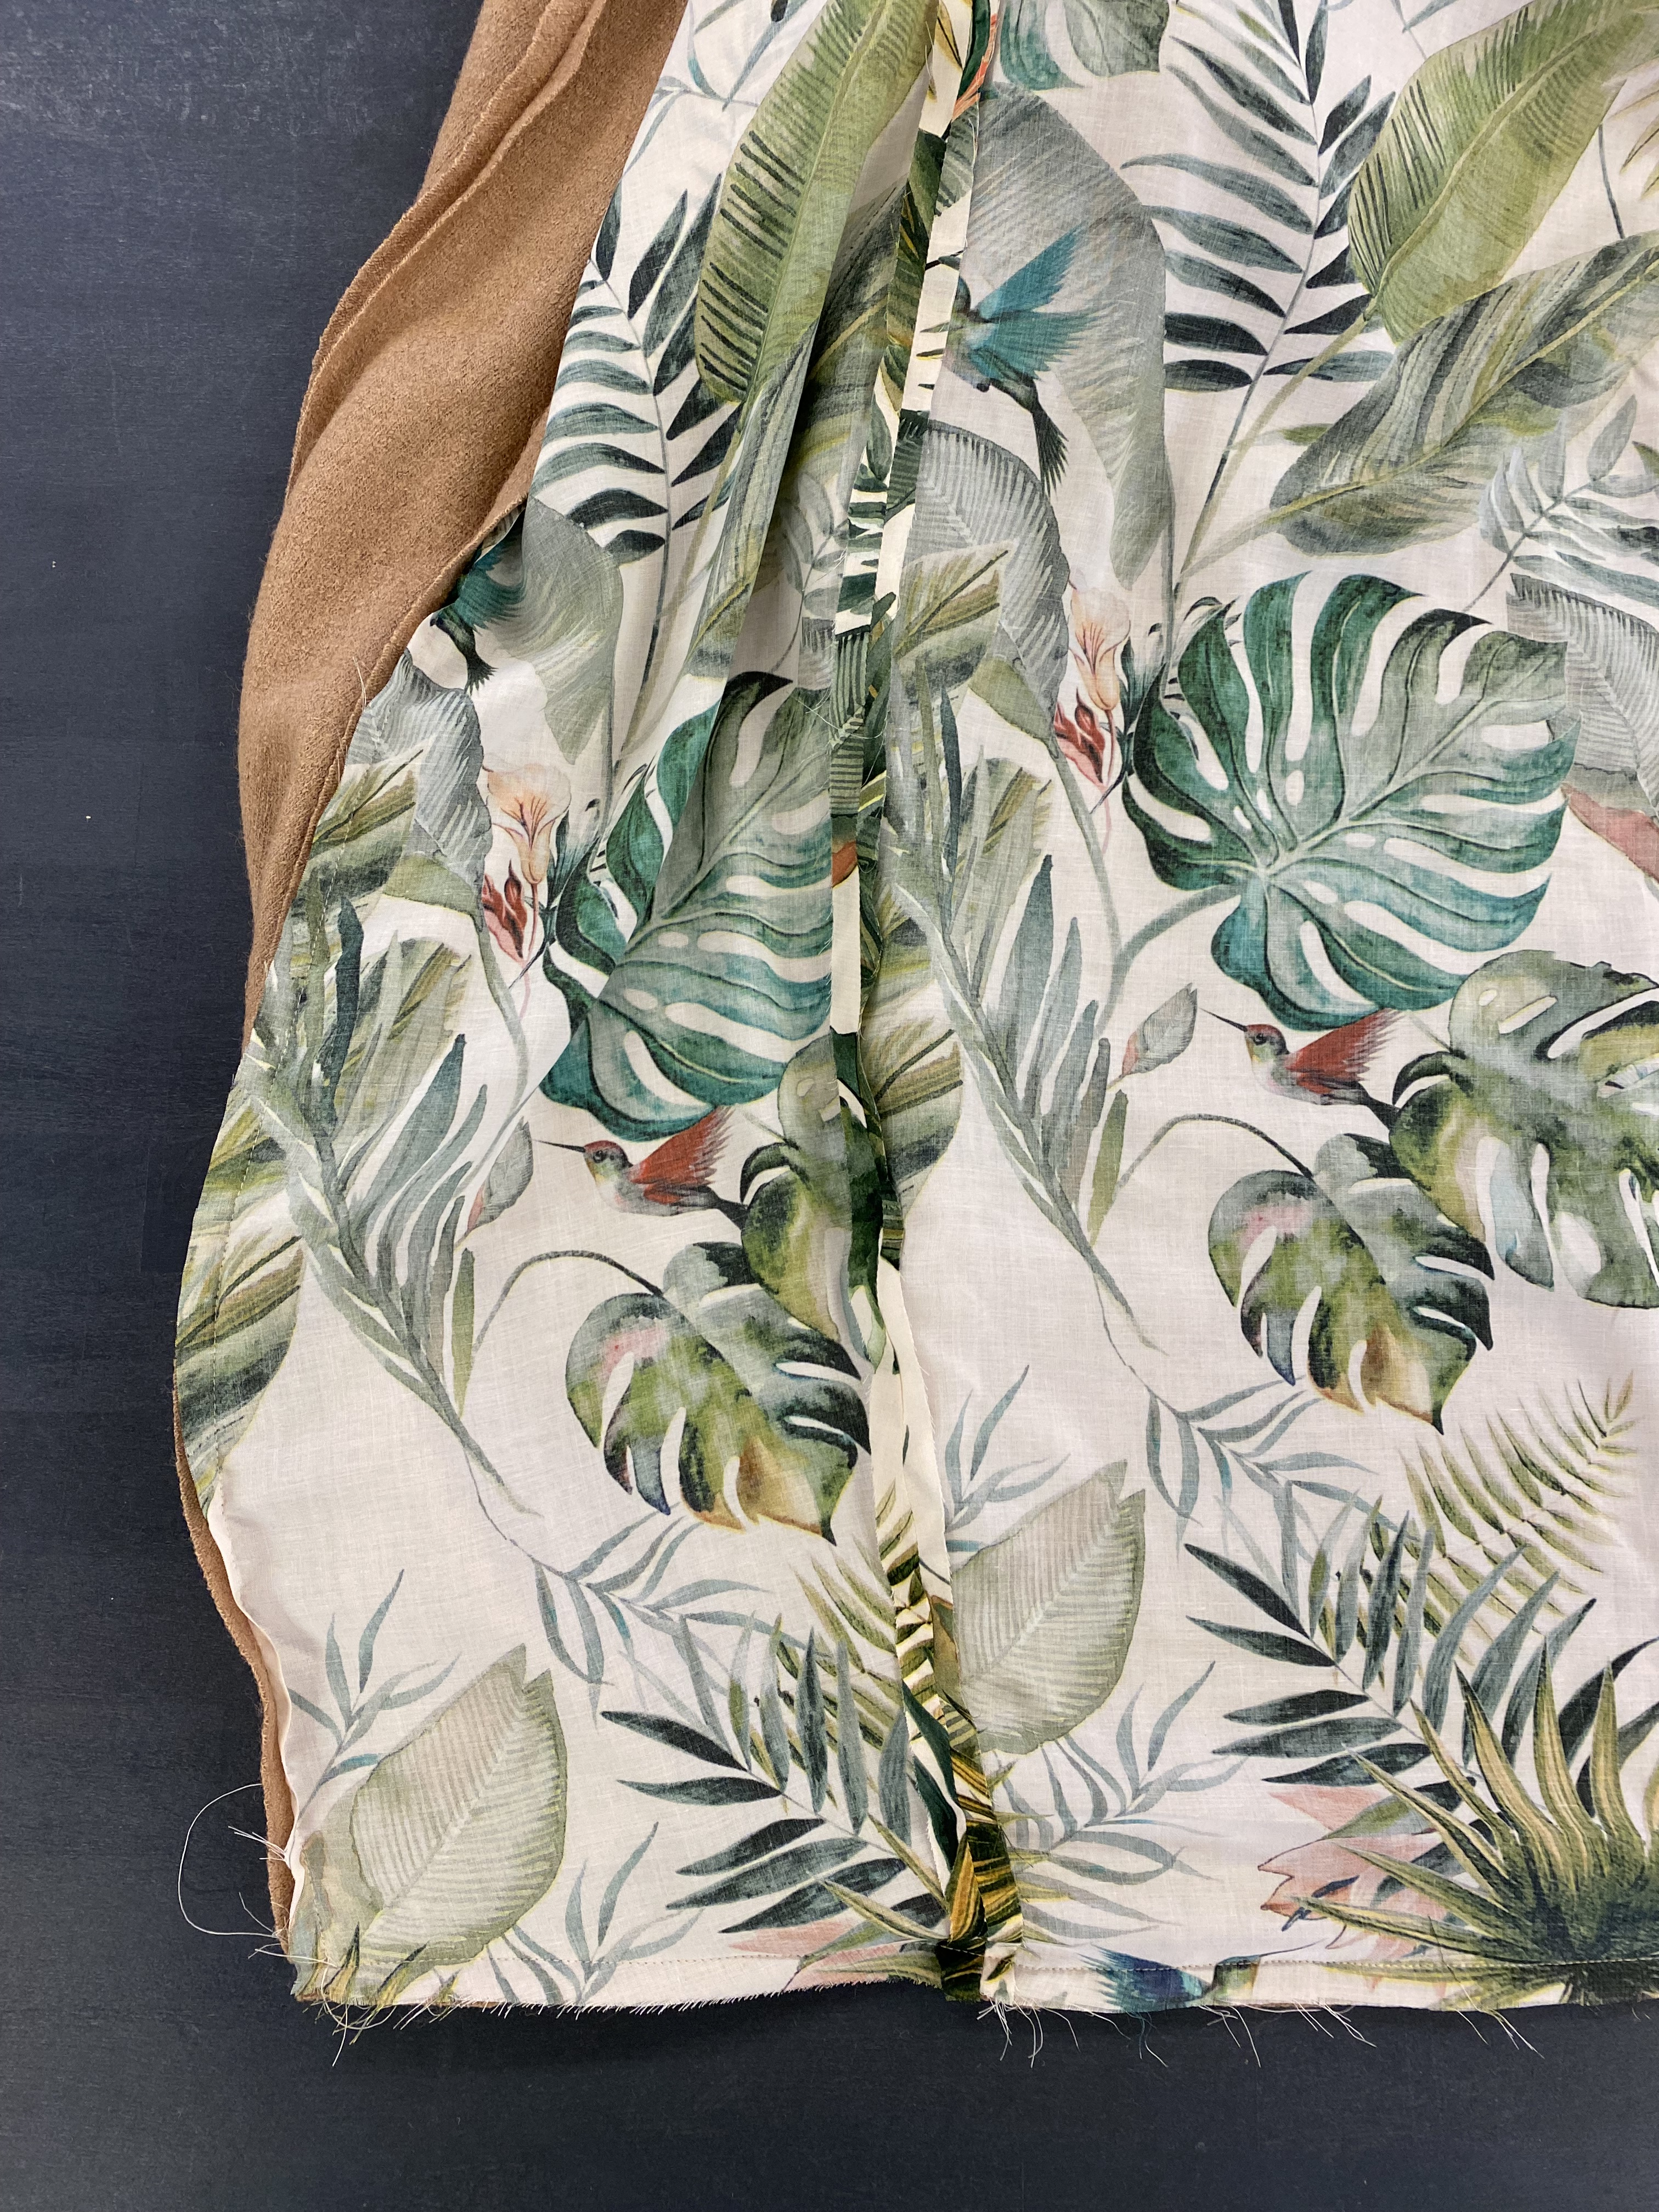
Turn out the hem so that you can see the lower section of the unsewn collar (image 3). The hem of the lining should now lie at the same position as the coat hem, with the collar sandwiched between the hems, leaving a 1cm section of fabric (image 4). Remove the pin from step 2 and line up the raw edges of the collar and lining front.


When stitching the lining to the other collar, start 1cm from the hem so that you are leaving 1cm of the lining unsewn.


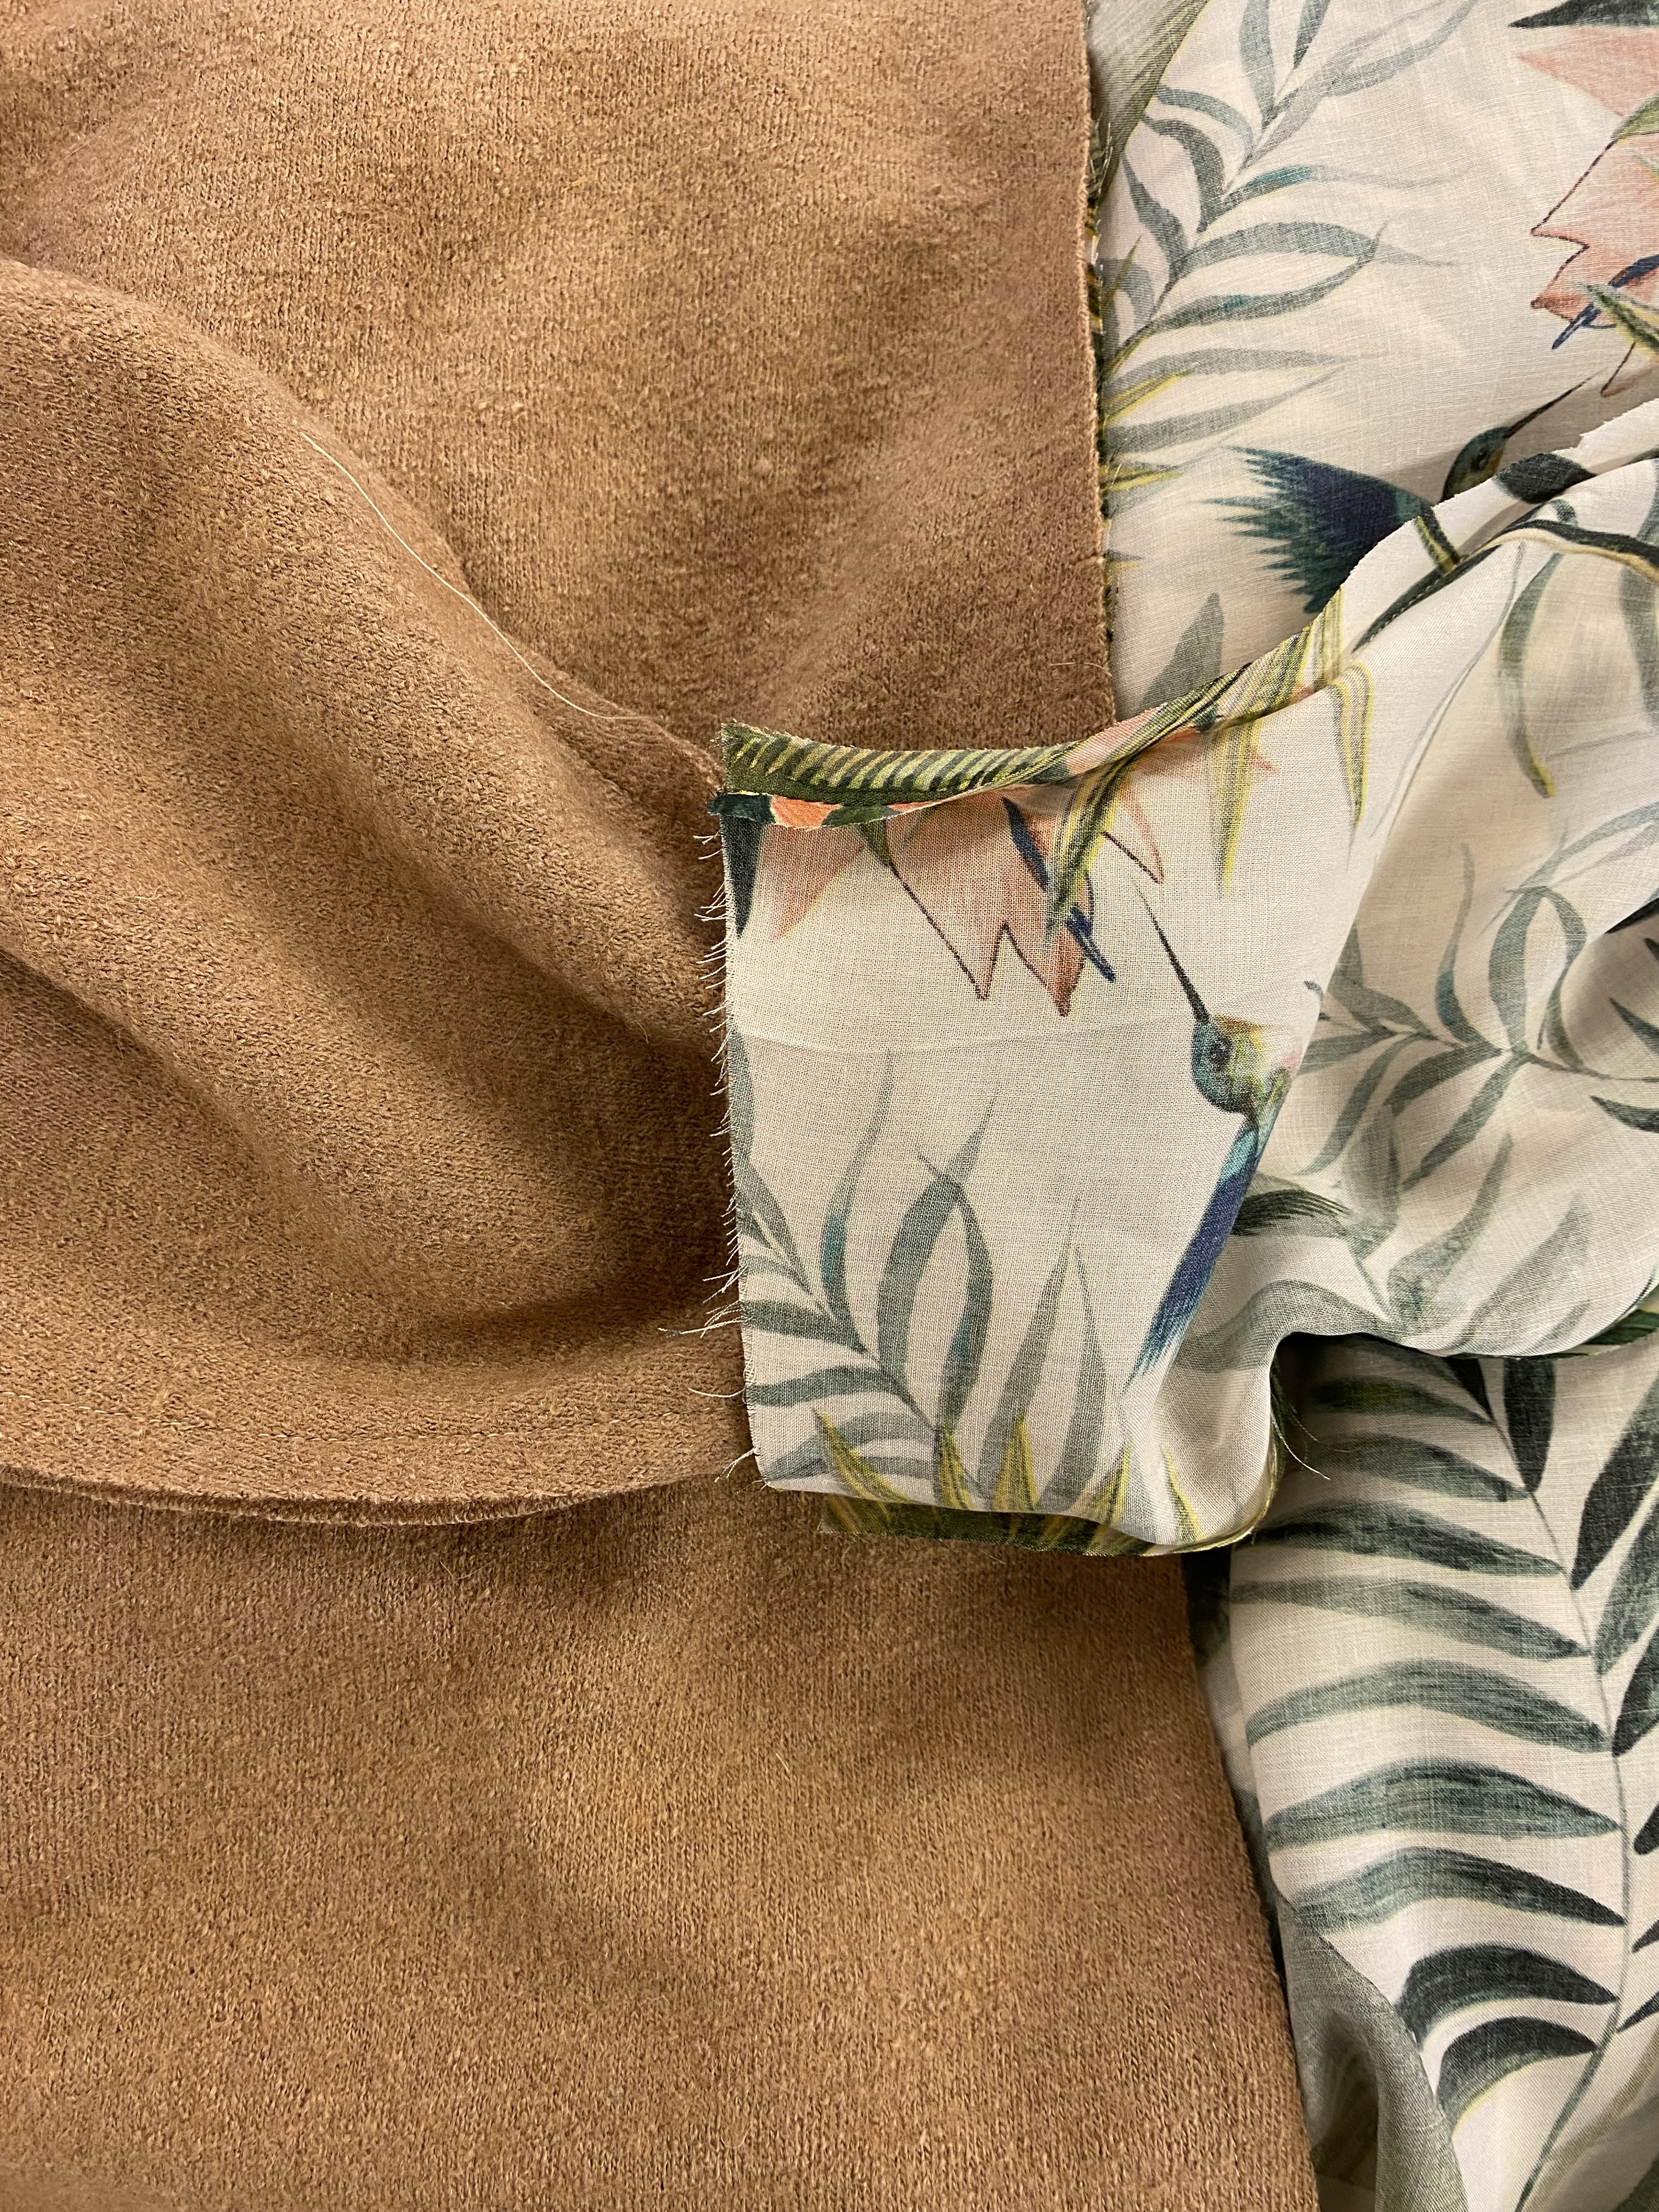
Next, it’s time to finish the hem. With the right sides of the coat shell and lining still facing each other, pin the hem, matching up seams of the lining to the main garment and keeping seam allowances open.
Sew the hem with a 0.4″/1 cm seam allowance.


SLEEVES

To sew the sleeve to the sleeve lining at the cuff, start with both sleeves inside out. Bring the sleeve shell and sleeve lining around to meet each other. With the sleeve shell’s cuff still pressed in and thereby exposing the right side of the cuff, slip the lining over, match the seams, and pin in place. Be extra careful not to twist the lining. Then stitch and repeat the process for the other sleeve.

COMPLETING THE COAT
There are two options for finishing the hem and cuffs:
OPTION 1
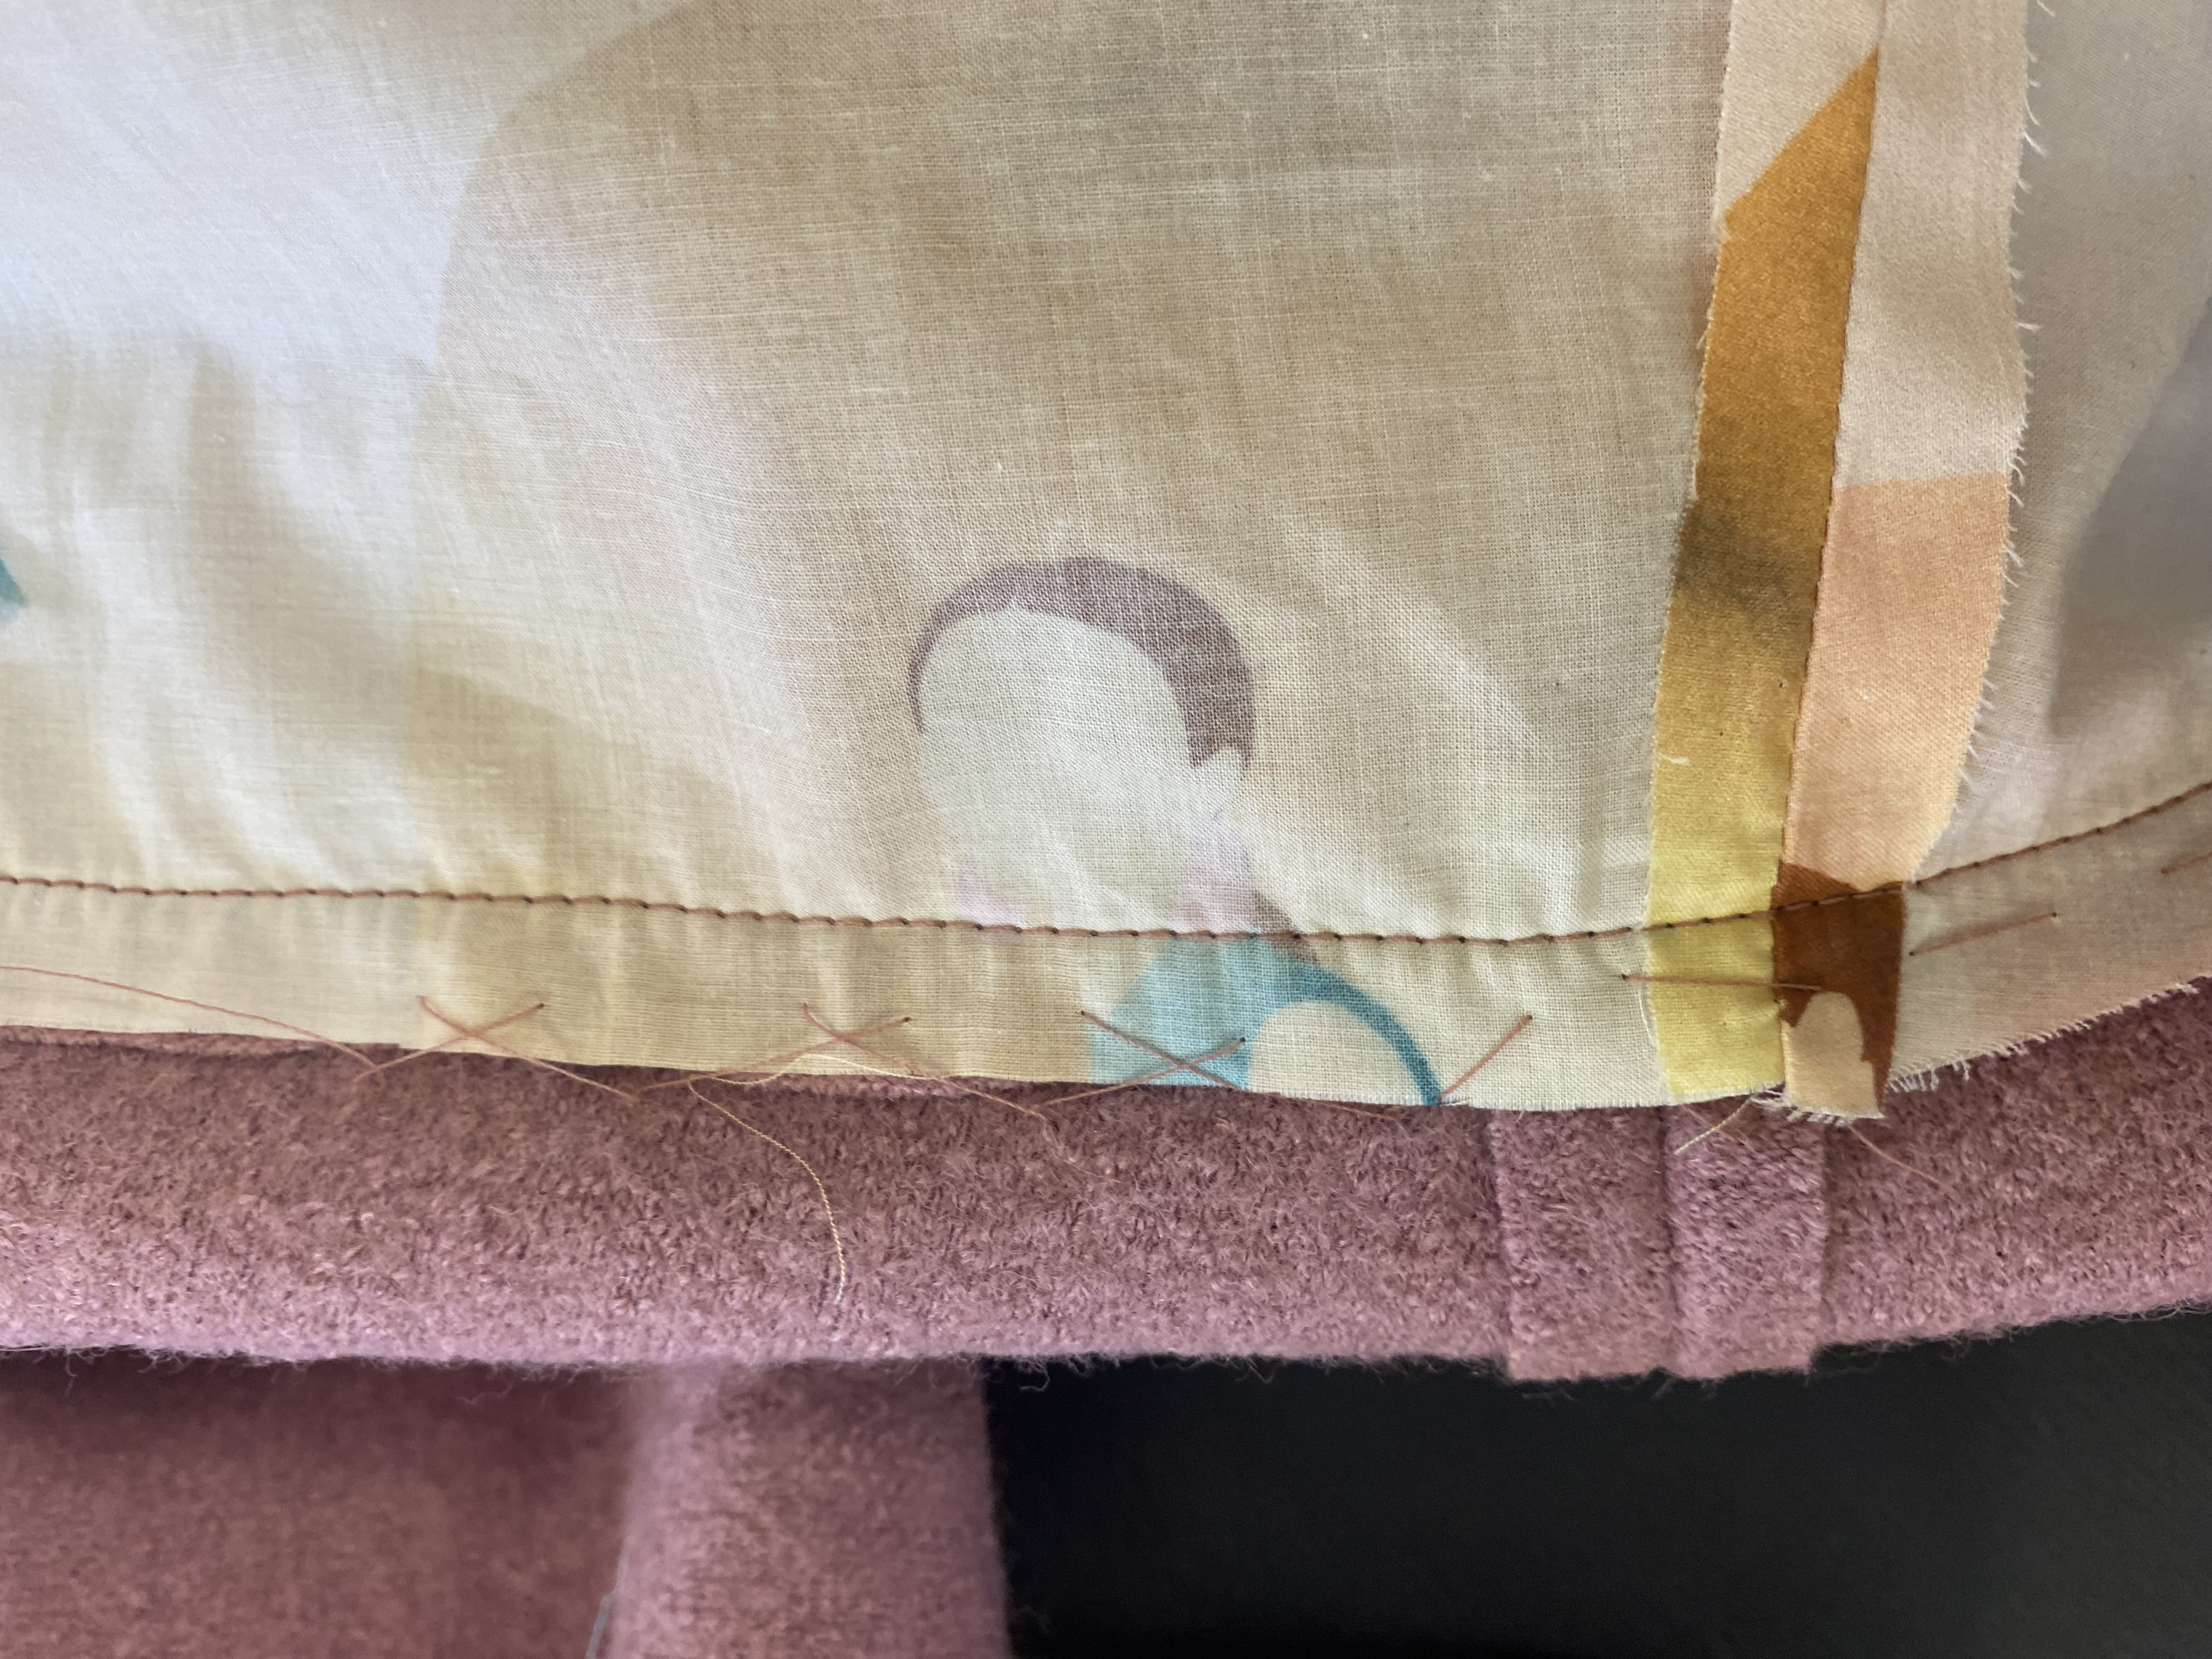
Before turning the entire coat right side out, it’s time to secure the hem and cuffs that you pressed earlier. Thread up a hand-sewing needle and, with the wrong sides of the coat shell facing each other, pin the hem along the existing pressed fold and use a catch stitch to secure.
This will keep the hems holding their lines once the coat is turned right side out. When stitching through the outer layer of fabric, be sure to work carefully so that the catch stitch is invisible from the right side of the coat. Repeat the same hand-stitching process on the cuffs.
Turn the coat to the right side through the opening in the one sleeve.

OPTION 2
This option is good if the pressed hem isn’t concise or you are working with a fabric that doesn’t hold a pressed edge well. Turn the garment to the right side through the opening in the one sleeve. Lay the hem turned up on the previous pressed line or repress the hem (if you are working with a fabric that doesn’t hold the press use pins to hold the hem in place). Using a hand stitch, create tacks to hold the layers together ensuring they aren’t visible from the right side.
Final steps..
Check that the corners are nice and neat.
Close the sleeve opening by pressing both the lining and shell in and either slip stitching by hand or stitching close the edge with a sewing machine. Give your entire coat a good press. Congratulations, you’re done!
We’d love to see your gorgeous creation. Don’t forget to tag us @theavidseamstress #TheAvidSeamstress #WimborneCoat #TheWimborneCoat #TaukoMagazine

