
Before you begin making any alterations to the pattern, select the Jumpset size you’ll be making. The pattern Pieces which will need altering are A Top Front, C Back and D Front Neck Facing. We suggest tracing the pieces so that you still have the master copy.

The measurement you’ll need to shorten the bodice of the Jumpset is the Centre Back Length. Measure from the Shoulder Neck Point to Waist as shown on the mannequin.

Compare your personal Centre Back Length Measurement to that on the size chart for your selected size. The difference in these two numbers is the amount you need to remove from the Jumpset bodice. In our example we are shortening by 3cm.

Follow these steps to shorten the bodice:
TOP FRONT A
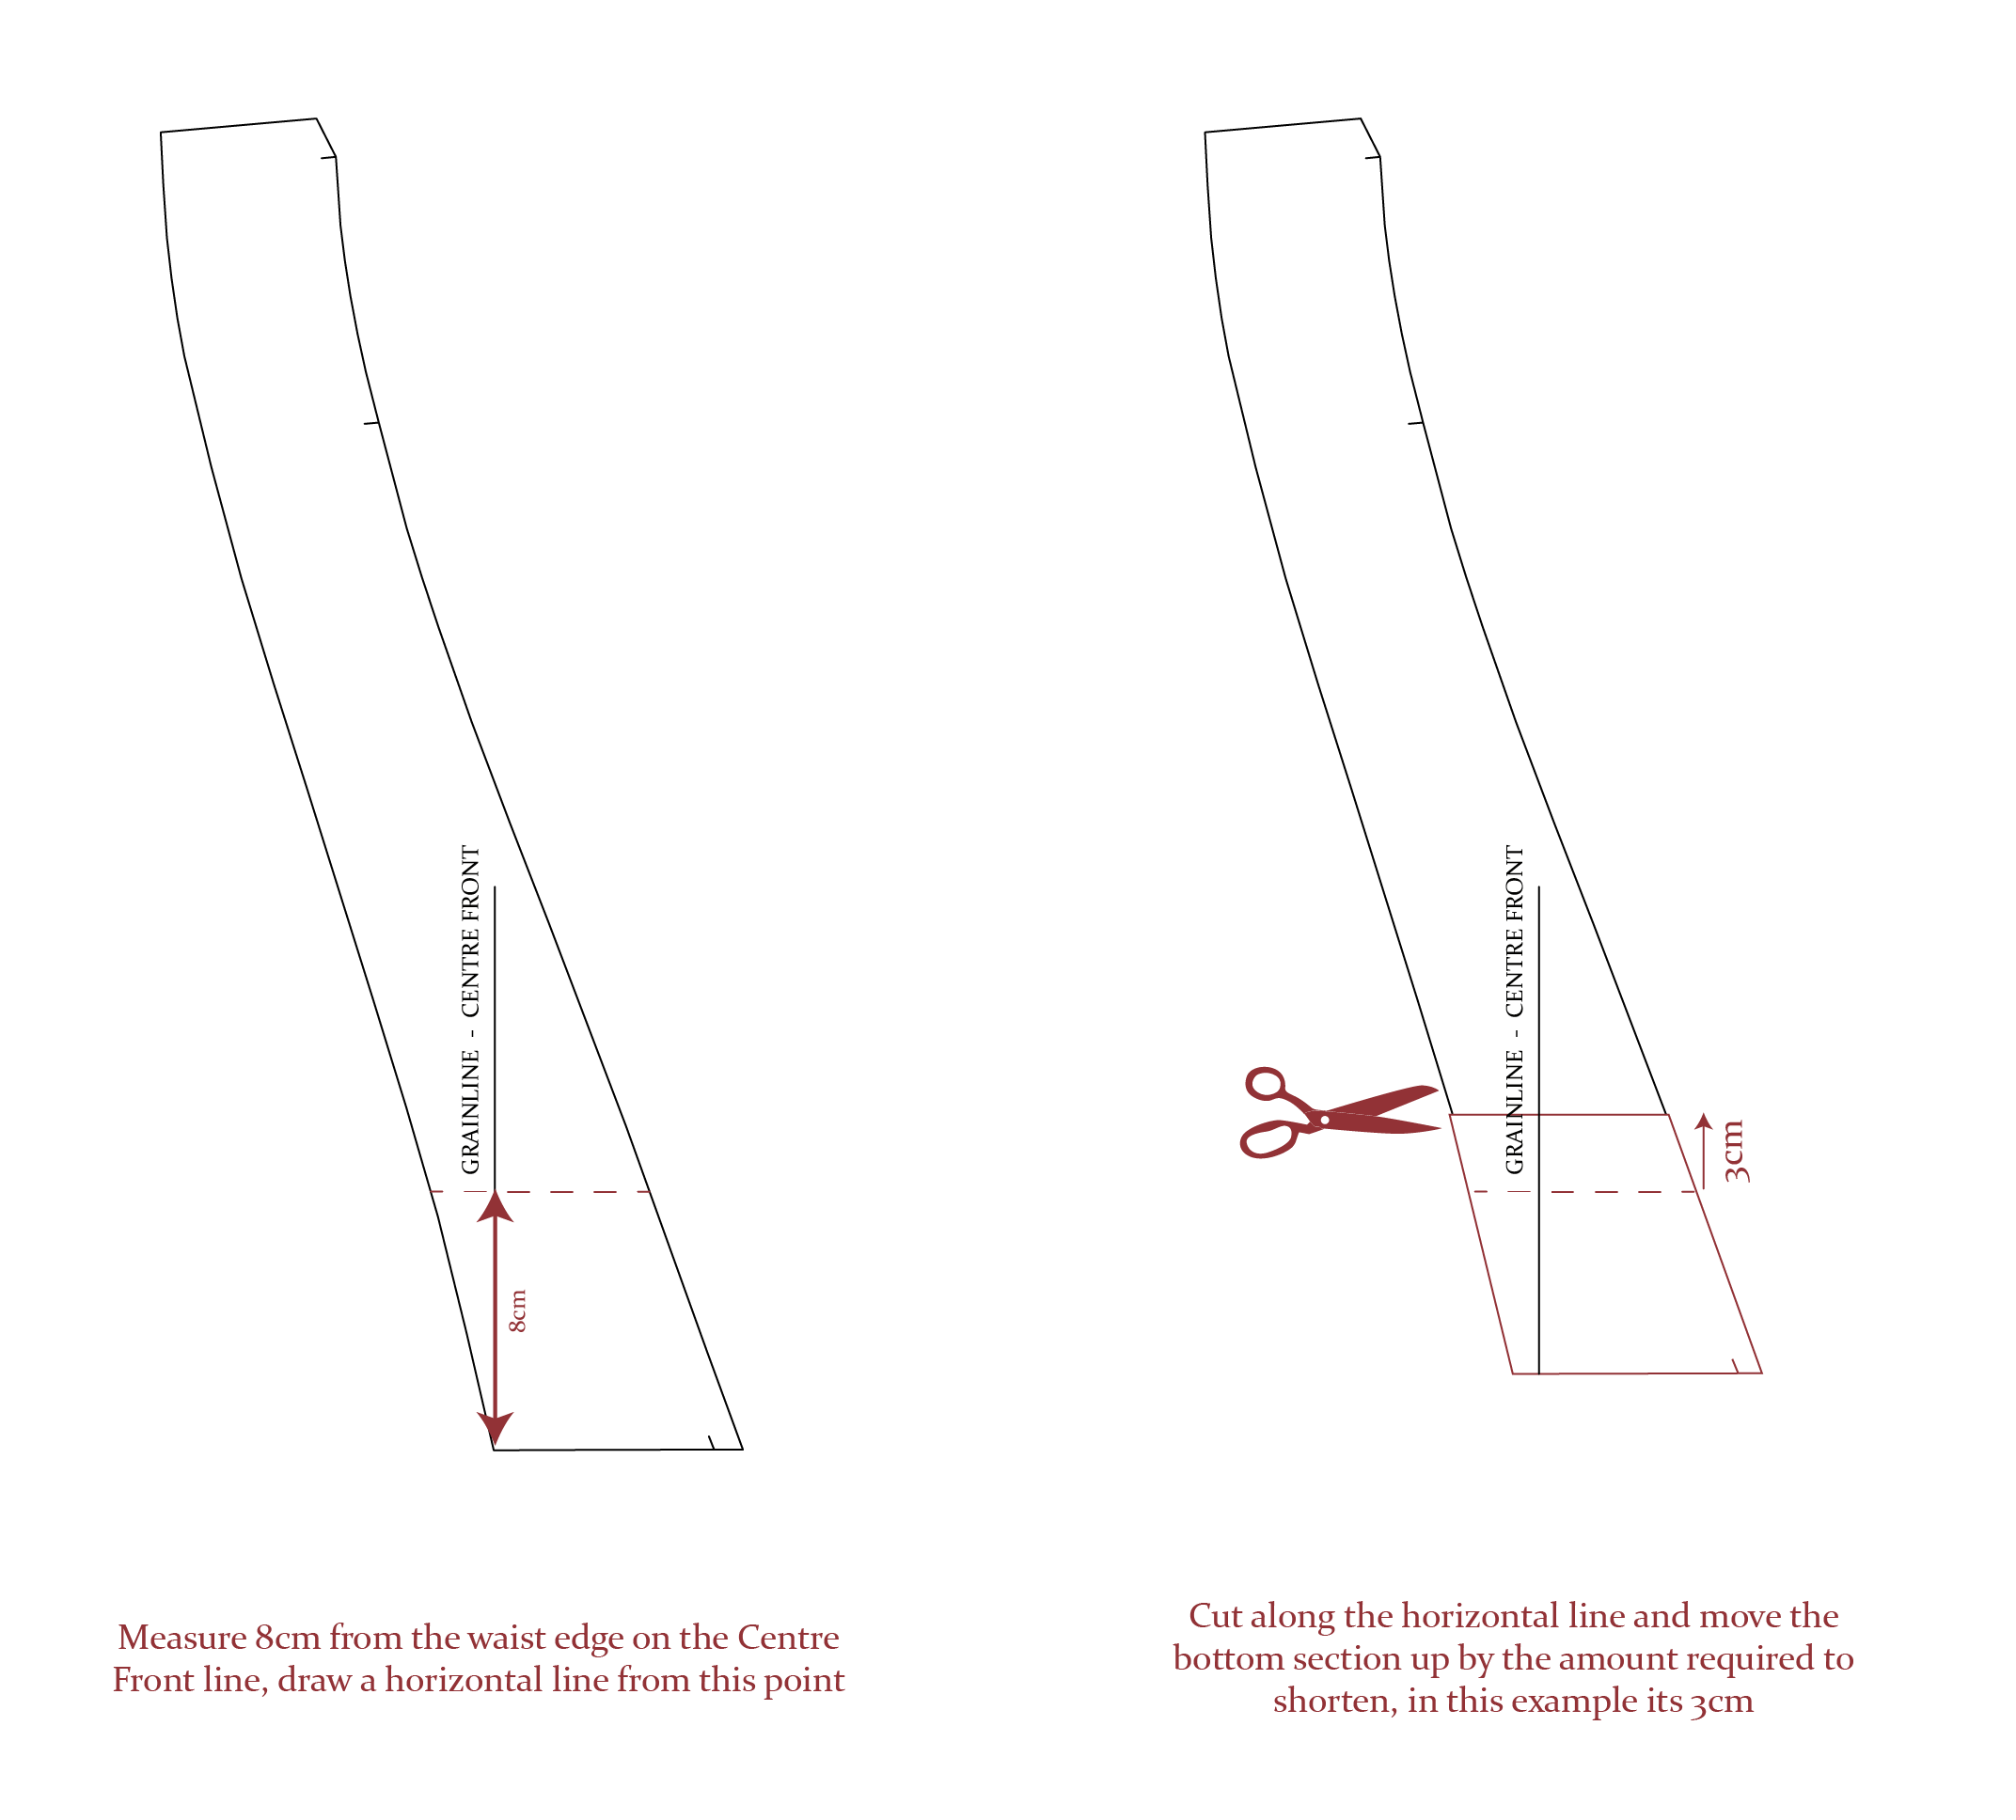
Measure 8cm from the waist edge of pattern piece A Top Front. Draw a horizontal line from this point all the way across the pattern piece.
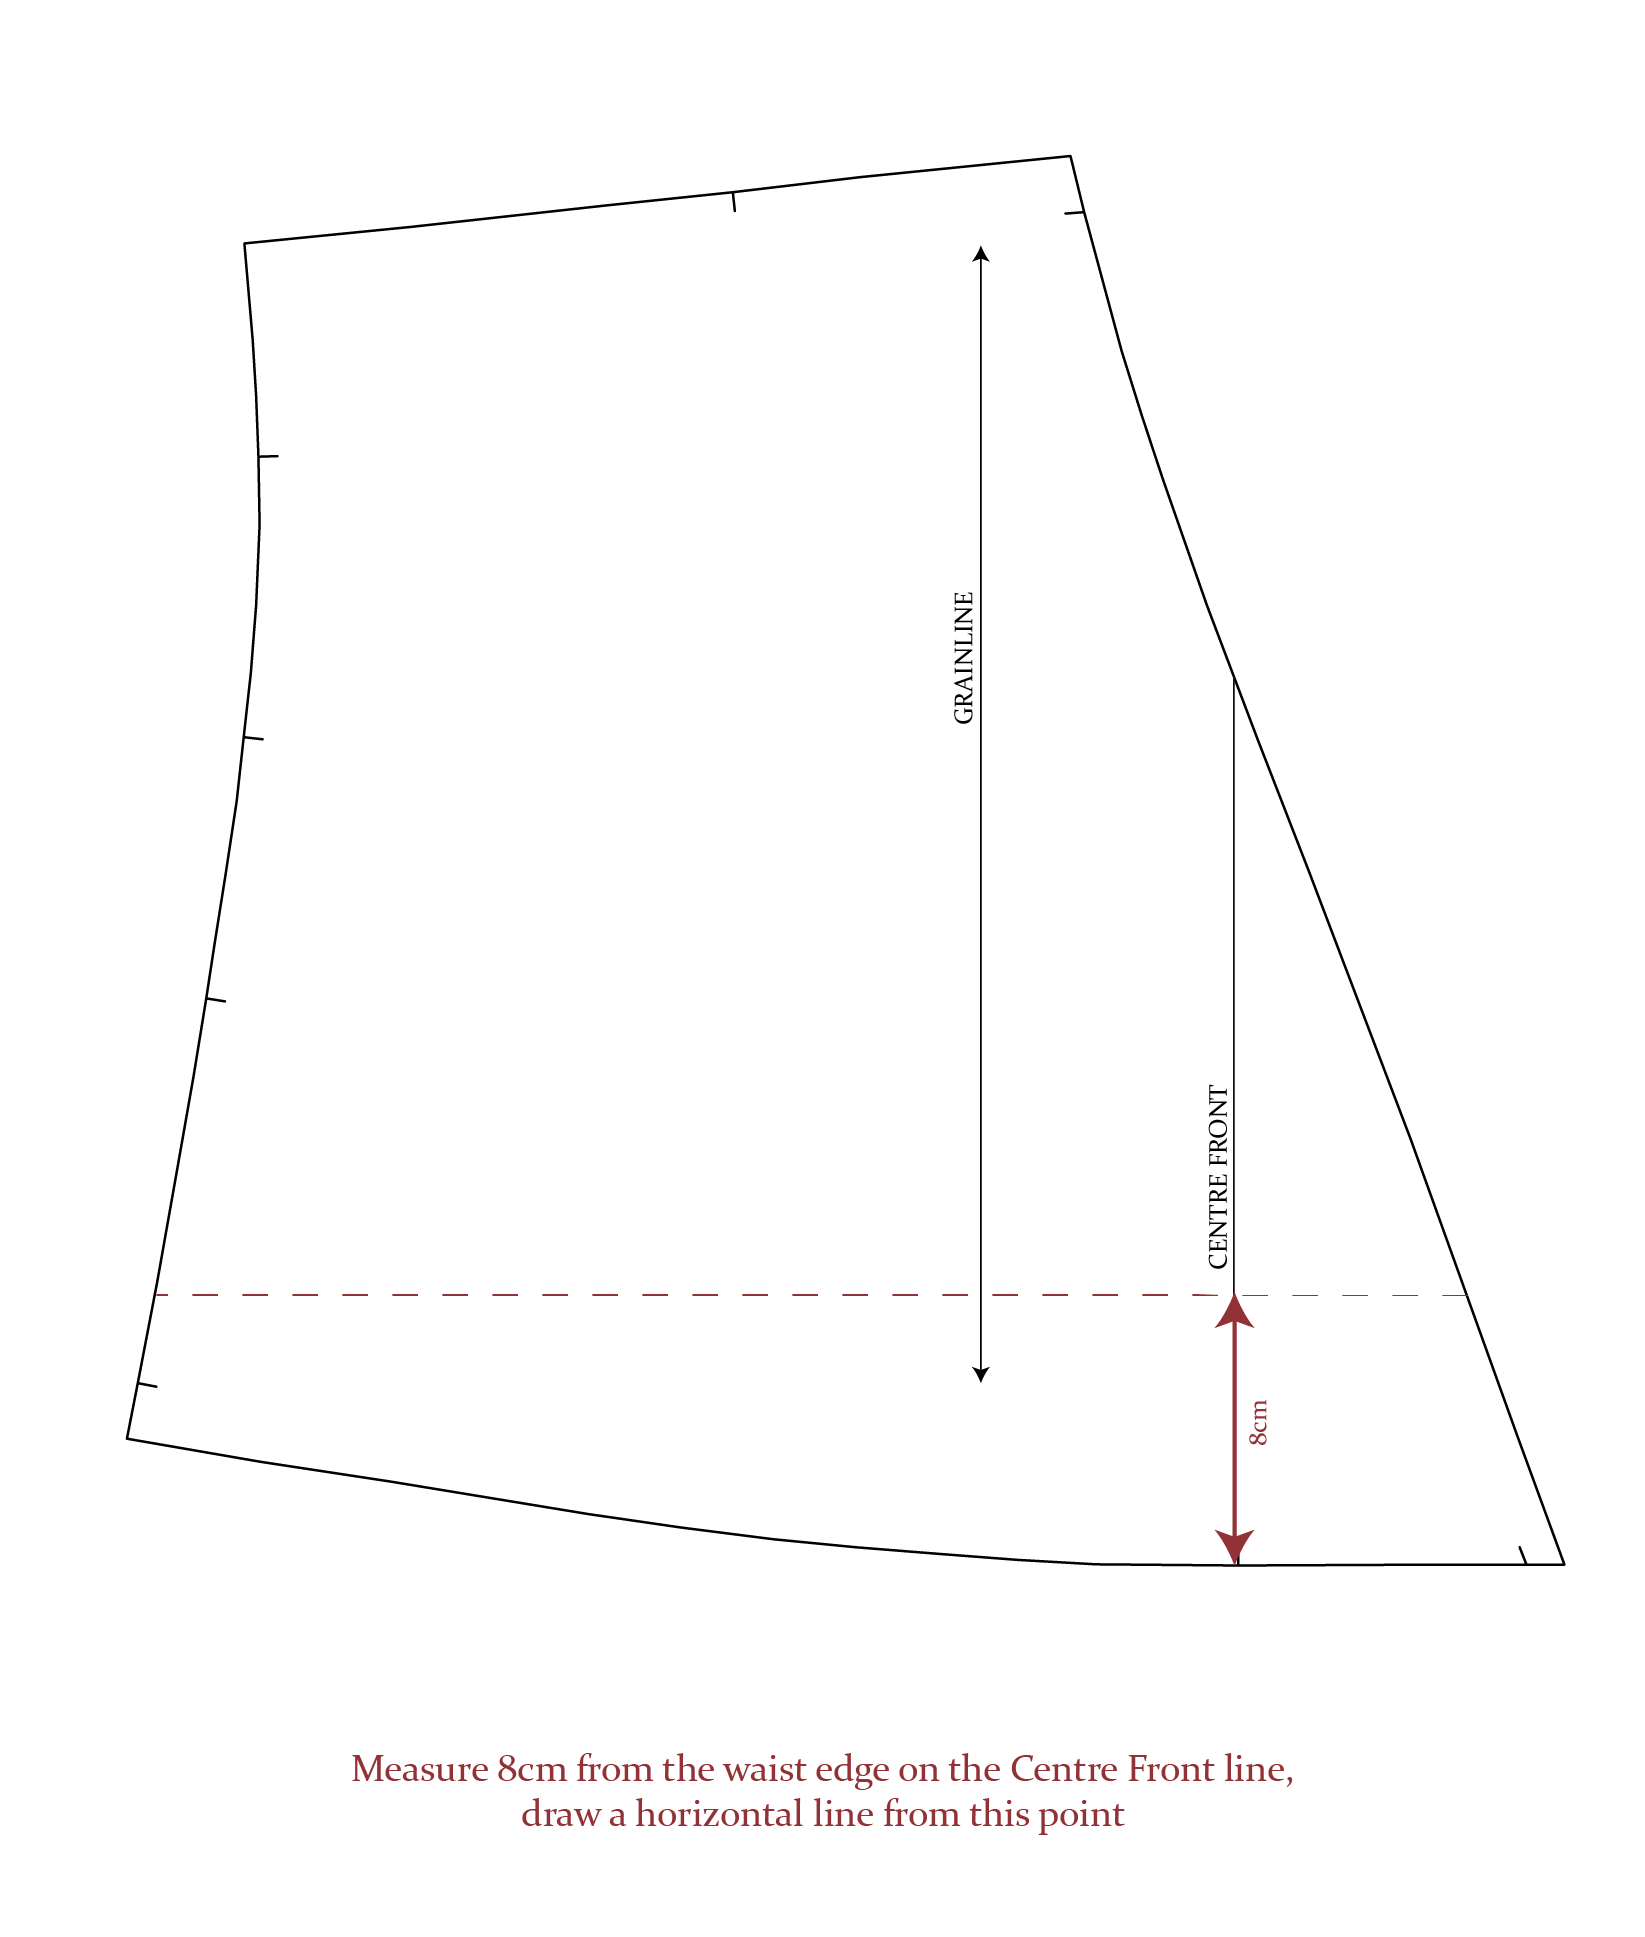
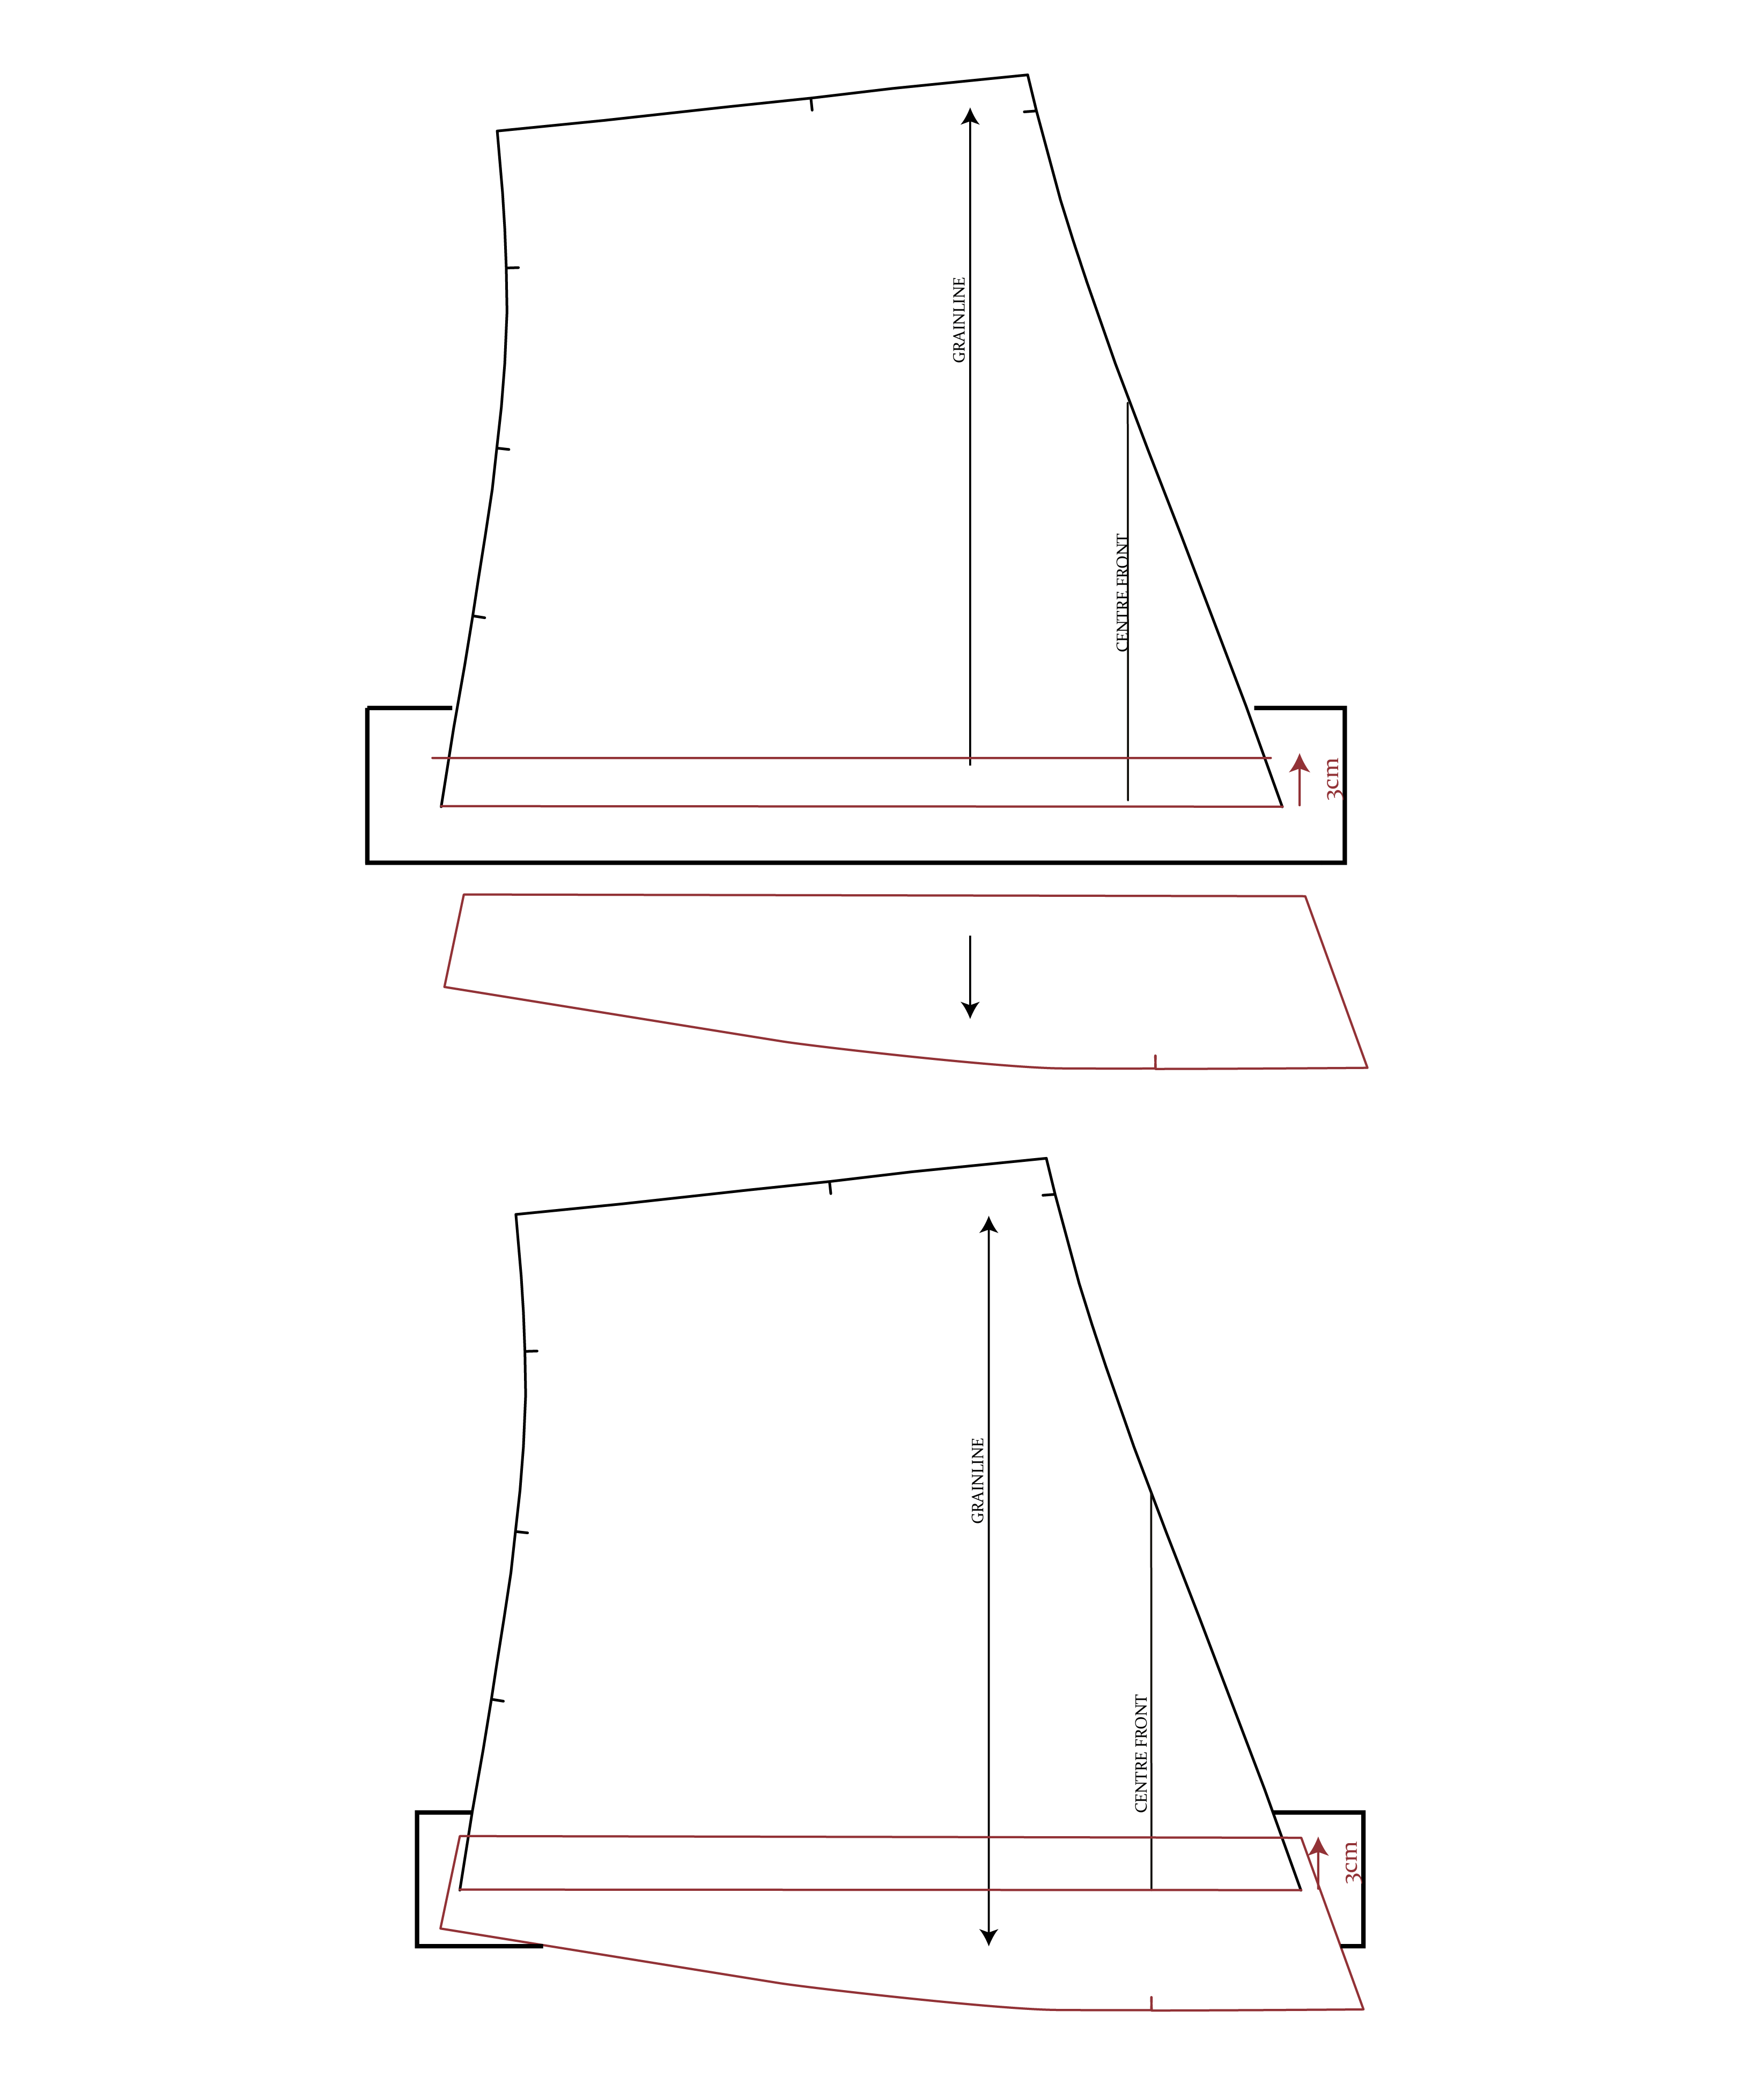
Cut along this horizontal line.

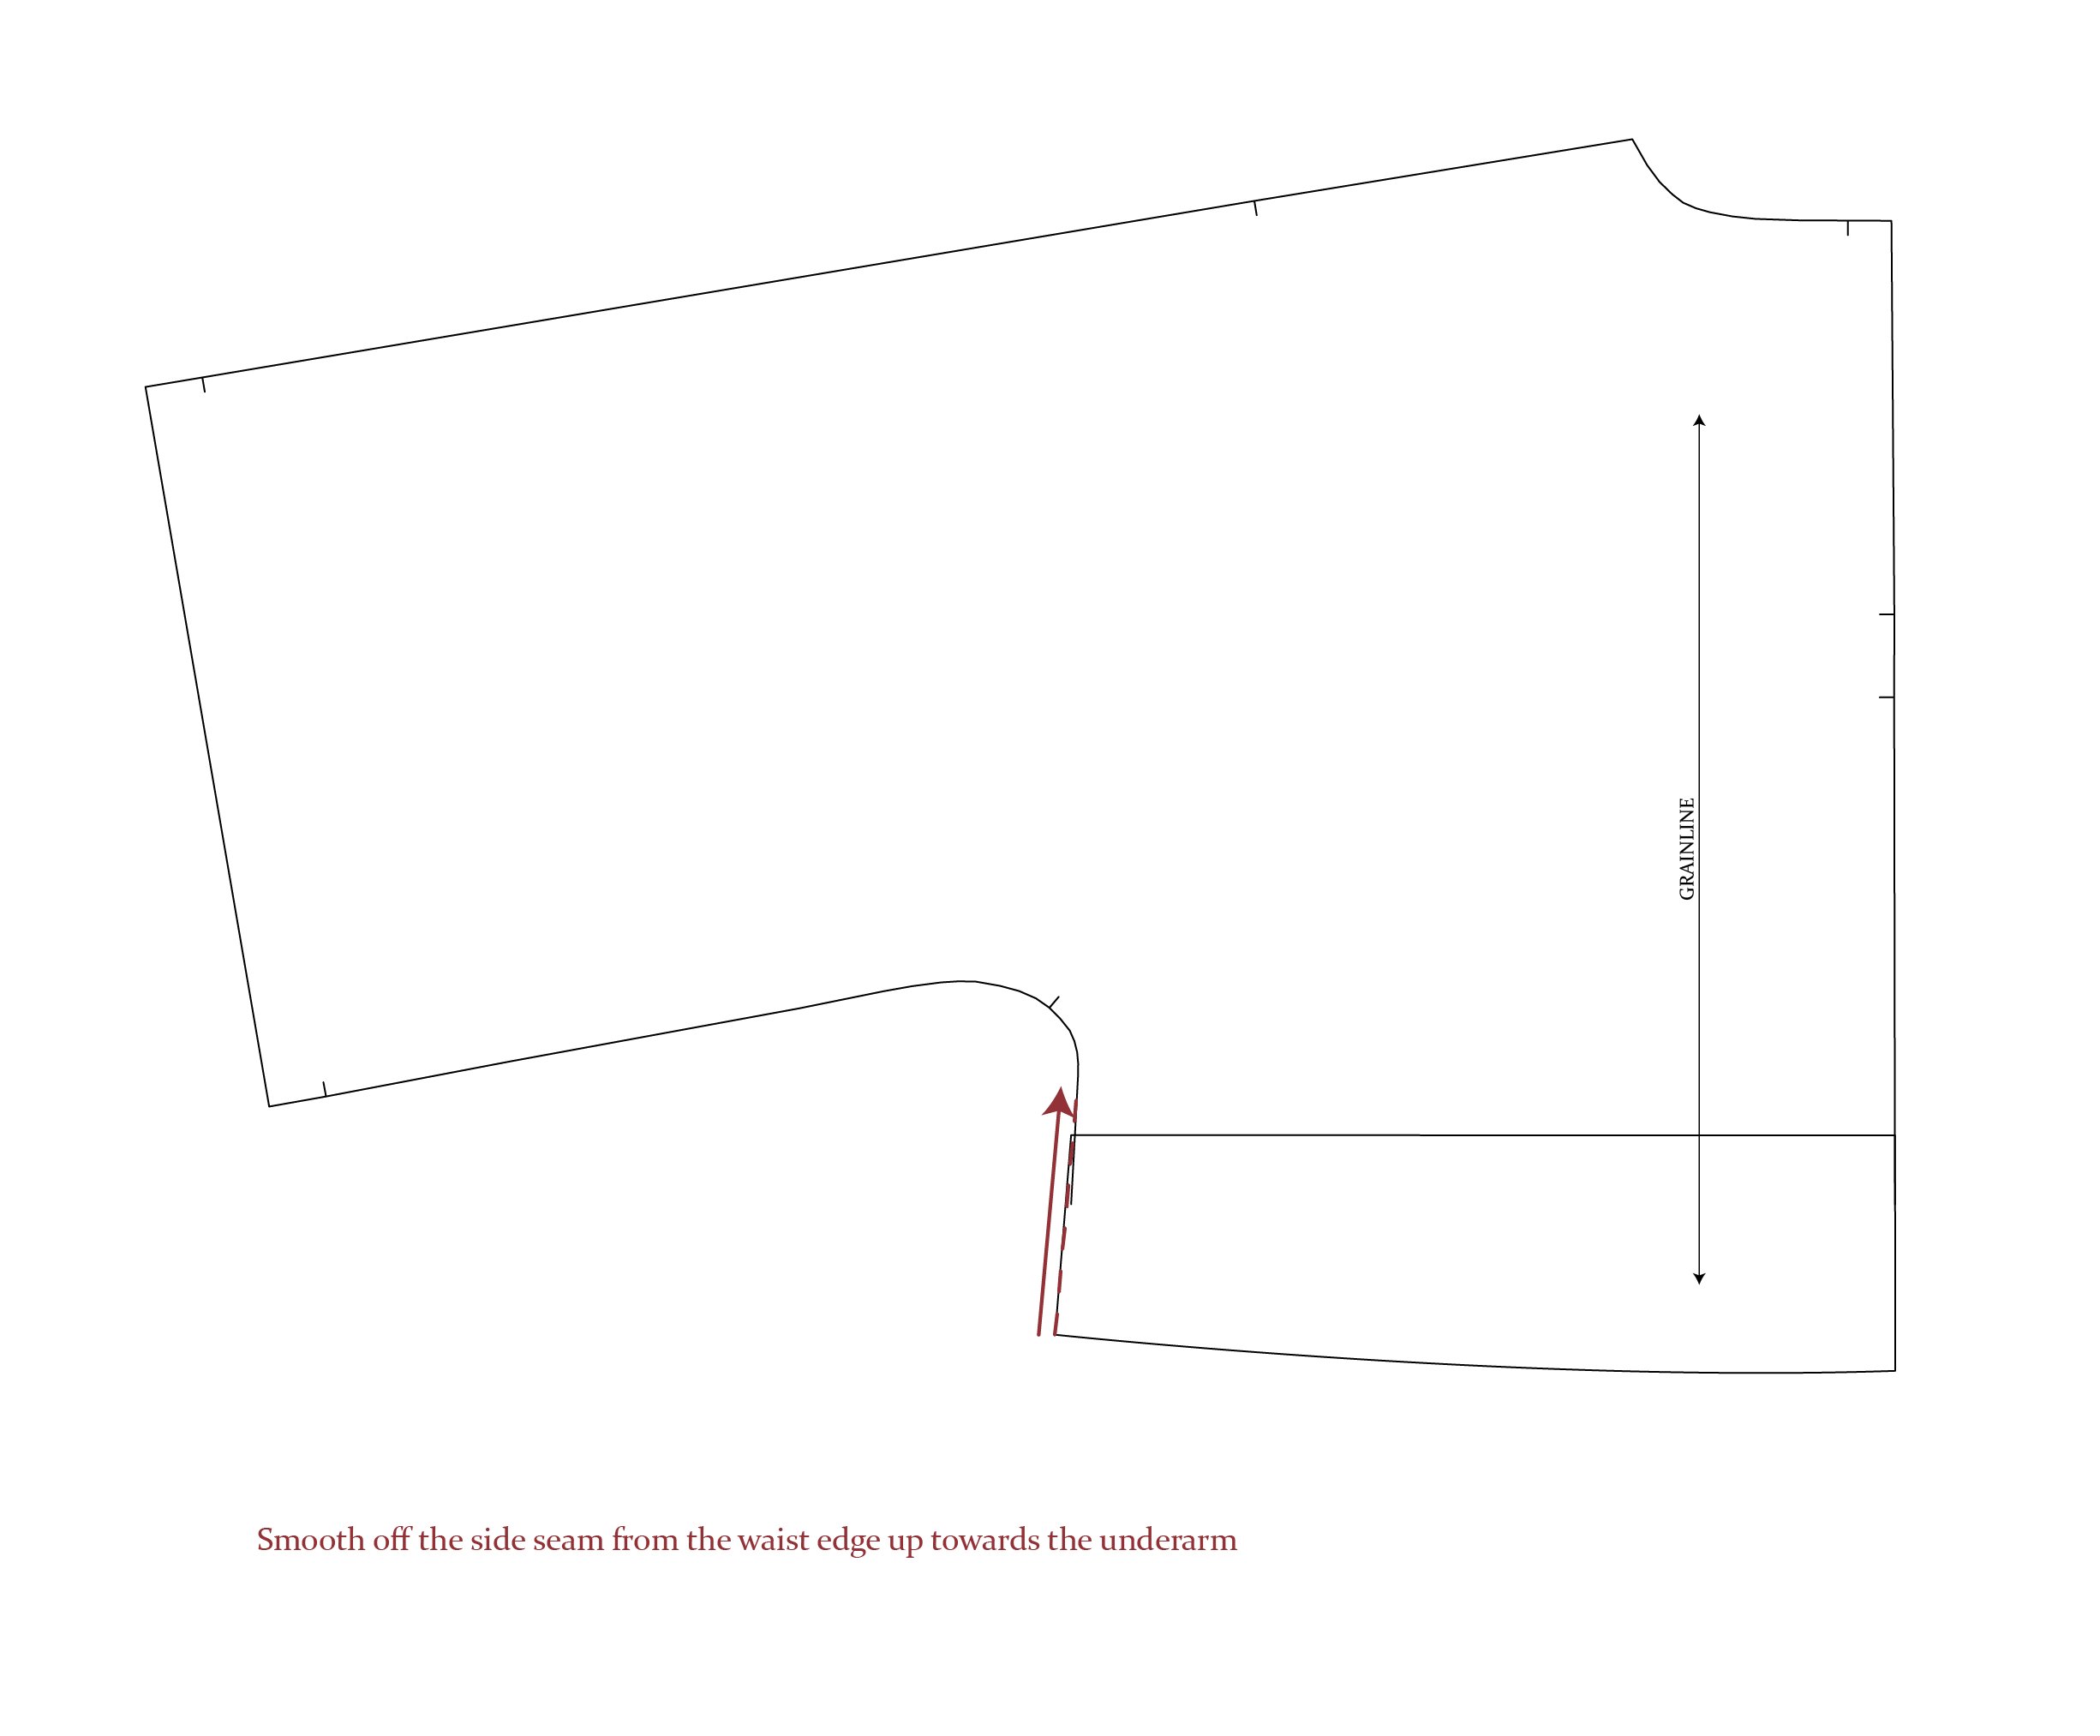
Tape a sheet of paper behind the upper pattern piece. Draw a horizontal line 3cm from the cut edge. Tape/glue the lower piece along this horizontal line, lining up the centre front lines.
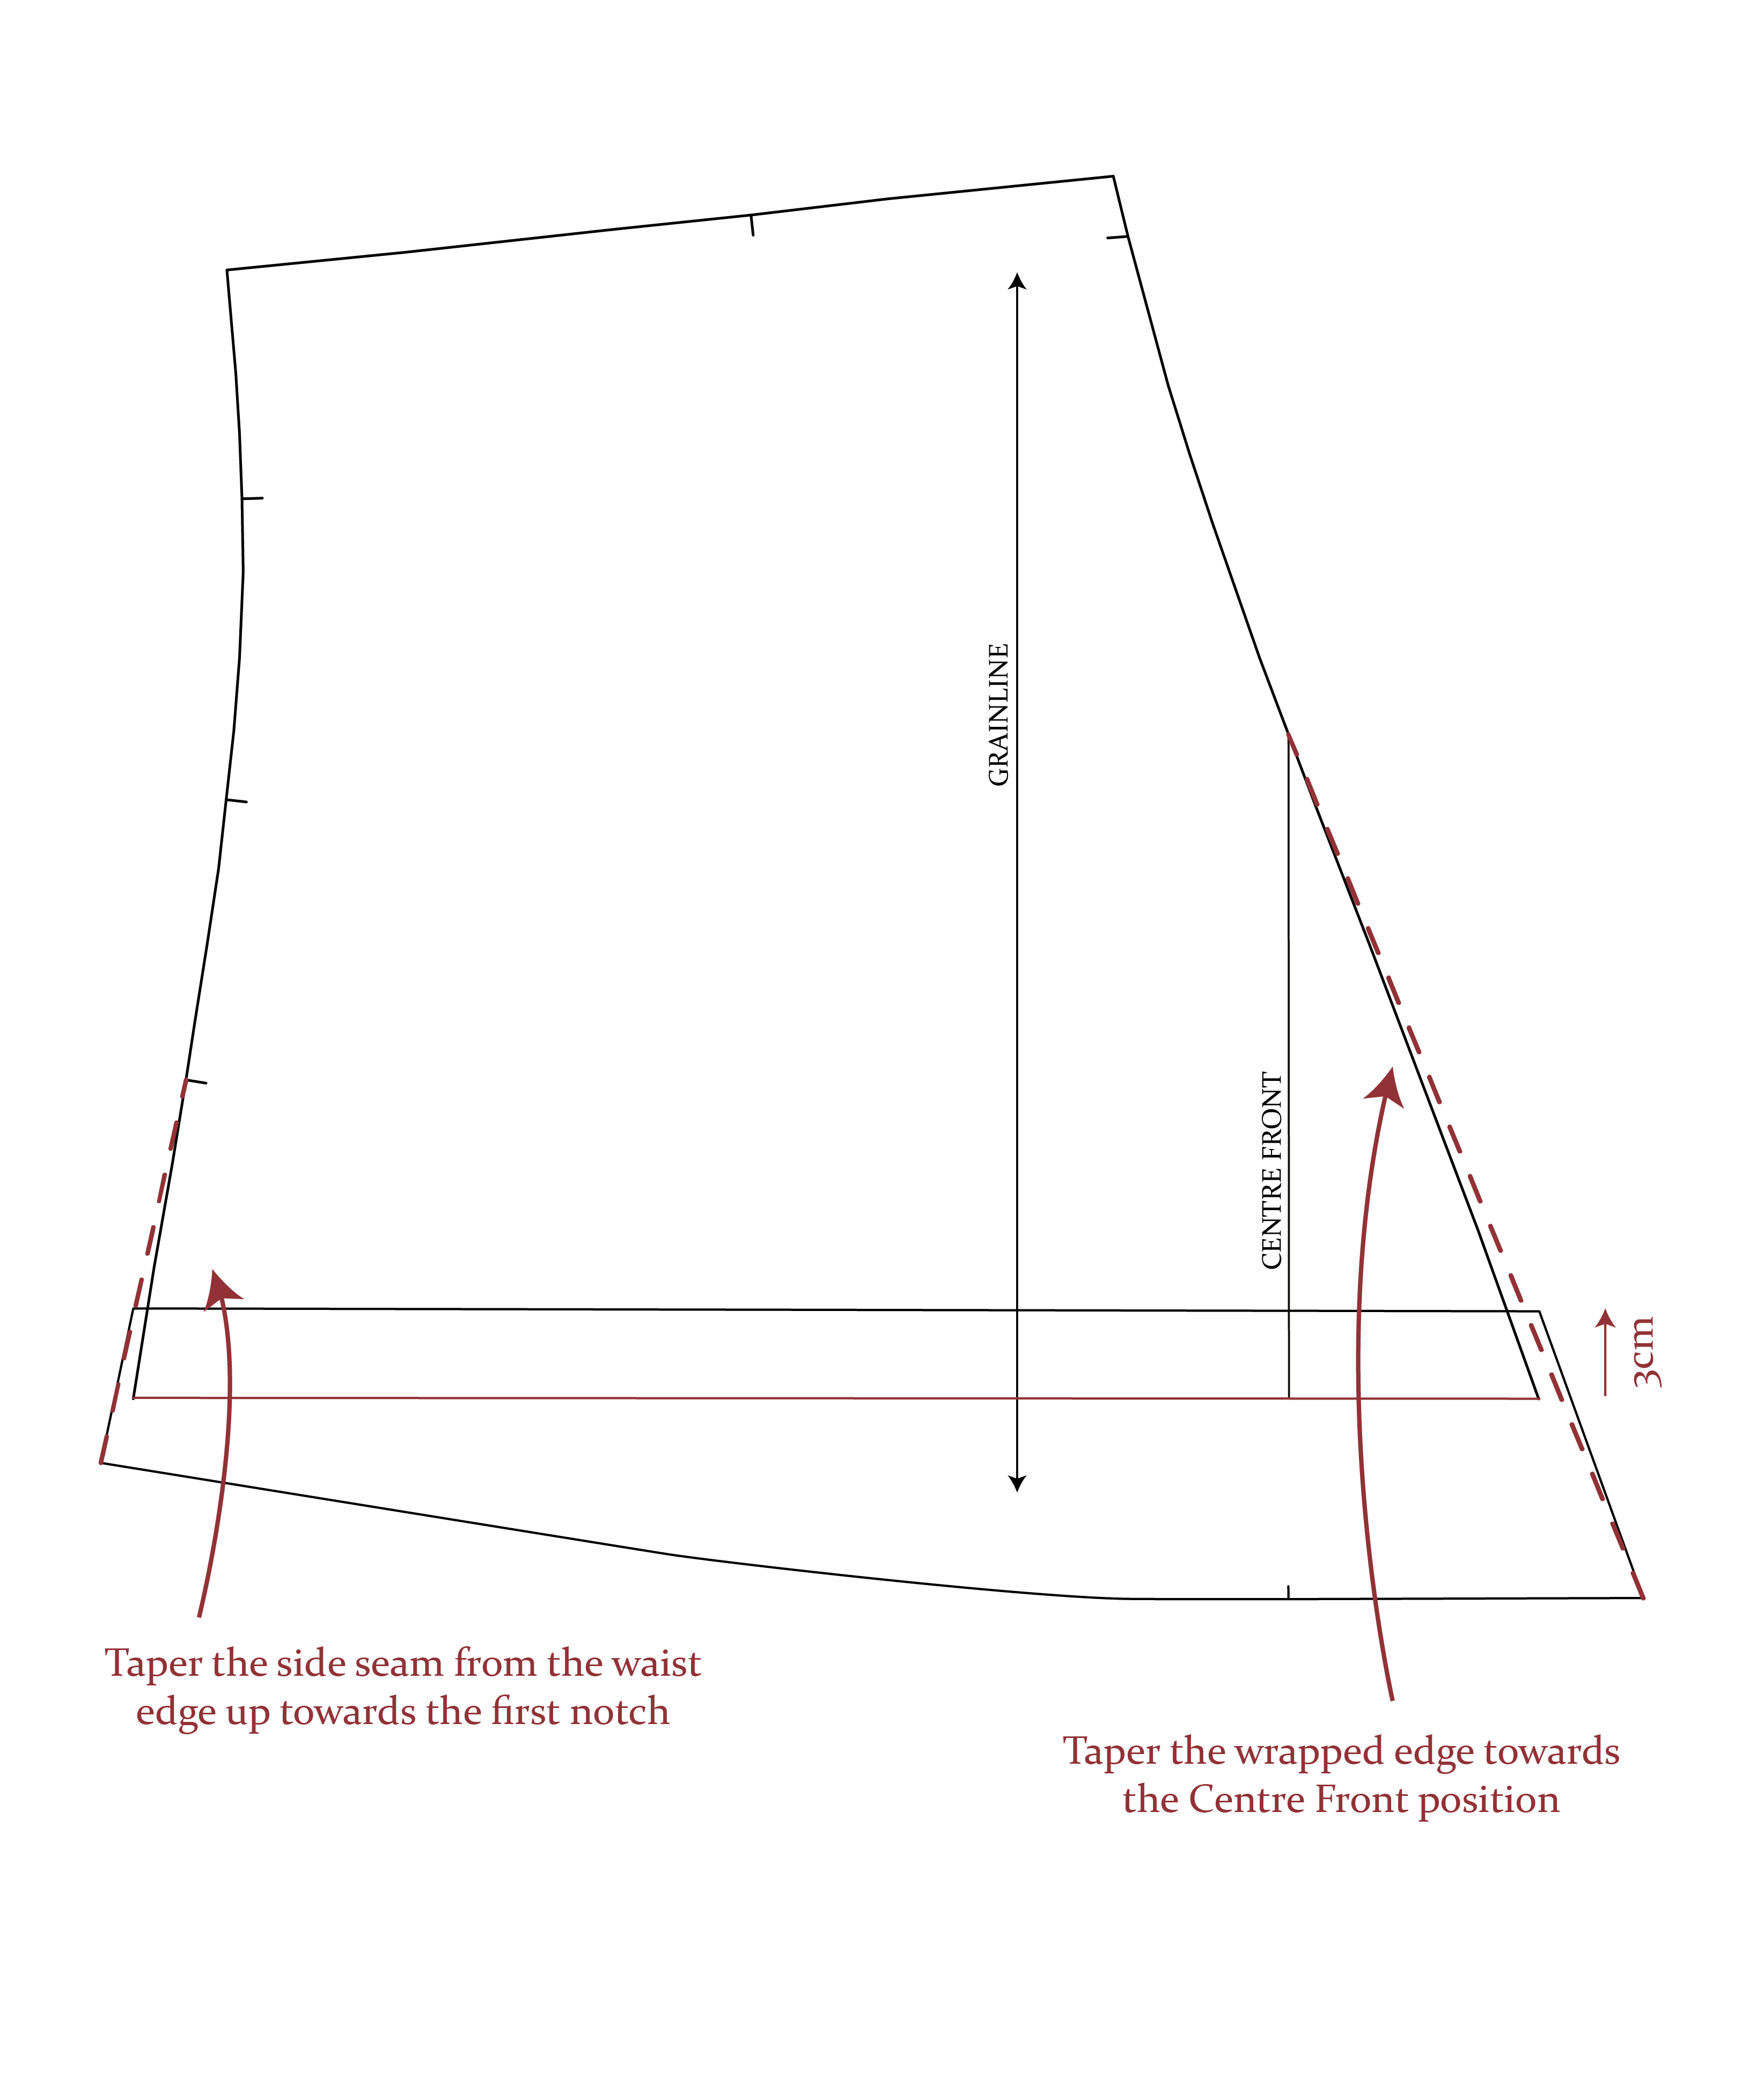
Without changing the waist edge, taper the side seams from the waist edge up towards the first notch. Again, without changing the front waist edge, taper the front edge towards the centre front position adding extra paper behind the pattern if necessary.
FRONT NECK FACING D
Shorten the Front Facing D using the same method.
BACK C
For the back bodice, repeat the same method as above this time keeping the CB edge aligned when moving the lower piece upwards. Redraw the side seam. Taper the side seams from the waist edge up towards the first notch as you don’t want to change the size of the waist edge!
We hope you found this tutorial useful. If you need any extra support don’t hesitate to contact us at hello@theavidseamstress.co.uk or use our handy contact form below.


