
Previous steps:
Getting started with the Sheath Dress
Invisible zip
Pocket and Side Seam
Let’s put in the elastic casing…
ELASTIC CASING
1. Open out your dress with the wrong side facing you. Place your elastic casing
piece E across the width of the dress. Starting from the left hand side and using
the elastic casing notches as your guide, line up the elastic casing across the width
of the dress. Let some of the elastic casing piece E hang over each side of the dress.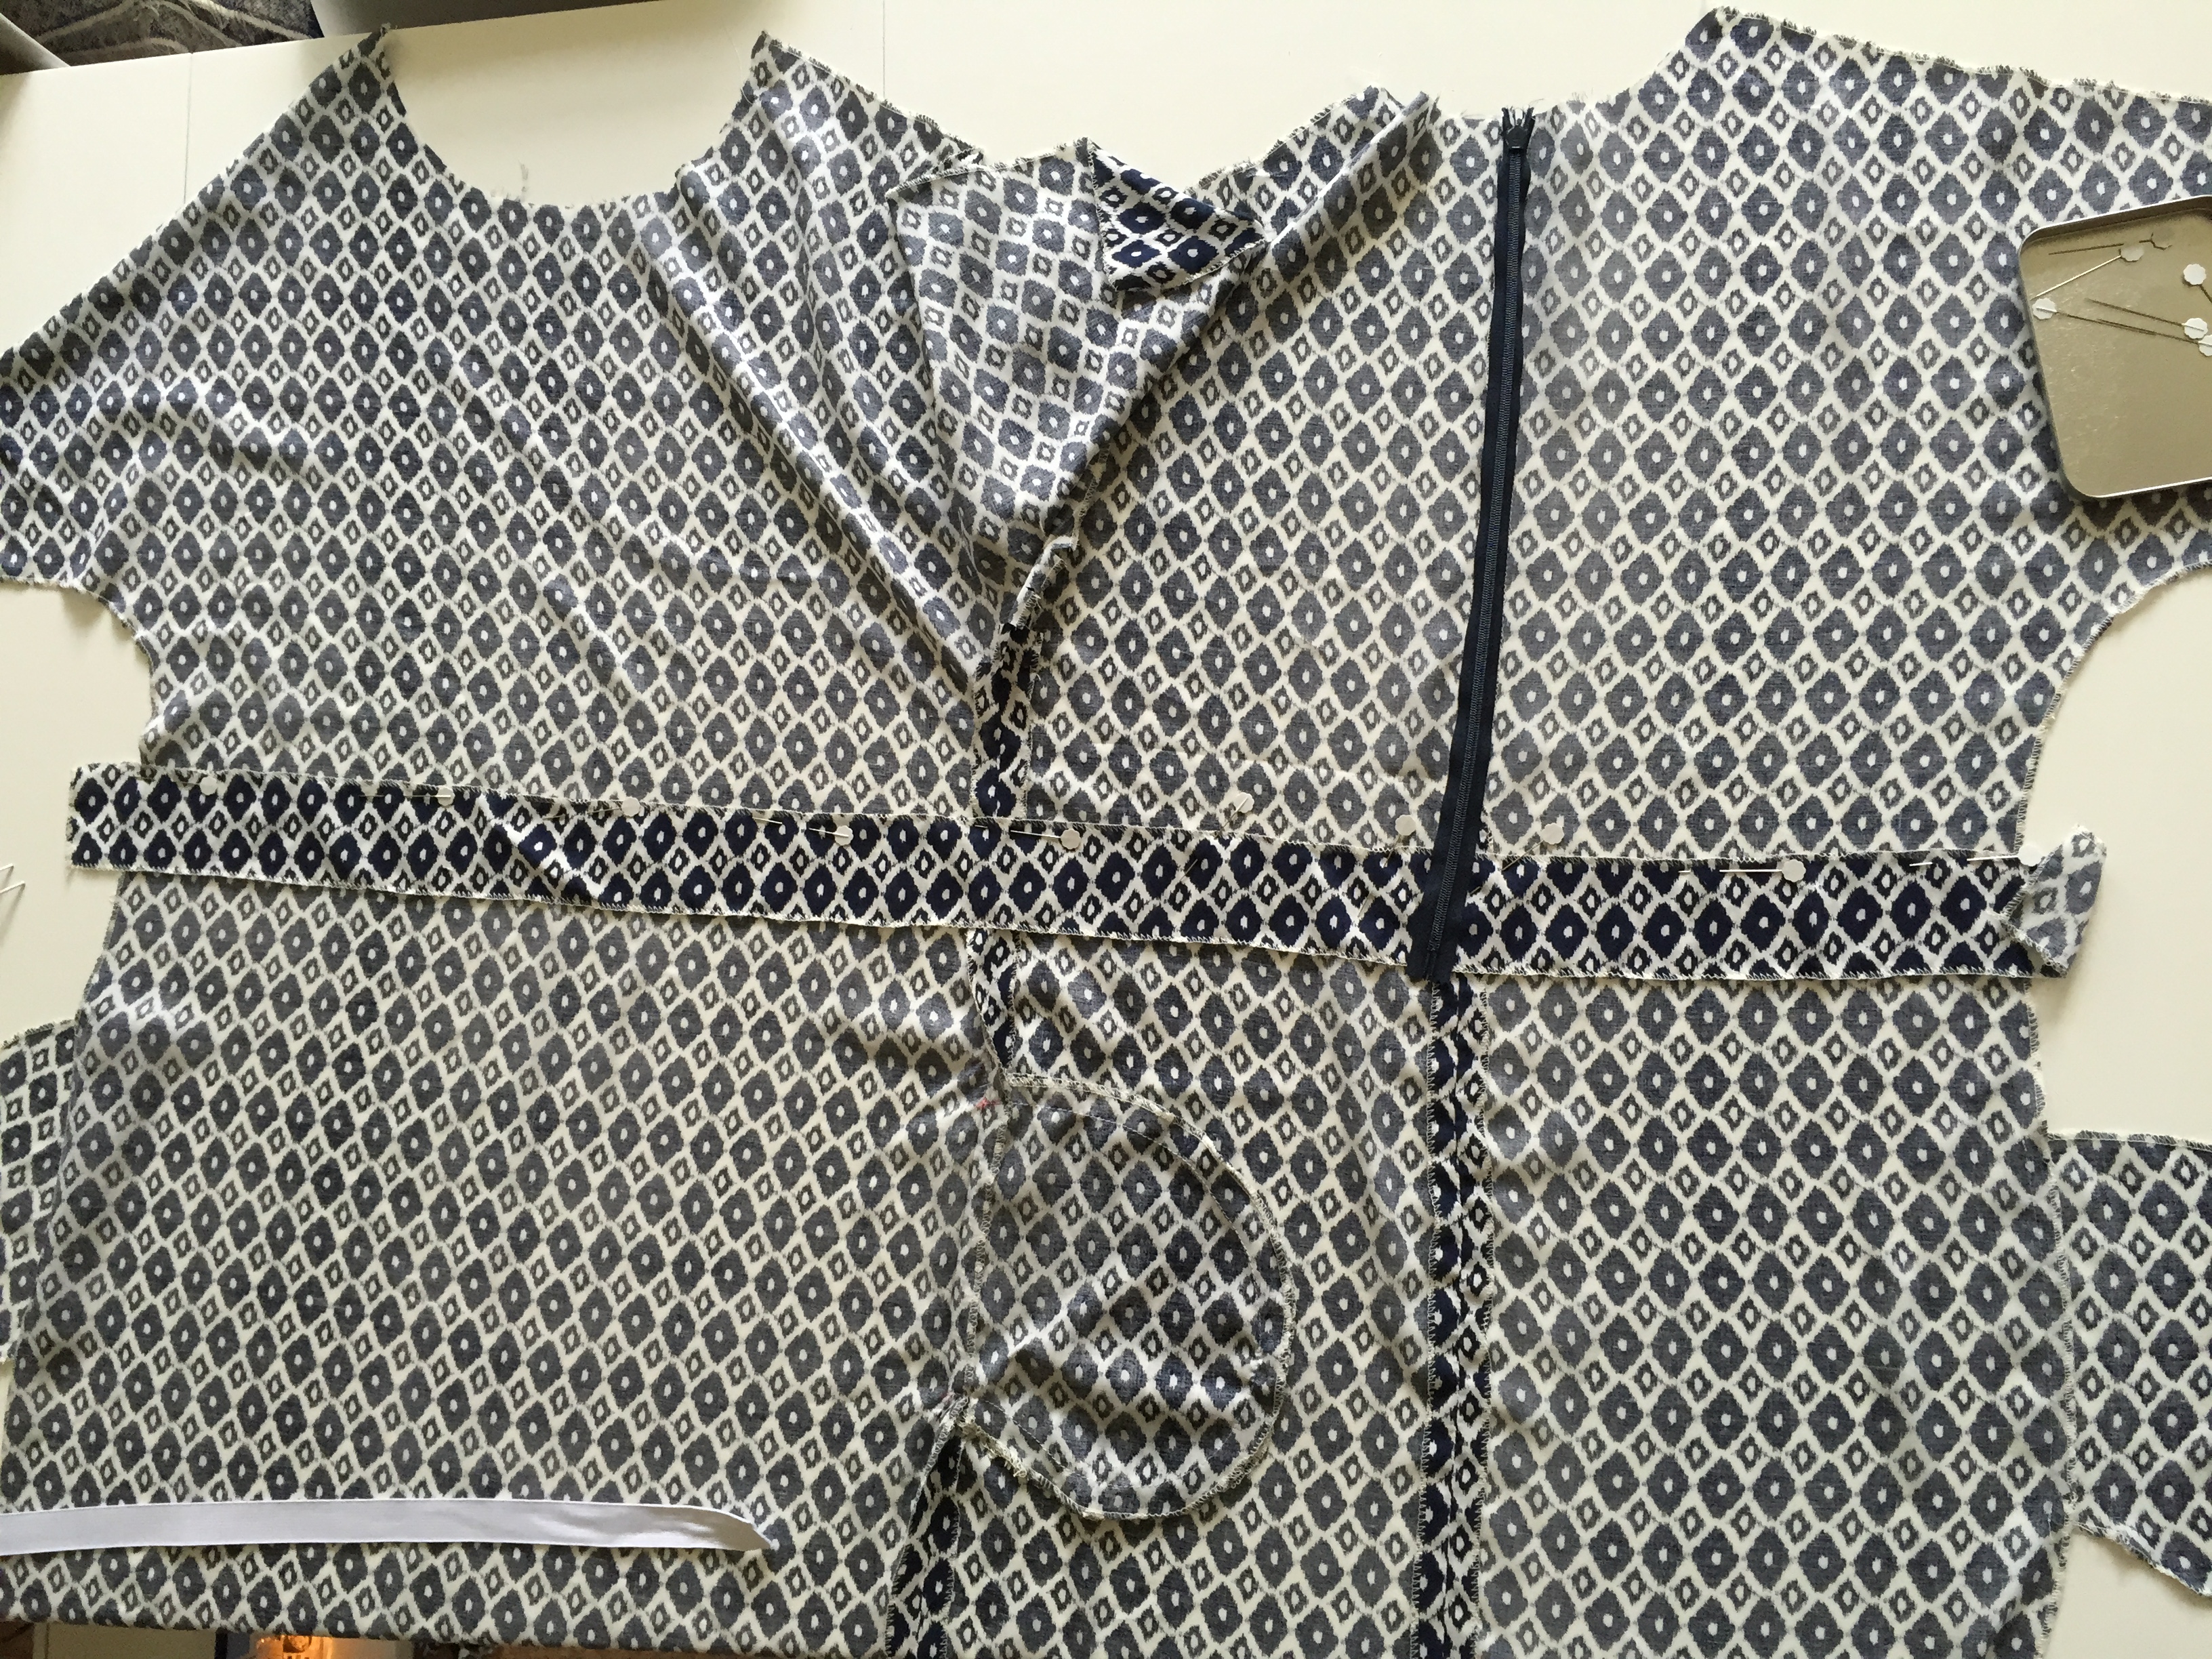
2. Starting from the top left hand side of the elastic casing, stitch your elastic casing
to the dress (if you are going to use wide elastic in your dress use a 1cm seam
allowance, if you are going to use thin elastic use a 1.5cm seam allowance). Then,
starting again from the bottom left hand side of the elastic casing, create a row of
stitches along the bottom edge.
3. Using a safety pin connected to the end of the elastic, feed the elastic from
the right hand side through the casing until it comes out the left side, ensuring
that the elastic is still visible on both ends. Don’t try to adjust the elastic yet – we
will fit the dress later and then adjust the elastic to fit your waist perfectly. On the
left hand side, sew the elastic onto the side seam – you will need to backstitch
over the elastic to ensure that it is firmly stitched in place. Keep the right hand
side loose and unsewn.

4. Move to the other side and use the safety pin to keep the elastic from
slipping inside. Fold your dress so that the unsewn side seams match up, matching up the notches and elastic casing. Sew this piece together but DON’T sew across
the elastic casing. Keep the casing section free. We will complete this section later.
If you are not putting in inner pockets, continue to sew across the section.
Next step… Sleeves and facing
